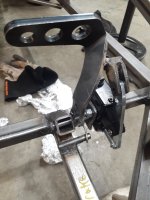
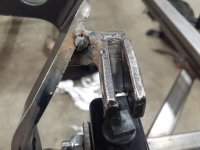
-Parking brake mounted
-E brake mounted with AN3-IFF fitting converter (for brake lines). Parking brake mounted so you can apply forward pressure and slide your hand down to activate.
-Throttle linkage set up and adjusted,
-Master Cylinder mounted to brake pedal.
Next step:
Swap out the compression fittings for IFF fittings. Make a braket for the second brake rotor.
Connect/make brake lines
make a bracket to hold tbe alternstor.
Weld on 2 brackets in case I need the tow bar.
Lights
Then last gussets/cross supports to beef a few sections up.
Grind/cleanup welds on the whole thing
Then paint
Stuff on the maybe list:
Install zirc fittings on suspension pivot points. If not, ill grease manually periodically.
I may make a small shelf, at a similar height and footprint on the exact opposite side of the gas tank. I have been considering welding on a plate that could accept a reloading press for reloading ammo. It is a perfect height for me, and would be a very stable mounting platform. Ot would be quickly mountable/moveable. As a side benefit, I could dial up rounds on the fly while long distance shooting, and size/prep brass while the bbq/smoker is going! Plus it would fit the Mad Max vib.
I may make some sort of basket up front, behind/above the front suspension, and beneathe the dashboard. There is a big space here that could be used. Ill probably skip it, but ive been thinking about it.
Im leaning away from the reverse for now. Primarily due to the weight. Ill need an eztra battery, a startet, a flywheel, and more steel, that all weighs quite a bit. It can be easily mounted afterwards if needed.