Gary's Low Budget Kart Build

Status
Not open for further replies.

LiveDarkness

Live Life In The Dark
Messages
32
Reaction score
0
Location
South Carolina
Progress?

Well we got a decent bit done today, as far as running the wires and the tail lights.
-
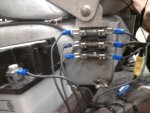
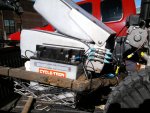
First was the instrument panel. Headlight switch in the middle and push buttons are blinkers

-
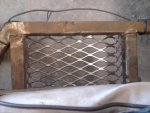
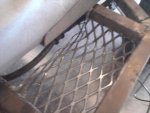
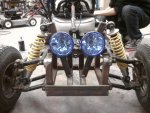
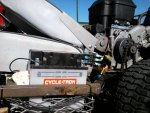
Then I ran all the wire while Gary mounted the lights

-
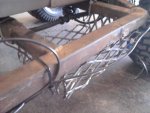
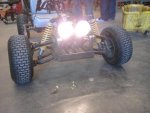
And finally we had to test them

-
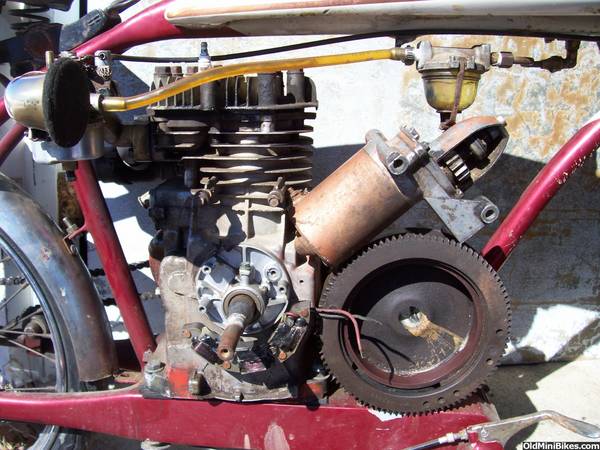
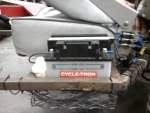
Our engines generator is enough to power the tail lights so the headlights will have to wait until i get a battery, but so far so good :thumbsup:
 

redsox985

Active member
Messages
4,092
Reaction score
11
Location
PA
Now, can you make them brighten like car lights when the brake is pressed? This thing is great, even if it technically isn't street legal, people will see you. I really like the electronics you've put into it.
 

Garified

I like to move it move it
Messages
211
Reaction score
1
Location
SC
The tail lights shine nice and bright, but the brake lights struggle to brighten. Our motor just doesn't put out enough to power all those things at once. :(

Main thing I'm worried about is drivers being able to see me at night. Plus the head-lights for visibility obviously.
 

Bluethunder3320

New member
Messages
5,677
Reaction score
30
when i took the flywheel off my briggs, there was an extra half circle area and bolt holes for a second coil.

take the blower housing off, loosten the flywheel nut, pry off the flywheel while tap the flywheel nut, take it off, and look if you can put in a second coil.

this isnt my pic, but look at the half of charge coil. there are bolt holes for another.


Garified

I like to move it move it
Messages
211
Reaction score
1
Location
SC
Hey, I might just look at that Bluethunder! We have a spare engine just like the one on our kart, so I have a 2nd coil if there is room for another! Thanks!
 

Garified

I like to move it move it
Messages
211
Reaction score
1
Location
SC
Well took the flywheel off our parts motor and to my disappointment, there wasn't a coil on it. :furious2:

Oh well. We made a small basket that will hold the battery. Patrick has the pictures on his phone, I'll trust that he'll upload them later. :thumbsup:
 

LiveDarkness

Live Life In The Dark
Messages
32
Reaction score
0
Location
South Carolina
Pics of battery basket

Heres the battery basket we made. will have the battery put in tomorrow:wai:
 

Attachments

  • 0119111452.jpg
    0119111452.jpg
    72.7 KB · Views: 9
  • 0119111451a.jpg
    0119111451a.jpg
    64.3 KB · Views: 8
  • 0119111451.jpg
    0119111451.jpg
    75.7 KB · Views: 8

Garified

I like to move it move it
Messages
211
Reaction score
1
Location
SC
We got a LOT done today. We installed our battery, along with the headlights. Our headlights+tail lights+brakelights now work full force. Pictures/videos maybe tonight!!!
 

LiveDarkness

Live Life In The Dark
Messages
32
Reaction score
0
Location
South Carolina
Update

Heres the pics of the head lights, the battery, and the fuse panel
 

Attachments

  • 0121111057b.jpg
    0121111057b.jpg
    143.8 KB · Views: 43
  • 0121111022a.jpg
    0121111022a.jpg
    71.5 KB · Views: 42
  • 0121111048.jpg
    0121111048.jpg
    77.8 KB · Views: 42
  • 0121111023.jpg
    0121111023.jpg
    104.3 KB · Views: 44
  • 0121111022.jpg
    0121111022.jpg
    83.1 KB · Views: 39
  • 0121111057a.jpg
    0121111057a.jpg
    119 KB · Views: 36
  • 0121111057.jpg
    0121111057.jpg
    109 KB · Views: 35

Garified

I like to move it move it
Messages
211
Reaction score
1
Location
SC
Ok, so paint's been held off a bit. I've got to fix a problem with the motor leaking oil (Probably just a gasket) and I also need to create a tensioner for the chain.

Any advice on making a tensioner?


Also, the clutch is still in tip top shape.
 

Doc Sprocket

*********
Messages
15,677
Reaction score
142
Location
Ontario, Canada
It might mess up your budget, but you can squeeze a bit more out of the charging system re: lighting if you were to change all the lights to LED.
 

r97

Measure twice cut once
Messages
3,793
Reaction score
8
Location
Massachusetts, USA
a tensioner can be made with some flat bar and some springs, then either attach a skateboard wheel with a groove in it or fender washers on either side, or you can use an idler sprocket (check surplus center for a good price)
 

Garified

I like to move it move it
Messages
211
Reaction score
1
Location
SC
I might be able to get ahold of a scrap skateboard truck/wheel.

We'll see how it turns out. I'm not sure when the next time it'll be that I have the kart up at the school. But we'll see. Thanks for the suggestions!
 

redsox985

Active member
Messages
4,092
Reaction score
11
Location
PA
A piece of flat bar with a hole in it, a bolt through the hole and skateboard wheel, then bolted down tight. Now drill a small secondary hole in the flat bar, put a spring end through here and to some here solid and BOOM, tensioner.
 

r97

Measure twice cut once
Messages
3,793
Reaction score
8
Location
Massachusetts, USA
the first flat bar could be the frame, unless the frame isn't close to the chain, or you prefer not to drill through the frame.

i will again say cutting a notch and/or putting washers on either side of the skateboard wheel to keep the chain from falling off will help.

also, put the tensioner on the SLACKED side of the chain, not the side of the chain transferring the engines power.
 
Status
Not open for further replies.
Top