Dirtbox Venom Texas build!

Status
Not open for further replies.

mysteryboy28

New member
Messages
1,582
Reaction score
11
Location
Lansing, MI
roof and hood bars notched and welded in place.

hacked out the passenger side rails, and set it up like the drivers side - ready for a latching door bar!
 

Attachments

  • IMG_20130625_045019.jpg
    IMG_20130625_045019.jpg
    107.1 KB · Views: 35
  • IMG_20130625_045207.jpg
    IMG_20130625_045207.jpg
    106.5 KB · Views: 42
  • IMG_20130625_045230.jpg
    IMG_20130625_045230.jpg
    98 KB · Views: 29

mysteryboy28

New member
Messages
1,582
Reaction score
11
Location
Lansing, MI
seats and quick release steering adapter arrived today. :)
 

Attachments

  • IMG_20130625_155625.jpg
    IMG_20130625_155625.jpg
    109.1 KB · Views: 37
  • IMG_20130625_155706.jpg
    IMG_20130625_155706.jpg
    98.5 KB · Views: 34

n1kogr

New member
Messages
265
Reaction score
0
Location
Mass
what kind of quick release did you get? seats look nice! Are they heavy?
 

mysteryboy28

New member
Messages
1,582
Reaction score
11
Location
Lansing, MI
Summit Racing Part Number: AAF-ALL52302 3/4" shaft 3-bolt aftermarket quick release.

seats heavy? eh, weigh about the same as a regular car seat, maybe a LITTLE lighter. they're definetely made in china, as i could see some minor manufacturing defects right away. lol. but overall they're pretty nice. they're a little narrow for my fat a$$, but should work great for smack911 at keeping him centered in the seat. :)
 

Attachments

  • $T2eC16R,!)UE9s3wCMSpBRr1vcqBBQ~~60_12.jpg
    $T2eC16R,!)UE9s3wCMSpBRr1vcqBBQ~~60_12.jpg
    11.7 KB · Views: 6

mysteryboy28

New member
Messages
1,582
Reaction score
11
Location
Lansing, MI
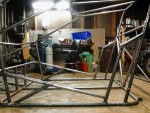
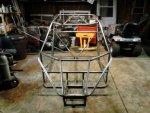
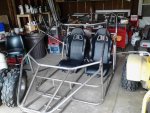
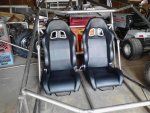
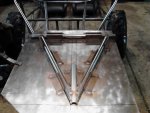
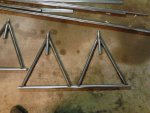
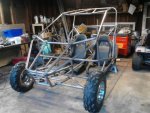
gotta hit the hardware store for bolts n stuff tomorrow, then i'll be welding in the seat mounting bars.

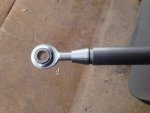
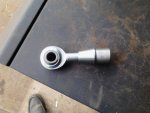
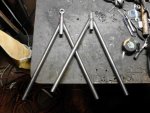
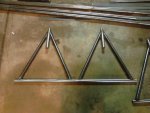
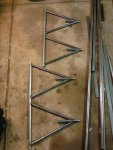
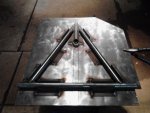
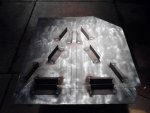
thought i had 4 bungs to weld onto the a-arms, but i only had 3 (apparently i used one on a kart repair job i did a while back). so ordered the 4th one, which should be here by the weekend. normally i've been just welding on a 1/2" fine thread nut to thread the heims into, but bungs are a bit more heavy duty. it also means that i gotta round up some bigger tubing to accomodate the outter sleeve of the bungs. fun stuff.

tonight i slapped the new predator motor in the mini-bike for the dude. the baja warrior type mini-bikes have a fake gas tank on them (for that cool chopper look), which gets in the way of accessing the tank on the predator. so i'm going to round up a butterfly nut to hold the fake tank in place, for easy removal to access the gas cap on the predator tank. the one thing the guy has to give up for now is having a working headlight, as the predator motors don't have the power circuit to power lights.
 

smack911

New member
Messages
63
Reaction score
0
Location
Emory, Texas ( it ain't permanent! )
you would think that seats made from flammable corrosive materials by 6 year old workers paid with rice chex. Well you would think they would be somewhat lighter than conventional auto seats. I bet they got lead or some kind of heavy weight, it could have a small china person that pops out of the bottom in a day or two. you never know, check carefully!
 

mysteryboy28

New member
Messages
1,582
Reaction score
11
Location
Lansing, MI
Lol! I did see some creepy little legs crawling in the crease of one of the seats. Thought it was some weird foreign bug or something. Turned out to be a common spider. I was poking at it, getting a little freaked out (all I could see was wiggly legs at first).

Meanwhile, gotta hit the retail metal store tomorrow for some tubing that'll fit the bungs for the heims on the a-arms. And I lost the darn key to the sled. The key ring hole was busted off on the key, so it was floating around in my pocket for a few days. Musta fell out when I pulled my keychain out or something. So I'm just gonna order a new ignition switch and key. They're pretty cheap.
 

mysteryboy28

New member
Messages
1,582
Reaction score
11
Location
Lansing, MI
$20 for a 4ft piece of .065 wall 1" tube. Crazy. But I had to have it if I'm gonna use the bungs for the a-arms. I'll get creative and find a way to use like a 6" piece on each a-arm.

The polaris sportsman rear hubs (with 156x4 bolt pattern) are coming in the mail today, which means I will finally be able to determine what size rear axle and bearings I will be using. In the past I've used some common honda rear hubs that I bored out to 1". But these polaris hubs look bigger in the pictures, so that means bigger axle, bearings, and sprocket and rotor hubs. That also will mean a more heavy duty rear end that should be able to take more abuse (like slamming sideways into sand banks and curbs without bending the axle. Lol)
 

Attachments

  • IMG_20130627_162719.jpg
    IMG_20130627_162719.jpg
    68.7 KB · Views: 16
  • IMG_20130627_162803.jpg
    IMG_20130627_162803.jpg
    74 KB · Views: 14

mysteryboy28

New member
Messages
1,582
Reaction score
11
Location
Lansing, MI
got started on the a-arms. after ending up with questionable angles, i have decided i'm going to make a jig so that i can guarantee that all 4 of my a-arms are uniform. i tried sketching out the outline on a board, but it just wasn't cutting it. tomorrow i will pick up some 1x1 lumber and do it right. :)
 

Attachments

  • IMG_20130628_034959.jpg
    IMG_20130628_034959.jpg
    80.3 KB · Views: 18
  • IMG_20130628_035042.jpg
    IMG_20130628_035042.jpg
    88.2 KB · Views: 27

mysteryboy28

New member
Messages
1,582
Reaction score
11
Location
Lansing, MI
but i like fire. lol. i'd need a big chunk of steel plate, and a bunch of pricey square tubing to make the steel jig (i like the sound of it though). i'll start with the wooden one for now. i only plan to tack-weld on the jig, so hopefully nothing will really catch on fire!
 

smack911

New member
Messages
63
Reaction score
0
Location
Emory, Texas ( it ain't permanent! )
cant and find some angle iron and hack up with a few movable bolts to hold her all square.
at least it will hold the angle, wood just gives too much screws and angle iron would be inexpensive and hold, just an idea...
 

mysteryboy28

New member
Messages
1,582
Reaction score
11
Location
Lansing, MI
jig made, a-arms tacked together.
 

Attachments

  • IMG_20130629_055007.jpg
    IMG_20130629_055007.jpg
    77.8 KB · Views: 35
  • IMG_20130629_054938.jpg
    IMG_20130629_054938.jpg
    81 KB · Views: 33
  • IMG_20130629_024442.jpg
    IMG_20130629_024442.jpg
    81 KB · Views: 37
  • IMG_20130629_024353.jpg
    IMG_20130629_024353.jpg
    72.2 KB · Views: 40
  • IMG_20130629_015618.jpg
    IMG_20130629_015618.jpg
    66 KB · Views: 41
  • IMG_20130629_055020.jpg
    IMG_20130629_055020.jpg
    85.7 KB · Views: 31

fowler

New member
Messages
5,463
Reaction score
17
Location
Bullsbrook West Aus
Very nice
Good choice of material
Although now u have made it

What u usually do is make the jig so it takes all the mounts

So u have the two frame mounts
The spindle mounts
The shock mount

As long as they are in the same place then u are good
It doesn't mater how the arms differ inbetween the mounts

Looks like it works anyway
 

mysteryboy28

New member
Messages
1,582
Reaction score
11
Location
Lansing, MI
i'm going to be cutting out like a 17" section from the center of the horizontal bar on the a-arms, so each a-arm will be quadruple sheared, rather than the double sheared you see now. i just wanted to make sure they were 100% straight for final welding. i haven't determined where i want to place shock mounts yet, and will add 1' square tubing to the a-arms to support the shock mount brackets.
 

mysteryboy28

New member
Messages
1,582
Reaction score
11
Location
Lansing, MI
more work done on the a-arms. a-arm mounting tab plates cut, ready for boring 16 3/4" holes.

the wife found the snowmobile key while we were deep-cleaning the bedroom. she rocks. i drilled a hole in it and stuck a key ring on it. hung it up in a safe place in the garage.

couple of mock-up pics for your viewing pleasure. :)
 

Attachments

  • IMG_20130630_055256.jpg
    IMG_20130630_055256.jpg
    89.1 KB · Views: 37
  • IMG_20130630_054514.jpg
    IMG_20130630_054514.jpg
    90.5 KB · Views: 29
  • IMG_20130630_054423.jpg
    IMG_20130630_054423.jpg
    77.9 KB · Views: 30
  • IMG_20130630_054323.jpg
    IMG_20130630_054323.jpg
    78.3 KB · Views: 33
  • IMG_20130630_015032.jpg
    IMG_20130630_015032.jpg
    87.8 KB · Views: 22
  • IMG_20130630_055317.jpg
    IMG_20130630_055317.jpg
    95.6 KB · Views: 36
  • IMG_20130630_060407.jpg
    IMG_20130630_060407.jpg
    86.5 KB · Views: 37
  • IMG_20130630_060430.jpg
    IMG_20130630_060430.jpg
    99.8 KB · Views: 45
Status
Not open for further replies.
Top