Dirtbox Venom mini-buggy upgrade/rebuild!

Status
Not open for further replies.

mysteryboy28

New member
Messages
1,582
Reaction score
10
Location
Lansing, MI
she put in a good 2+ hours for me last night. didn't complain once, even when she sliced through the glove and knicked her knuckle a little bit. :)
 

mysteryboy28

New member
Messages
1,582
Reaction score
10
Location
Lansing, MI
lots of grinding done today. front a-arms ground and polished, rear trailing arms ground, ready for polishing. more ginding done on the buggy. i "grinded" till my arms and hands became retarded and i couldn't squeeze the grinder trigger or barely even hold the grinder any more.

decided i wasn't happy with the rear wheel alignment. when i had moved the bearings to the inside of the trailing arms, the angle of the wheels shifted, and both of them were leaning in on top more than i wanted. so i hacked off the outer bearing plates, ran a 1" bar through the trailing arms to make sure everything was aligned perfectly, then welded the plates back on. perfect alignment. yay!

bought another pair of jack stands. i was sick of propping the buggy up on milk crates and pieces of wood. lol. hydraulic floor jack and jack stands are just way cool to have. :)
 

Attachments

  • IMG_20130429_020706.jpg
    IMG_20130429_020706.jpg
    85.5 KB · Views: 23
  • IMG_20130429_020758.jpg
    IMG_20130429_020758.jpg
    89.8 KB · Views: 22
  • IMG_20130428_235446.jpg
    IMG_20130428_235446.jpg
    90.5 KB · Views: 21
  • IMG_20130428_235558.jpg
    IMG_20130428_235558.jpg
    85.9 KB · Views: 25
  • IMG_20130428_235754.jpg
    IMG_20130428_235754.jpg
    88.9 KB · Views: 22
  • IMG_20130428_235639.jpg
    IMG_20130428_235639.jpg
    79.9 KB · Views: 22
  • IMG_20130428_235703.jpg
    IMG_20130428_235703.jpg
    93.3 KB · Views: 23

mysteryboy28

New member
Messages
1,582
Reaction score
10
Location
Lansing, MI
spent a bit of time prepping the fenders for painting, and scrubbing all the grease and grime off the sled motor mount. fenders needed to be sanded and uneven edges leveled off. motor mount had years of sludge built up in all the nooks and crannies.

will need to touch up the fenders in a few days after the paint cures (otherwise the paint will crinkle up), but otherwise the fenders and motor mount turned out pretty good! Also painted the back side of the roof and hood. Now I need more green paint!
 

Attachments

  • IMG_20130429_192751.jpg
    IMG_20130429_192751.jpg
    85.7 KB · Views: 13
  • IMG_20130429_145007.jpg
    IMG_20130429_145007.jpg
    135.7 KB · Views: 7
  • IMG_20130429_144103.jpg
    IMG_20130429_144103.jpg
    103.1 KB · Views: 10
  • IMG_20130429_164436.jpg
    IMG_20130429_164436.jpg
    97.4 KB · Views: 19
  • IMG_20130429_170214.jpg
    IMG_20130429_170214.jpg
    94.1 KB · Views: 23

mysteryboy28

New member
Messages
1,582
Reaction score
10
Location
Lansing, MI
polished up the trailing arms, and gave those and the a-arms their first coat of paint.

scrubbed the tire rims clean with a wire bush attachment. then hosed them down, and dried them off with compressed air and a rag. then painted the rims pretty silver. will need to scrub off some over-spray on the tires. can only get them so perfect with my template i made with a trash bag and duct tape. :)

got a bunch more grinding done on the buggy the night before, as well as welded on the 4-point harness mounts.

for future buggies i will be using colored plastic for the fenders/roof/hood. it's actually cheaper than the plastic and paint method i've been using, will save time, and will probably be more durable. there aren't as many colors to pick from (basic colors), but i think i can live with that. :) 
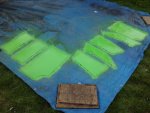
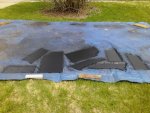
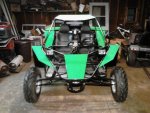
4x8 sheets are available from a race car supply website, delivered locally for about $40 after tax and stuff. i was paying about $25 a sheet for the white stuff, and so far i'm about $35 in the hole for green paint!
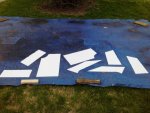
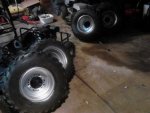
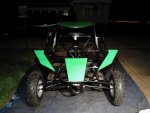
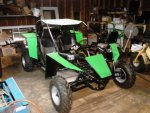
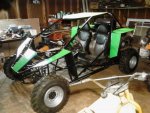
 

Attachments

  • IMG_20130503_021757.jpg
    IMG_20130503_021757.jpg
    80.1 KB · Views: 23
  • IMG_20130503_021704.jpg
    IMG_20130503_021704.jpg
    73.3 KB · Views: 19

mysteryboy28

New member
Messages
1,582
Reaction score
10
Location
Lansing, MI
buggy polished and ready for a bath (followed by a thorough towel drying). then it's paint time! Sorry for the dark pic. i dragged the buggy out of the garage to have it ready for it's bath tomorrow.
 

Attachments

  • IMG_20130507_003444.jpg
    IMG_20130507_003444.jpg
    50 KB · Views: 13

mysteryboy28

New member
Messages
1,582
Reaction score
10
Location
Lansing, MI
frame painted and drying. a few more little things to paint (spindles, tie rods, hubs, etc.), re-assembly is next!
 

Attachments

  • IMG_20130508_202352.jpg
    IMG_20130508_202352.jpg
    126.7 KB · Views: 14
  • IMG_20130508_202331.jpg
    IMG_20130508_202331.jpg
    121.3 KB · Views: 17

mysteryboy28

New member
Messages
1,582
Reaction score
10
Location
Lansing, MI
got the extra items painted. then i realized i had forgotten to weld on the mounting tabs on the buggy for the rear brake light. so i got that done in the dark, just as it was starting to sprinkle. sprayed a quick coat of paint on and around the mounting tabs, and threw a tarp over the buggy.

today is cold, wet, and miserable. tomorrow will be raining, the next day will be 55 degrees, then hopefully nicer weather after that!
 

Attachments

  • IMG_20130509_164831.jpg
    IMG_20130509_164831.jpg
    177.8 KB · Views: 19

mysteryboy28

New member
Messages
1,582
Reaction score
10
Location
Lansing, MI
weather starting to warm back up a lil bit. yay.

last night i took the shocks apart and cleaned and painted them. here's some nice dark pics for ya.

meanwhile i'm trying to find some replacement grub/set screws for the bearings, as about 1/2 of the ones that came with the bearings have either gone missing or have been stripped when i was trying to crank them down nice and snug. my local nut and bolt place had the larger grubs for the CV's, but not the smaller ones for the bearings, which hold the axle stubs, sprocket/rotor spindle, and wheels in place.
 

Attachments

  • IMG_20130514_001140.jpg
    IMG_20130514_001140.jpg
    55.7 KB · Views: 11
  • IMG_20130514_001202.jpg
    IMG_20130514_001202.jpg
    61.3 KB · Views: 10

mysteryboy28

New member
Messages
1,582
Reaction score
10
Location
Lansing, MI
so today was spent getting the shocks back together, and making a handy-dandy hydraulic shock compressor. the threaded compressors from harbor frieght were'nt working out for re-assembly (totally messing up my paint job, and couldn't compress the fully extended springs, and couldn't squeeze the clamping claw parts in between the springs on the smaller shocks), so i knew i needed to come up with a solution.

the threaded compressors took forever to tighten, and i thought it would be way cool to go hydraulic. at first i thought maybe i'd make something to utilize my floor jack, but decided it would be better to have something a little more sturdy (and not have wheels on it that could slip while under lots of pressure).

here's what i came up with. worked great, did minimal damage to my paint (a little touch-up paint fixed that). and yes, the slotted plate is crooked on purpose to accomodate the angle of the springs better.
 

Attachments

  • IMG_20130515_001216.jpg
    IMG_20130515_001216.jpg
    72.3 KB · Views: 17
  • IMG_20130514_223417.jpg
    IMG_20130514_223417.jpg
    76.7 KB · Views: 16
  • IMG_20130514_223315.jpg
    IMG_20130514_223315.jpg
    73.3 KB · Views: 19
  • IMG_20130514_223440.jpg
    IMG_20130514_223440.jpg
    60 KB · Views: 18
  • IMG_20130515_000950.jpg
    IMG_20130515_000950.jpg
    83.9 KB · Views: 19

mysteryboy28

New member
Messages
1,582
Reaction score
10
Location
Lansing, MI
lots done today!
 

Attachments

  • IMG_20130517_030549.jpg
    IMG_20130517_030549.jpg
    93.3 KB · Views: 26
  • IMG_20130517_030648.jpg
    IMG_20130517_030648.jpg
    102.4 KB · Views: 24
  • IMG_20130517_030815.jpg
    IMG_20130517_030815.jpg
    103.7 KB · Views: 26
  • IMG_20130517_030913.jpg
    IMG_20130517_030913.jpg
    84.5 KB · Views: 25
  • IMG_20130517_031034.jpg
    IMG_20130517_031034.jpg
    78.6 KB · Views: 23

mysteryboy28

New member
Messages
1,582
Reaction score
10
Location
Lansing, MI
It's a Kawasaki!!

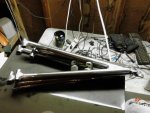
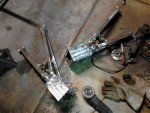
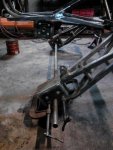
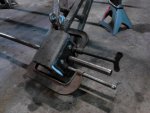
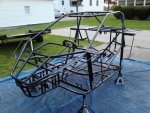
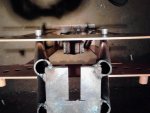
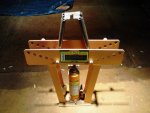
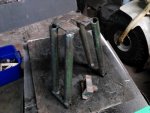
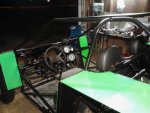
I like the spring compressor

Yeah, I actually angled the plate the wrong way on the spring compressor. Lol. From the front of the shocks the angle would have been correct, but from the rear it's the opposite angle. Still got the job done, and will be an easy fix before the next buggy is started.

The green color is a good match for both kawasaki and arctic cat, supposedly. I think its a pretty green, although way too expensive, and nearly impossible to get a nice good shiny finish on the plastic fenders without using a ton of paint - which I wasn't going to do at $7 a can. Lol.
 
Status
Not open for further replies.
Top