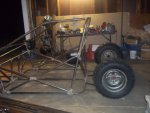
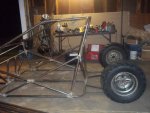
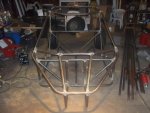
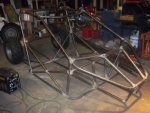
Dirtbox Venom mini-buggy, 40+ horsepower!

Status
Not open for further replies.

mysteryboy28

New member
Messages
1,582
Reaction score
11
Location
Lansing, MI
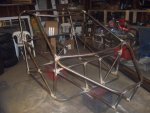
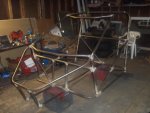
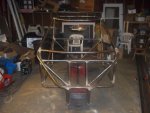
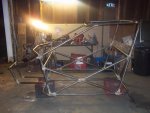
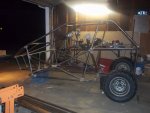
so many designs for suspension out there, it's crazy! i've opted for simple and effective, without needing to be a rocket scientist in geometry. both a-arms and trailing arms are great, and so are semi-trailing arms, and any combination of the bunch. :)

i'd love to experiment with some different suspension ideas, but not when i'm on a deadline, and have bills to pay. plus i'm getting married on the 18th! :wai:

meanwhile, more pics!
 

Attachments

  • 100_0998.jpg
    100_0998.jpg
    84.9 KB · Views: 33
  • 100_1007.jpg
    100_1007.jpg
    66.3 KB · Views: 33
  • 100_1009.jpg
    100_1009.jpg
    68.3 KB · Views: 31
  • 100_1011.jpg
    100_1011.jpg
    81.2 KB · Views: 38

greaser

new here
Messages
126
Reaction score
0
Location
moose lake mn
Wow it is really looking great I like the design tweaks. Congrats on getting married it has been the best thing for me she keeps me in line lol.
 

mysteryboy28

New member
Messages
1,582
Reaction score
11
Location
Lansing, MI
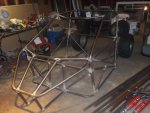
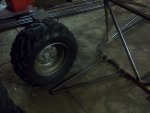
Nose is done, waiting on the spindles to arrive to determine the A-arm height. started on the trailing arms, cut out the 3/16" thick plates for the bearings to bolt to. just need a drill press to bore out the holes, then weld it all together. debating on the trailing arm length, hard to determine without a motor in place to use as a guide. i'd like to keep the wheel base as short as possible, which will assist with the turning radius of the buggy.

Also got started on rebuilding the front suspension/steering on a client's 250cc buggy. He and a buddy had tried to beef it up and threw everything all outta whack. Ought to be a fun side project while I finish up the Venom. :)
 

Attachments

  • 100_1053.jpg
    100_1053.jpg
    73.1 KB · Views: 39
  • 100_1047.jpg
    100_1047.jpg
    79.3 KB · Views: 37
  • 100_1028.jpg
    100_1028.jpg
    77.8 KB · Views: 28
  • 100_1022.jpg
    100_1022.jpg
    78.5 KB · Views: 30
  • 100_1021.jpg
    100_1021.jpg
    85.8 KB · Views: 35

mysteryboy28

New member
Messages
1,582
Reaction score
11
Location
Lansing, MI
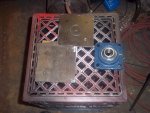
A fun filled night of frustration and accomplishment. Cut out the plates for the rear bearings to mount to, started boring out a center 1 3/4" hole, and ruined a brand new hole saw before finishing one hole. Apparently the steel plating I bought is hard steel, not the usual mild steel my tools are accustomed to. So I scratched on finishing that tonight.

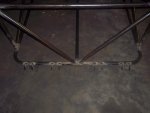
Meanwhile, cut out tabs for the trailing arms to mount to, bored out 3/4" bolt holes (another new hole saw), and welded them on to the frame (double shear!). Used "mock" tube pieces to make the dimensions universal (2 1/2" outer pieces, 7" inner piece).

Can't get more steel till Wednesday, but hopefully my spindles arrive tomorrow so that I can get started on the front suspension (fabbing up tabs and welding them, making a-arms, etc.).

Finding a motor has been interesting. Fresh batch of crazy people out there trying to sell their sleds. Jeesh...

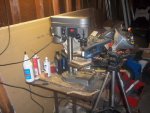
New addition to the tool family: a nice lil drill press I picked up for $40. My last drill press was a Harbor Freight brand that had NO balls. This one isn't a whole lot better (at least a LITTLE better), but cost $100 less! :)

Also ordered some different front rims today. The set of Yamaha Grizzly wheels I had bought were all 4x110 bolt pattern, which is impossible to find practical front hubs/spindles for. Bought some Polaris 700 quad rims that should fit the 4x156 bolt pattern Yamaha Banshee spindle/hub/rotor combos I bought just fine and dandy. :)

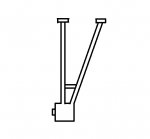
Trailing arms will look similar to the lil drawing I made.
 

Attachments

  • 100_1090.jpg
    100_1090.jpg
    83 KB · Views: 38
  • 100_1087.jpg
    100_1087.jpg
    58.4 KB · Views: 29
  • 100_1074.jpg
    100_1074.jpg
    61.5 KB · Views: 31
  • 100_1072.jpg
    100_1072.jpg
    107.5 KB · Views: 28
  • Trailing arm.jpg
    Trailing arm.jpg
    17 KB · Views: 22

machinist@large

Active member
Messages
2,865
Reaction score
32
Location
West Michigan, 49331
Looks like you need a bigger drill press; one that gets down to 200 RPM or lower. Also, are you using high carbon or Bi-Metalic hole saws? Bi-Metal's (tool steel teeth welded to carbon steel body) are a LOT tougher, but they still don't like high speed. I'm guessing from the photo that your current drill press doesn't go lower than 500/600 RPM; a 1 1/4" hole saw wants to be down around 100 or so. Also, are you using anything for a cutting fluid? Most true penetrating oils (of which WD-40 is not) are a lot better than nothing to help keep the cutting edges cool and lubricated. Smoke like crazy though, so keep the door into the house closed until the cloud clears.:cheers2:
 

mysteryboy28

New member
Messages
1,582
Reaction score
11
Location
Lansing, MI
bi-metal of course, and yeah, getting like 500/600 rpms. i carve the fist millimeter in the metal (so the oil has someplace to go), then add a drop of 10w30 every so often with a plastic medicine syringe i saved just for that purpose.

my 3/4" hole saw worked like a charm in the nice soft mild steel i use for my mounting tabs. but the metal i was using the 1 3/4" hole saw on ruined my brand new 3/8" titanium drill bit (Dewalt brand) almost right away too. it's crazy hard steel! evil! i'll hit the scrap yard on wednesday and get something softer. :)
 

machinist@large

Active member
Messages
2,865
Reaction score
32
Location
West Michigan, 49331
bi-metal of course, and yeah, getting like 500/600 rpms. i carve the fist millimeter in the metal (so the oil has someplace to go), then add a drop of 10w30 every so often.

Keep clearing the chips; once you tear out a tooth, it just goes down hill from there.

my 3/4" hole saw worked like a charm in the nice soft mild steel i use for my mounting tabs. but the metal i was using the 1 3/4" hole saw on ruined my brand new 3/8" drill bit almost right away too. it's crazy hard steel! evil! i'll hit the scrap yard on wednesday and get something softer. :)

Sounds like you got hold of some high strength/ low alloy matl. Even with the correct tooling & equipment, it's pretty chewy stuff. Sounds like it got hot on you; once that happens, the only thing that will touch it is solid carbide tooling. Get yourself a brand new Nicolsen brand file, medium cut. try to keep it for just when you head out to the scrap yard to check the hardness of the matl. you're looking at. A good file is one of the hardest pieces of steel you'll find (Rc low to mid 60's) so if a file won't touch it, you don't need to buy it. Try it out on what you have lying around to get a feel for it before you head out. Can help save you some grief.:cheers2:
 

exenos

Project Nut
Messages
1,217
Reaction score
0
Location
Ontario, Canada
Are you going to add more structure to those trailing arms? The one in your drawing would flex and twist something fierce because of the large off center loads. Add some 3d structure to them, like the ones in the post Fowler linked, they don't need to be quite as beefy but should be close because you have two people riding.

* This is just my opinion and may or may not be based upon solid scientific fact. :D
 

Doc Sprocket

*********
Messages
15,677
Reaction score
151
Location
Ontario, Canada
My drill press is about the same for speed. So, I am very gentle with the handle, use a ton of cutting oil, and back out of the cut very often. Seems to work pretty well, aside from the pools of oil and chips on my bench...

Looking good, my man!
 

mysteryboy28

New member
Messages
1,582
Reaction score
11
Location
Lansing, MI
Are you going to add more structure to those trailing arms? The one in your drawing would flex and twist something fierce because of the large off center loads. Add some 3d structure to them, like the ones in the post Fowler linked, they don't need to be quite as beefy but should be close because you have two people riding.

* This is just my opinion and may or may not be based upon solid scientific fact. :D

actually yes, i do plan to criss-cross some bars inside the trailing arm. the drawing was just a basic idea of the external dimensions. i'm also using some pretty heavy duty square tubing for the arms (.125" wall).
 

mysteryboy28

New member
Messages
1,582
Reaction score
11
Location
Lansing, MI
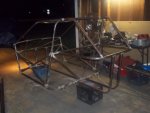
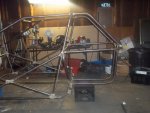
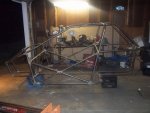
And we have a motor cage. :)

since i don't have the motor yet, i built it based on the dimensions of my Phaser 480 sled motor. lots of room for a sled motor and it's frame, and lots of room to accomodate a bigger motor down the road. i hope it's not too honky looking! :)
 

Attachments

  • 100_1141.jpg
    100_1141.jpg
    76.6 KB · Views: 42
  • 100_1114.jpg
    100_1114.jpg
    61.1 KB · Views: 32
  • 100_1134.jpg
    100_1134.jpg
    82.2 KB · Views: 29
  • 100_1138.jpg
    100_1138.jpg
    73.1 KB · Views: 39

mysteryboy28

New member
Messages
1,582
Reaction score
11
Location
Lansing, MI
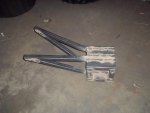
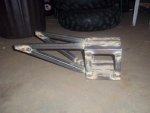
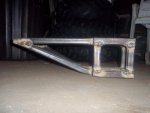
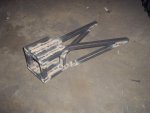
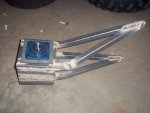
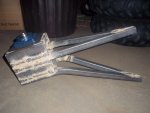
Trailing arm 1 basically done... tedious time consuming work! Need to throw some bracing in it, weld on the pivot tubing, slap on a shock mount -then polish and paint!
 

Attachments

  • 100_1150.jpg
    100_1150.jpg
    76.8 KB · Views: 36
  • 100_1151.jpg
    100_1151.jpg
    68.2 KB · Views: 34
  • 100_1154.jpg
    100_1154.jpg
    72.1 KB · Views: 29
  • 100_1157.jpg
    100_1157.jpg
    78.3 KB · Views: 34
  • 100_1158.jpg
    100_1158.jpg
    82.9 KB · Views: 39
  • 100_1162.jpg
    100_1162.jpg
    84.7 KB · Views: 33
Status
Not open for further replies.
Top