• OFF TOPIC fun forum - NO politics - NO religion - NO jerks. It's not complicated. Thanks!

Digatron fix

Status
Not open for further replies.

BirdFanatic

New member
Messages
1,616
Reaction score
7
Location
Jonesboro Arkansas
Is anyone better at electronics then i am ? I have this digatron dt-32k1 and the screens are shot in it they go on but not all the numbers show correctly .
 

itsid

Moderator
Staff member
Messages
11,563
Reaction score
248
Location
Ruhrpott [Germany]
I'd bet ;)

Anyways.. chances are it's a very minor problem, like nearly dead batteries.
so first thing, install fresh cells.

But to be sure, how about a pic of the issue..
maybe we can narrow it down

'sid
 

BirdFanatic

New member
Messages
1,616
Reaction score
7
Location
Jonesboro Arkansas
I'd bet ;)

Anyways.. chances are it's a very minor problem, like nearly dead batteries.
so first thing, install fresh cells.

But to be sure, how about a pic of the issue..
maybe we can narrow it down

'sid

The batterys are AA batteries 4 of them and they test 1.6V each
Sitting in the sun is no good for lcd screens
 

itsid

Moderator
Staff member
Messages
11,563
Reaction score
248
Location
Ruhrpott [Germany]
gently push around the edges of the displays...
I don't know the digatron in person, but it appears like a simple 4 char 7segment display,
see if you can bring single segments back to life when you apply pressure.
if so, chances are good the LCD itself is still in perfect working condition and the segments just lost contact to the pcb
happens quite often on segment displays that are connected via conductive rubber, and not soldered in.

if you cannot bring any segment back to life, check if the crystals have been leaking.
easiest way is to use another polarisation filter, one from a broken LCD calculator for example..
if you have, if you don't, shine bright light into the LCD and look from different angles, until you clearly see the traces of the segments.. any splash or blob would be leaked crystals...
you need a replacement display (or tachometer)
no leaks, mayvbe a soldered display with broken connections..
you need to open the case to find out I'm afraid.


'sid
 

BirdFanatic

New member
Messages
1,616
Reaction score
7
Location
Jonesboro Arkansas
gently push around the edges of the displays...
I don't know the digatron in person, but it appears like a simple 4 char 7segment display,
see if you can bring single segments back to life when you apply pressure.
if so, chances are good the LCD itself is still in perfect working condition and the segments just lost contact to the pcb
happens quite often on segment displays that are connected via conductive rubber, and not soldered in.

if you cannot bring any segment back to life, check if the crystals have been leaking.
easiest way is to use another polarisation filter, one from a broken LCD calculator for example..
if you have, if you don't, shine bright light into the LCD and look from different angles, until you clearly see the traces of the segments.. any splash or blob would be leaked crystals...
you need a replacement display (or tachometer)
no leaks, mayvbe a soldered display with broken connections..
you need to open the case to find out I'm afraid.


'sid

I brought back the bottom one but the top one is not it flickers when i hold a button u can see a piece will go on go off then go back on the off and stay off when i opened it up it looked brand new never touched but the battery's where exploded
 

itsid

Moderator
Staff member
Messages
11,563
Reaction score
248
Location
Ruhrpott [Germany]
ouch.. betteries leakage..

that's not good...

Okay, remove the batteries and open it up,
take some emery cloth (or if you don't have that .. emery paper) and clean the battery tabs as good as you can
now tak an old toothbrush (harder bristles is better),
wet it with your finger (finger in water, wipe finger on bristles..)
shake the toothbrush dry.. you do not want the pvb to get wet just now.
clean all the pcb with your nearly dry toothbrush.
rinse the toothbrush and repeat until it's all good and clean,
take care that the brush is always nearly dry.. again, one loaded tiny capacitor and a drop of water can ruin that thing forever!

if your happy and left with a clean pcb
inspect for broken leads, popped traces or anything that doesn't look pretty,
If in doubt, take pictures and let us see.

If you cannot find anything, let it sit overnight at a warm dry place..
or gently blow it with a hair dryer until it's nice and warm all over.

Install the batteries (without closing the case for now) and check the LCD again.
if it's back up and running, you're done, reassemble and call it a day.

if not, find the broken part.
(if you need help, we will need pictures of it's internals ;))

'sid
 

BirdFanatic

New member
Messages
1,616
Reaction score
7
Location
Jonesboro Arkansas

Attachments

  • 143dt89.jpg
    143dt89.jpg
    230.7 KB · Views: 2
  • 35bf80n.jpg
    35bf80n.jpg
    251.8 KB · Views: 2
  • 2j43f9h.jpg
    2j43f9h.jpg
    287.8 KB · Views: 2
  • icuuef.jpg
    icuuef.jpg
    68.1 KB · Views: 2
Last edited by a moderator:

mckutzy

Well-known member
Messages
8,353
Reaction score
110
Location
bc, canada
DigiKey might have the display in the right or very close approximation of a screen.
They have also decent in stock product and shipping rates. Also I'm pretty sure no real minimums to buy.
 

itsid

Moderator
Staff member
Messages
11,563
Reaction score
248
Location
Ruhrpott [Germany]
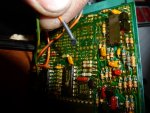
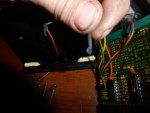
I'm not too concerned about that orange wire to be honest.. it appears to be intended that way..

(looks like it was just glued to the front panel inbetween the middle buttons)

maybe some sort of temp probe *shrugs*

The yellow wire looks broken though.
maybe just the picture.

unfortunately the pcb doesn't exactly lack lacquer (hihi :D), does it?
So there's a bit of glare to deal with in the images.

get a magnifying glass and check all the legs of the components, they should all be covered in lacquer still, no cracks crumbles or extensive discoloration.

if so, and all the wires are okay too (no cracks, no breaks)
that side is to be considered either "in order" or "tobe further examined"
we should take more care about the front panel again.

The displays look to be just sitting in sockets.
that's great.

get a watersoluble marker and mark the TOP RIGHT corner of both LCDs
the upper with a 1, the lower with a 2.

now carefully grab the upper one with your fingers left and right and wiggle it until you can gently pull it out.
No force please, you do not want to bend or break a leg or contact.. or the glass itself,
so be careful!

when it's out, clean the contact socket on the pcb with the old toothbrush,
to the same with the legs, but carefully!

underneath one or both LCDs should be a small IC display driver,
the board looks perfectly clean so I assume that will be too..
but check that it indeed is clean and no traces are broken (or cooked /turned brown).

If you happen to have electronics contact spray squirt some on a Q-tip and rub the legs and the socket with it.
WD40 works too sometimes.
reinsert the LCD to it's socket.. again very carefully, do NOT BEND the legs or worse break them.
push it as far in as possible.. evenly, both sides (up and down in this case) at the same time!
but still gently of course.

repeat with the second display.

If nothing changed, check the displays...
they appear to be identical, so swap LCD 1 with 2 and observe if the same segments are missing..
either per display or per socket.

if the upper now shows a perfect 0 (like the lower does in the pic) it's an LCD issue,
and you can buy new displays like that at digikey or farnell or maybe even radio shack...
if it's still showing just that 'broken 2' it's the electronics, not the displays.

Since everything appears to be in order,
you can of course take some measurements of the individual parts, but since it's all covered in lacquer,
that'll be a huge PITA!

'sid
 

itsid

Moderator
Staff member
Messages
11,563
Reaction score
248
Location
Ruhrpott [Germany]
no video chip... display driver big difference...;)

well, not like that I'm afraid.

first you need to split the two boards, by unsoldering them.
that thing looks ancient, so it's likely lead solder..
take care of good ventilation when doing so.

But prior.. find the replacement chips you need!
make sure they're available and cheap enough.
be sure it's not only the same model, but identical.

again digikey, farnell, radioshack, rs-components....
find the chips first.

btw: a cracked shell doesn't necessarily mean the chip itself is faulty.
so although it's likely that's the problem, it still can be something else.

Test the chip (s) first.
you can find a datasheet for nearly any chip online;
read it and measure the pins you can measure with just a multimeter,
ground, signal.. whatever.
the pins close to the cracks are the ones I'd check first.

if you cannot detect any fault, chances are the chip is still in working condition and you should make sure everything else is okay, before you drop any money into the repair.

While you have the backside of the rear pcb exposed for example, you can try to measure the resistors and capacitors with your multimeter.

be sure to know all issues with it to get a good idea of what the repair will cost you in the end, before you buy parts.

Or.. since you already put that up to ebay... stop messing with it!
do not make it worse... ;)

But feel free to collect the infos on the chips online, the new owner will be happy to have it.

'sid
 

firemanjim

Just kartin' around....
Messages
5,247
Reaction score
87
Location
Houston Texas
You can send it to digitron for repair....... :rolleyes:
It's usually a lot cheaper than buying a new/replacement unit..... :thumbsup:
 
Status
Not open for further replies.
Top