Damien

Status
Not open for further replies.

Functional Artist

Well-known member
Messages
5,326
Reaction score
2,800
Location
Toledo, Ohio
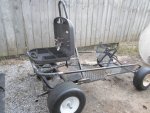
I think there is gonna be a change of plans :thumbsup:
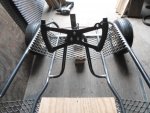
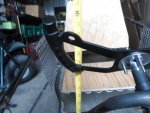
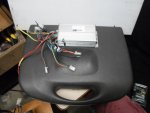
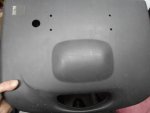
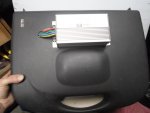
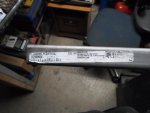
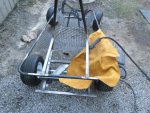
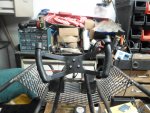
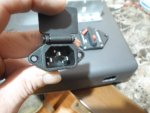
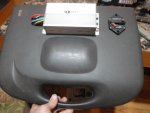
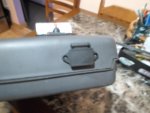
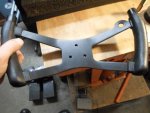
Santa brought ma a kool butterfly style steering wheel :wai:
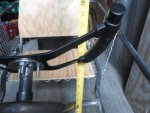
It even has protrusions on top of each side, that are perfect for mounting a hand brake lever on the left side
...& a thumb throttle on the right :2guns:
 

Attachments

  • SAM_3530.JPG
    SAM_3530.JPG
    1.3 MB · Views: 6
  • SAM_3533.JPG
    SAM_3533.JPG
    1.3 MB · Views: 5

Functional Artist

Well-known member
Messages
5,326
Reaction score
2,800
Location
Toledo, Ohio
I also picked up a splined hub for my new steering wheel but, (there is always a but) it's a bit too shallow (puts the steering wheel too far away, for comfort) & the shaft, I'm using, don't have splines anyways. :huh:

:idea2: 
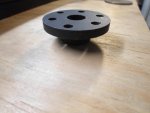
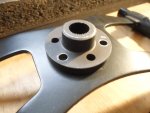
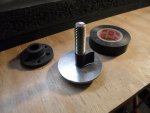
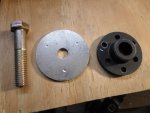
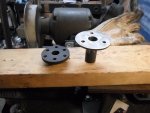
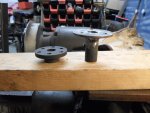
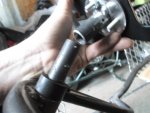
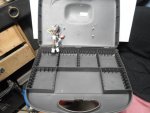
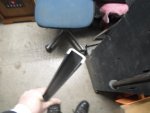
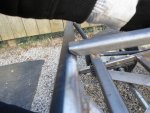
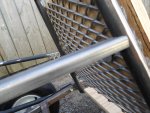
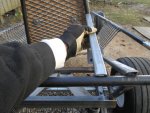
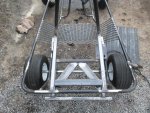
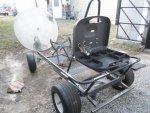
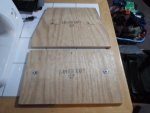
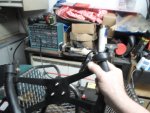
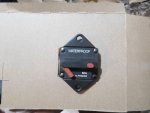
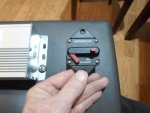
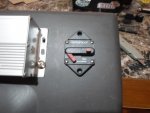
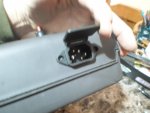
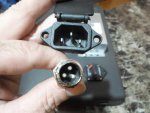
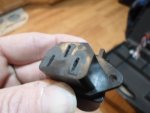
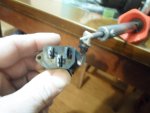
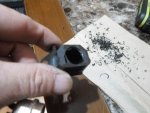
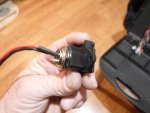
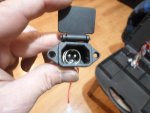
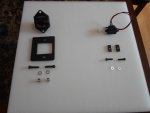
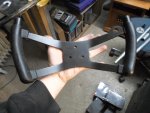
I'll use this hub as a template & make my own taller/extended hub :thumbsup:

First, I marked which holes match up with the steering wheel.

I used a 1/8" thick x ~2 1/2" dia. washer, a 1/2" bolt & some electrical tape
(used as shim material to "build up" from the 1/2" bolt to the 5/8" splined center hole)
…clamped 'em together to drill some "marker" divots :cheers2:
…& then, took 'er apart to drill 'em out proper :2guns:
 

Attachments

  • SAM_3529.JPG
    SAM_3529.JPG
    1.3 MB · Views: 3
  • SAM_3532.JPG
    SAM_3532.JPG
    1.2 MB · Views: 3
  • SAM_3534.JPG
    SAM_3534.JPG
    1.2 MB · Views: 3
  • SAM_3537.JPG
    SAM_3537.JPG
    1.2 MB · Views: 3
  • SAM_3538.JPG
    SAM_3538.JPG
    1.3 MB · Views: 3
  • SAM_3546.JPG
    SAM_3546.JPG
    1.3 MB · Views: 3
  • SAM_3541.JPG
    SAM_3541.JPG
    1.3 MB · Views: 3

Functional Artist

Well-known member
Messages
5,326
Reaction score
2,800
Location
Toledo, Ohio
(1) custom made (taller) steering hub BOOM! :thumbsup:

I squared up the Pitman Arm, slid the steering wheel/with hub on to the steering shaft, aligned it (by measuring the height on each side) & drilled some attachment holes :cheers2:

*gotta get some shorter steering wheel to hub bolts (maybe like some chrome Allen heads) :2guns:
 

Attachments

  • SAM_3648.JPG
    SAM_3648.JPG
    1.3 MB · Views: 3
  • SAM_3649.JPG
    SAM_3649.JPG
    1.3 MB · Views: 4
  • SAM_3640.JPG
    SAM_3640.JPG
    1.3 MB · Views: 4
  • SAM_3641.JPG
    SAM_3641.JPG
    1.3 MB · Views: 3
  • SAM_3642.JPG
    SAM_3642.JPG
    1.3 MB · Views: 4
  • SAM_3646.JPG
    SAM_3646.JPG
    1.2 MB · Views: 3
  • SAM_3643.JPG
    SAM_3643.JPG
    1.3 MB · Views: 3

Functional Artist

Well-known member
Messages
5,326
Reaction score
2,800
Location
Toledo, Ohio
I got an idea for a rear control box :idea2:
…& I think it looks kool too :thumbsup:

It's a 80's era hard cover plastic audio cassette carrying case
...about the size of a laptop case just a little thicker

I can mount the speed controller right on top (for good kooling)
…then, run the wires thru a hole & make the connections inside.

Inside there's plenty of room for all of the connecting plugs, a shunt (for the dash meter) & the fuse (or circuit breaker)

Should be mostly water resistant, will keep all of the connecting plugs safe & sound while allowing easy access, if/when necessary.

I think, it will look kool mounted behind the seat, right above the motor & batteries.

Repurposing at it's finest :2guns:
 

Attachments

  • SAM_3608.JPG
    SAM_3608.JPG
    1.2 MB · Views: 2
  • SAM_3607.JPG
    SAM_3607.JPG
    1.3 MB · Views: 2
  • SAM_3610.JPG
    SAM_3610.JPG
    1.3 MB · Views: 4
  • SAM_3611.JPG
    SAM_3611.JPG
    1.3 MB · Views: 2
  • SAM_3612.JPG
    SAM_3612.JPG
    1.3 MB · Views: 2
  • SAM_3613.JPG
    SAM_3613.JPG
    1.2 MB · Views: 2

Functional Artist

Well-known member
Messages
5,326
Reaction score
2,800
Location
Toledo, Ohio
I picked up a piece of 1/2" x 1" x 1/8" x 36" steel channel to make a couple of control box mounting rails out of. ...& I got Damien out to do a "dry fit" of the control box & take some measurements for the mounting rails :thumbsup:

Once I had that info, I measures, marked, cut the pieces of channel
...& then, shaped the ends to fit snuggly. :2guns:
 

Attachments

  • SAM_3684.JPG
    SAM_3684.JPG
    1.4 MB · Views: 5
  • SAM_3683.JPG
    SAM_3683.JPG
    1.3 MB · Views: 2
  • SAM_3680.JPG
    SAM_3680.JPG
    1.3 MB · Views: 2
  • SAM_3675.JPG
    SAM_3675.JPG
    1.2 MB · Views: 2
  • SAM_3674.JPG
    SAM_3674.JPG
    1.2 MB · Views: 3
  • SAM_3689.JPG
    SAM_3689.JPG
    1.3 MB · Views: 2
  • SAM_3688.JPG
    SAM_3688.JPG
    1.3 MB · Views: 2
  • SAM_3687.JPG
    SAM_3687.JPG
    1.3 MB · Views: 3
  • SAM_3686.JPG
    SAM_3686.JPG
    1.3 MB · Views: 3

Functional Artist

Well-known member
Messages
5,326
Reaction score
2,800
Location
Toledo, Ohio
After double checking the height, squareness (as opposed to the rear bar) & also making sure the rear control box would sit level, I welded the (2) support rails on good. :thumbsup:

I just got & started using a welding apron to protect the tires from welding (heat, sparks, spatter etc.) & also to help reduce the "colleterial damage" clean up. :cheers2:

It seems that every time I add another piece to the puzzle (weld another piece on) it adds "so much" to the cleanup. :smiley_omg:
That sucks!, especially in them hard to reach places or places that I have already cleaned up (a few times) :ack2:

Yea, :wai: that works SO MUCH BETTER! :2guns:
 

Attachments

  • SAM_3693.JPG
    SAM_3693.JPG
    1.3 MB · Views: 2
  • SAM_3694.JPG
    SAM_3694.JPG
    1.3 MB · Views: 2
  • SAM_3696.JPG
    SAM_3696.JPG
    1.3 MB · Views: 2
  • SAM_3698.JPG
    SAM_3698.JPG
    1.3 MB · Views: 2
  • SAM_3699.JPG
    SAM_3699.JPG
    1.3 MB · Views: 3

Functional Artist

Well-known member
Messages
5,326
Reaction score
2,800
Location
Toledo, Ohio
Pics of the control box :thumbsup:

Kinda wanted to put 'er on an angle like the side rails
...but, it would have had to sit too far back to open properly.

I like it, it still looks kool! :2guns:

Easy access & plenty of room :cheers2:
 

Attachments

  • SAM_3707.JPG
    SAM_3707.JPG
    1.3 MB · Views: 3
  • SAM_3704.JPG
    SAM_3704.JPG
    1.3 MB · Views: 3
  • SAM_3702.JPG
    SAM_3702.JPG
    1.3 MB · Views: 4
  • SAM_3700.JPG
    SAM_3700.JPG
    1.3 MB · Views: 4
  • SAM_3701.JPG
    SAM_3701.JPG
    1.3 MB · Views: 4
  • SAM_3711.JPG
    SAM_3711.JPG
    1.3 MB · Views: 4
  • SAM_3710.JPG
    SAM_3710.JPG
    1.3 MB · Views: 4
  • SAM_3709.JPG
    SAM_3709.JPG
    1.3 MB · Views: 4
  • SAM_3708.JPG
    SAM_3708.JPG
    1.3 MB · Views: 5

Functional Artist

Well-known member
Messages
5,326
Reaction score
2,800
Location
Toledo, Ohio
Winter has arrived
...with a vengeance :ack2:

So I'm stuck doin' indoor projects
...well, I guess it's time to do the seat cover :cheers2:

I still have some of the black pinhole vinyl, left over from makin' the seat for the Atom kart
…& also some of the faux Crocodile material, left over from makin' the seat for the Torsk kart.

I'm thinkin' a black vinyl seat with a Crocodile insert. :thumbsup:

I did some measurin', markin', cuttin' & sewin'

Then, I layed the seat back in place on the material, marked the outline & sewed on the side flaps.

Sewed up the corners, nice-n-square
…& then, curved 'em in a bit (to help it'll fit snuggly) :2guns:
 

Attachments

  • SAM_4137.JPG
    SAM_4137.JPG
    1.2 MB · Views: 3
  • SAM_4108.JPG
    SAM_4108.JPG
    1.3 MB · Views: 2
  • SAM_4105.JPG
    SAM_4105.JPG
    1.3 MB · Views: 3
  • SAM_4104.JPG
    SAM_4104.JPG
    1.2 MB · Views: 2
  • SAM_4102.JPG
    SAM_4102.JPG
    1.3 MB · Views: 2
  • SAM_4100.JPG
    SAM_4100.JPG
    1.3 MB · Views: 2
  • SAM_4113.JPG
    SAM_4113.JPG
    1.3 MB · Views: 3
  • SAM_4112.JPG
    SAM_4112.JPG
    1.2 MB · Views: 3
  • SAM_4111.JPG
    SAM_4111.JPG
    1.3 MB · Views: 3
  • SAM_4109.JPG
    SAM_4109.JPG
    1.3 MB · Views: 2

voided

parking lot pimp
Messages
297
Reaction score
0
Location
CT
Did you try the thumb throttle on the steering wheel yet?

Wondering if it fit or how close to fitting it is..

Was gonna do something similar, for my build..
 

Functional Artist

Well-known member
Messages
5,326
Reaction score
2,800
Location
Toledo, Ohio
Did you try the thumb throttle on the steering wheel yet?

Wondering if it fit or how close to fitting it is..

Was gonna do something similar, for my build..

Yup, I tried 'em :thumbsup:
The thumb throttle & brake lever fit nicely. :2guns:
 

Attachments

  • SAM_4263.JPG
    SAM_4263.JPG
    1.3 MB · Views: 5
  • SAM_4262.JPG
    SAM_4262.JPG
    1.3 MB · Views: 6
  • SAM_4261.JPG
    SAM_4261.JPG
    1.3 MB · Views: 4

voided

parking lot pimp
Messages
297
Reaction score
0
Location
CT
I had a padded steering wheel I was willing to chop up, get to the metal and it was micro.. would of been a pain to build spacers for it. And the brake lever would also have to be modified...

Going the way you did looks great, functions and doesn’t need any modifications...
 

Functional Artist

Well-known member
Messages
5,326
Reaction score
2,800
Location
Toledo, Ohio
To finish the seat bottom up, I sewed all (4) corners up nice-n-square
…rounded 'em inwards just a bit
…& then, flipped 'er right side out (with the seams back on the inside) :thumbsup:

Next, I cut (2) pieces of 1" foam rubber padding, to match the plywood seat base
…tucked 'em into the seat cover
…& then, tucked the plywood base in.

Made sure it looked nice-n-straight from the top side
...& started stapling 'er down

A few staples on each side, kinda in the middle
…& then, workin' toward the corners.

Turned out pretty good! :2guns:
...definitely not Bad! :lolgoku:
 

Attachments

  • SAM_4123.JPG
    SAM_4123.JPG
    1.2 MB · Views: 2
  • SAM_4120.JPG
    SAM_4120.JPG
    1.2 MB · Views: 2
  • SAM_4122.JPG
    SAM_4122.JPG
    1.2 MB · Views: 2
  • SAM_4116.JPG
    SAM_4116.JPG
    1.3 MB · Views: 3
  • SAM_4114.JPG
    SAM_4114.JPG
    1.2 MB · Views: 2
  • SAM_4126.JPG
    SAM_4126.JPG
    1.2 MB · Views: 2
  • SAM_4127.JPG
    SAM_4127.JPG
    1.3 MB · Views: 2
  • SAM_4129.JPG
    SAM_4129.JPG
    1.2 MB · Views: 2
  • SAM_4132.JPG
    SAM_4132.JPG
    1.2 MB · Views: 2
  • SAM_4133.JPG
    SAM_4133.JPG
    1.3 MB · Views: 2

Functional Artist

Well-known member
Messages
5,326
Reaction score
2,800
Location
Toledo, Ohio
I got the seatback done too. :thumbsup:
...same procedure :cheers2:

Boom! (1) black vinyl, low back bucket seat with a (faux) Crocodile insert :2guns:
* I sat 'er on a kitchen chair to show how the dimensions compare. :idea2:
 

Attachments

  • SAM_4145.JPG
    SAM_4145.JPG
    1.2 MB · Views: 2
  • SAM_4142.JPG
    SAM_4142.JPG
    1.3 MB · Views: 2
  • SAM_4143.JPG
    SAM_4143.JPG
    1.3 MB · Views: 2
  • SAM_4141.JPG
    SAM_4141.JPG
    1.3 MB · Views: 2
  • SAM_4139.JPG
    SAM_4139.JPG
    1.2 MB · Views: 2
  • SAM_4147.JPG
    SAM_4147.JPG
    1.3 MB · Views: 2
  • SAM_4146.JPG
    SAM_4146.JPG
    1.3 MB · Views: 3
  • SAM_4149.JPG
    SAM_4149.JPG
    1.3 MB · Views: 2
  • SAM_4148.JPG
    SAM_4148.JPG
    1.3 MB · Views: 2

Functional Artist

Well-known member
Messages
5,326
Reaction score
2,800
Location
Toledo, Ohio
Worked on the control box a bit more :thumbsup:

I marked & cut a template out of cardboard then used it to align & mark the spot for the cutout, for the circuit breaker.

Then, drilled holes at the corners & simply cut 'er out. :2guns:

It wasn't quite that easy :lolgoku:
...but, turned out pretty good. :cheers2:
 

Attachments

  • SAM_4185.JPG
    SAM_4185.JPG
    1.2 MB · Views: 2
  • SAM_4181.JPG
    SAM_4181.JPG
    1.2 MB · Views: 2
  • SAM_4182.JPG
    SAM_4182.JPG
    1.3 MB · Views: 3
  • SAM_4187.JPG
    SAM_4187.JPG
    1.3 MB · Views: 3
  • SAM_4189.JPG
    SAM_4189.JPG
    1.3 MB · Views: 3
  • SAM_4200.JPG
    SAM_4200.JPG
    1.2 MB · Views: 1
  • SAM_4198.JPG
    SAM_4198.JPG
    1.2 MB · Views: 1
  • SAM_4193.JPG
    SAM_4193.JPG
    1.3 MB · Views: 1
  • SAM_4192.JPG
    SAM_4192.JPG
    1.2 MB · Views: 2
  • SAM_4191.JPG
    SAM_4191.JPG
    1.2 MB · Views: 2

Functional Artist

Well-known member
Messages
5,326
Reaction score
2,800
Location
Toledo, Ohio
Now that the Circuit Breaker is "in place" next up is the charge port. :thumbsup:

I am using XLR style DC output plugs for ALL of my 48V karts (with SLA battery packs)

A while back, when I WAS going to use C-13/C-14 style charger plugs/receptacles, I found these kool "covered" receptacles & thought that they would be a good way to keep the charge port terminals covered.

But, since I'm NOT gonna use them any longer I thought maybe I can still put 'em to good use. :idea2:

So, I cut out a spot to mount it on the side of the control box.

Now, just gotta figure out/work on mounting an XLR receptacle inside of the covered C-14 receptacle. :thumbsup:
 

Attachments

  • SAM_4212.JPG
    SAM_4212.JPG
    1.3 MB · Views: 1
  • SAM_4209.JPG
    SAM_4209.JPG
    1.3 MB · Views: 1
  • SAM_4204.JPG
    SAM_4204.JPG
    1.2 MB · Views: 1
  • SAM_4203.JPG
    SAM_4203.JPG
    1.3 MB · Views: 1
  • SAM_4202.JPG
    SAM_4202.JPG
    1.2 MB · Views: 1
  • SAM_4211.JPG
    SAM_4211.JPG
    1.2 MB · Views: 1
  • SAM_4216.JPG
    SAM_4216.JPG
    1.2 MB · Views: 1
  • SAM_4217.JPG
    SAM_4217.JPG
    1.2 MB · Views: 1
  • SAM_4220.JPG
    SAM_4220.JPG
    1.3 MB · Views: 1

Functional Artist

Well-known member
Messages
5,326
Reaction score
2,800
Location
Toledo, Ohio
I removed the contact terminals for a "heat test" a few weeks ago.

Then, used the bench grinder to "smooth" the back side.

Yup, it looks like it will fit :thumbsup:

Drilled a "pilot" hole in the middle
...& then, drilled 'er out to ~5/8"
 

Attachments

  • SAM_4238.JPG
    SAM_4238.JPG
    1.2 MB · Views: 1
  • SAM_4234.JPG
    SAM_4234.JPG
    1.2 MB · Views: 1
  • SAM_4232.JPG
    SAM_4232.JPG
    1.2 MB · Views: 1
  • SAM_4226.JPG
    SAM_4226.JPG
    1.2 MB · Views: 1
  • SAM_4224.JPG
    SAM_4224.JPG
    1.2 MB · Views: 1
  • SAM_4243.JPG
    SAM_4243.JPG
    1.2 MB · Views: 1
  • SAM_4242.JPG
    SAM_4242.JPG
    1.3 MB · Views: 1
  • SAM_4241.JPG
    SAM_4241.JPG
    1.2 MB · Views: 1
  • SAM_4239.JPG
    SAM_4239.JPG
    1.2 MB · Views: 1

Functional Artist

Well-known member
Messages
5,326
Reaction score
2,800
Location
Toledo, Ohio
Slid it thru the front side & cinched 'er down with the nut from the back side. :thumbsup:

Then, inserted it into the hole in the side of the control box. :cornut:

Yup, we now have a "covered" XLR charge port/receptacle :2guns:

The last (2) pics are with the charger plug attached :cheers2:
 

Attachments

  • SAM_4245.JPG
    SAM_4245.JPG
    1.2 MB · Views: 1
  • SAM_4246.JPG
    SAM_4246.JPG
    1.2 MB · Views: 1
  • SAM_4247.JPG
    SAM_4247.JPG
    1.2 MB · Views: 1
  • SAM_4248.JPG
    SAM_4248.JPG
    1.3 MB · Views: 1
  • SAM_4250.JPG
    SAM_4250.JPG
    1.2 MB · Views: 1
  • SAM_4257.JPG
    SAM_4257.JPG
    1.2 MB · Views: 1
  • SAM_4258.JPG
    SAM_4258.JPG
    1.3 MB · Views: 1
  • SAM_4254.JPG
    SAM_4254.JPG
    1.3 MB · Views: 1
  • SAM_4253.JPG
    SAM_4253.JPG
    1.3 MB · Views: 1

Functional Artist

Well-known member
Messages
5,326
Reaction score
2,800
Location
Toledo, Ohio
Got a bit more done on the rear control box. :thumbsup:

I was thinkin' it would be best to "beef up" the mounting area of the Circuit Breaker & Charge Port.

Mainly because both of them are only mounted in plastic & will be physically handled often
...switching the CB on/off
...& attaching/detaching the charge port.

So, I added some TV back panel plastic to stiffen the mounting pads for both components.
…& added some Allen head bolts with lock nuts. :2guns:
 

Attachments

  • SAM_4325.JPG
    SAM_4325.JPG
    1.3 MB · Views: 0
  • SAM_4327.JPG
    SAM_4327.JPG
    1.3 MB · Views: 0
  • SAM_4328.JPG
    SAM_4328.JPG
    1.3 MB · Views: 0
  • SAM_4331.JPG
    SAM_4331.JPG
    1.2 MB · Views: 0
  • SAM_4335.JPG
    SAM_4335.JPG
    1.3 MB · Views: 0
Status
Not open for further replies.
Top