Comet 30 driven pulley problem

Status
Not open for further replies.

jim smith

New member
Messages
5
Reaction score
0
Location
Port Gamble WA
Hi, I’m a newcomer to the site, so please let me know if this is not an appropriate place for asking for help.
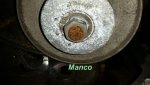
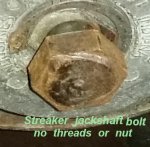
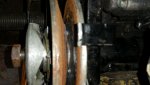
I have a 20 year-old Ken-Bar Streaker that needs repair or replacement of its Comet 30 driven pulley. The problem is that there isn’t a nut at the end of the jackshaft, as in my Manco go kart (see images). Rather, it appears to be a solid bolt. It has a Woodruff keyway, but it doesn’t extend to the far (inboard) end. So, it should have been apparent to me that I would be unable to tap it out from the far end, and in fact it would only go about 2cm, as in the photo. I assume that the sprocket also is fixed with a key, which would also prevent removal of the bolt.
So, is there a way for this geriatric entry-level technician to remove the pulley, or must I just cut through the bolt and get a new standard jackshaft?
I couldn’t find any such arrangement in go kart parts lists. Anyone with experience with it, or the rationale for that design?
Thanks for the help
 

Attachments

  • Manco driven pulley.jpg
    Manco driven pulley.jpg
    263.1 KB · Views: 9
  • streaker jackshaft BOLT closeup.JPG
    streaker jackshaft BOLT closeup.JPG
    38.5 KB · Views: 5

2SlickNick

American Minibikes @ FB
Messages
2,758
Reaction score
30
Location
Mesa, AZ.
Welcome.
Is that bolt on the outside of the inboard driven unit?
1st off use some on blaster to loosen the corrosion. I have a 1970 TC similar to that. Hard to tell with your pics... More always help.
Maybe post a few more pics of the entire jacckshaft set up.
 

jim smith

New member
Messages
5
Reaction score
0
Location
Port Gamble WA
Many thanks for your prompt response.
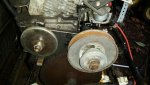
I apologize for providing inadequate information. I had put in the image of my Manco's driven pulley (the one on the left with the rusty shaft threads), in order to show the difference from the Ken-Bar Streaker assembly(on the right), which appears to be a one-piece bolt, rather than bolt threads and nut. On close inspection, it appears that the construction was that of a nut welded to the shaft. I don't think it was an after-market modification, as I bought it new from the dealer. At any rate, I can't get it off.

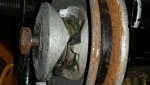
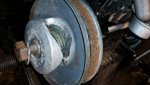
The first of today's images shows both pulleys (the driver is disassembled, waiting for new springs and speed reducer). The other two are closer views from above and from the rear. I had removed the nut from the inboard (right hand) end of the jackshaft, then pushed it out with a small punch; these show the maximum movement possible, and confirm the absence of threads on the shaft.

I hope that this is a clearer presentation of the problem, but please tell me if you need more information or photos.

Jim
 

Attachments

  • streaker both pulleys.jpg
    streaker both pulleys.jpg
    306.8 KB · Views: 9
  • streaker bolt out closeup.jpg
    streaker bolt out closeup.jpg
    303.8 KB · Views: 10
  • streaker bolt pushed out1.jpg
    streaker bolt pushed out1.jpg
    142.9 KB · Views: 11

jim smith

New member
Messages
5
Reaction score
0
Location
Port Gamble WA
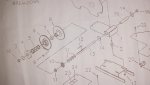
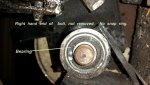
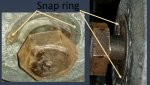
I think I'm confusing things by using the wrong terms. Instead of 'inboard', 'outboard', 'inside', 'outside', let's say 'right hand' and 'left hand'. So: regarding snap rings, there is none on the right hand end of the bolt. The labelled images show the snap ring on the left hand end before I removed it. The corners of the bolt end had locked the ring in place and prevented its removal until I pushed the bolt out. This confirmed my impression that the ring was holding the cam & sheave in place, but not preventing removal of the bolt. With the bolt out as far as I could move it, it looks as if the chain has tightened; but even if I removed the chain and took the entire assembly out from the chassis, it seems, judging from the attached torque converter breakdown, that I would have to remove the sprocket from the bolt, and that doesn't seem possible in view of the keyway that doesn't go to the right hand end of the bolt.

I'm probably missing something obvious here, and I'd appreciate your helping me find it.
 

Attachments

  • streaker comet 30 torque converter breakdown.jpg
    streaker comet 30 torque converter breakdown.jpg
    154.5 KB · Views: 9
  • streaker side view bolt out loose snap ring.jpg
    streaker side view bolt out loose snap ring.jpg
    283.1 KB · Views: 7
  • streaker top view bolt out loose ring chain tight.jpg
    streaker top view bolt out loose ring chain tight.jpg
    319.7 KB · Views: 9
  • streaker right hand end of bolt no snap ring.jpg
    streaker right hand end of bolt no snap ring.jpg
    238.5 KB · Views: 7
  • go kart sneaker snap ring endon_ back views.jpg
    go kart sneaker snap ring endon_ back views.jpg
    166.4 KB · Views: 4

2SlickNick

American Minibikes @ FB
Messages
2,758
Reaction score
30
Location
Mesa, AZ.
Okay we will use left and right , as if looking from rear of kart to the front....

So are where any Threads on the right hand end of the jacckshaft bolt? Or is there a small single groove as if there should be a snap ring there?

I don't see anything there to stop the bolt from coming out. You should be able to just use a BFH And wack the heck out of that bolt and knock it through the driven unit.

Make sure use pb blaster to loosen any corrosion first.
 

jim smith

New member
Messages
5
Reaction score
0
Location
Port Gamble WA
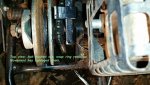
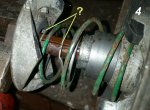
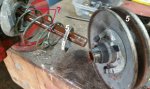
Thanks again. The bolt's out, but in case someone else has the same problem, here's how: it took more than a BFH (took me a minute to decipher that acronym). The bolt would only go out about 2 cm, then was stopped by the tightened chain. So I loosened the engine mounts, which slackened the chain so it could be removed from the sprocket. Once on the bench, it took a gear puller to remove the sprocket and pulley. Now to order the parts, but I can't identify to two thin--and bent--rings that I've indicated on the attached photos. Any idea what they are? I can't find them on the Comet parts diagram. No problem if not; I'll deal with the parts people.

Thanks so much for your help; I couldn't have got this far without it.

Merry Christmas!

Jim
 

Attachments

  • driven pulley off5.jpg
    driven pulley off5.jpg
    344.5 KB · Views: 8
  • driven pulley off6.jpg
    driven pulley off6.jpg
    238.3 KB · Views: 8

KartFab

Active member
Messages
3,381
Reaction score
60
Location
Dallas, TX
jim,

Im not sure what those bent parts are. However, there are some additional parts that usually hold the cam to the fixed post.

In one variation of the torque converter, a snapring holds that part on.

In another variation, instead of a snap ring, there is a thin circular flat wire (not sure of the name) that wraps around where the snap ring would go. In this type, there has been s small cap that goes over the top of the post.

Other than that, i have no clue as to what that would be.
 

2SlickNick

American Minibikes @ FB
Messages
2,758
Reaction score
30
Location
Mesa, AZ.
LOL on BFH...:thumbsup:
:oops:Sorry about not telling you to remove the chain- I just thought that was given- oh well learning curves help prevent it from happening again.:cool:

Honestly...I have never seen that extra piece of spring there. The cam is one solid piece and the sheave should be too.
You will have to clean that driven, jackshaft, and driver really well.

From the looks of it you will need a a new green spring and buttons. It doesn't hurt to replace springs in the driver too.

That extra spring is weird:huh: I wonder if someone took apart the driven before and added that.
Did you ever determine if that long bolt is held on by a snap ring on the far right side?

EDIT- never mind I see the threads...

---------- Post added at 10:07 PM ---------- Previous post was at 10:01 PM ----------

Look at part #6 It says it is for a ken-bar....

http://www.mfgsupply.com/gomini/gom...utchtorq40/gominiclutchtorq40drivenparts.html
 

jim smith

New member
Messages
5
Reaction score
0
Location
Port Gamble WA
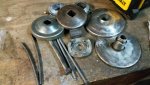
Thanks for the follow-ups, 2 and Kart. Nice website, KartFab (one must be careful not to reverse those 2 capital letters!); I followed your excellent video for cleaning the parts (see photo.) A drill press & wire brushes eased the task.
The springs and buttons are here or on their way.
The link was for the 40 series, but not it or any other torque converter parts lists have anything like it; so I guess I’ll just use the existing spacer, and hope it works.
Thanks to you both. Merry Christmas and happy holidays.
 

Attachments

  • go kart clean parts.jpg
    go kart clean parts.jpg
    291.6 KB · Views: 7
Status
Not open for further replies.
Top