Briggs 5Hp L Head Build Thread!!!

Status
Not open for further replies.

Hellion

Moderator
Messages
8,880
Reaction score
3,889
Sandblasting or 'some kind of media' blasting will do it. But I just used those steel wire toothbrushes and a steel pick/dental tool and other scrapers. Then once you see what the blower and engine tins cover up, you can do less cleaning on what doesn't show.

It's kind of a meditative Zen thing if you sit down on the sofa to work on it with the TV on in the background.

Looking at your crank now gives me some concern--you have the short PTO end; what is it, 1 1/2 to 2 inches long? I think the bare minimum for a clutch (or TAV) and bolt/washer is 2 1/2"

Your engine is from a tiller, right?
 

OldStrattonMan

New member
Messages
40
Reaction score
6
Location
Baton Rouge Cajun Baby
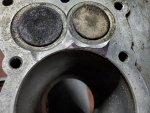
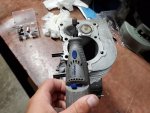
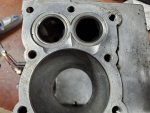
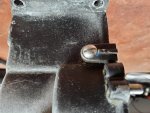
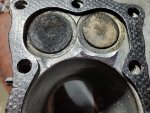
So I got around to doing a little work today on the ol engine. I deleted the governor from the block and once I removed the governor arm from the block I took a 1/4-20 tap and tapped threads for a bolt, I applied high temp teflon pretty thick and tightened it down and I think that should do the trick to keep oil inside the motor. I also did a eyebrow shave on the block and while I was nervous about doing it I think it came out ok although I'm waiting for some scotch dies for my dremel to polish it out all the way. Kart Fab has a great video on how to do this job so I can't take all the credit even though I still had to get it done. First thing to do is take your head gasket and trace out where you want to grind metal and fill it in with a sharpie. I used a small hand held dremel tool with a small 120 grit sanding disk and just take your time doing it this is not a rush job as you don't want to hit the cylinder walls or the valve seats, I put the valves in while I did the work so I didn't hit the valve seat but I'll be changing those anyway. Just make sure to slope it up to the cylinder and no more you don't want to take any material away from the cylinder walls. We have lots of rain in the forecast so I'm going to plan on doing my port and polish job tomorrow and I'm still trying to clean everything, I think that's the worst part of it all but it will be worth it in the end.
 

Attachments

  • 20190605_111553.jpg
    20190605_111553.jpg
    510.1 KB · Views: 8
  • 20190605_111356.jpg
    20190605_111356.jpg
    529.4 KB · Views: 7
  • 20190605_111405.jpg
    20190605_111405.jpg
    265.5 KB · Views: 10
  • 20190605_133348.jpg
    20190605_133348.jpg
    352.7 KB · Views: 14
  • 20190605_154348.jpg
    20190605_154348.jpg
    368.1 KB · Views: 7

OldStrattonMan

New member
Messages
40
Reaction score
6
Location
Baton Rouge Cajun Baby
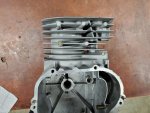
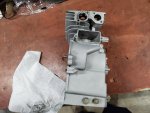
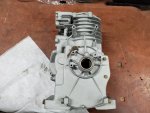
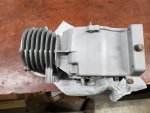
I'm lonely in here no more talking but that's fine I'm gonna keep on ramblin anyway. So I finally got the block clean enough that paint should stick and I ended up sand blasting on low pressure and it did a fantastic job in my opinion, I bought some aluminum tape that the AC guys use and taped off all the gasket areas really well as with the head mating area. After I was finished it went into the wash sink for cleaning and came out pretty good. It's still always from painting as I still need to hone it and do a few other things. Now to the big news, Hellion I feel like an idiot but you was exactly right about the crank being to short, it had that double pulley on it and for some reason I thought it was 2 1/4" long but boy I was wrong so i want to thank you for pointing that out. I searched Ebay and found a setup with a crank with ball bearing and also found the crank cover to fit the bearing so I'll at least have a bearing on the PTO side. Everyone have a good weekend see yall next week with more progress hopefully.
 

Attachments

  • 20190606_145638.jpg
    20190606_145638.jpg
    313.7 KB · Views: 10
  • 20190606_145627.jpg
    20190606_145627.jpg
    240.5 KB · Views: 5
  • 20190606_145617.jpg
    20190606_145617.jpg
    290.5 KB · Views: 8
  • 20190606_145610.jpg
    20190606_145610.jpg
    268.9 KB · Views: 5

JTSpeedDemon

2019 Build Off Winner!
Messages
4,026
Reaction score
162
Location
Texas
Naw, we're just here for crises and triumphs.
Nothing in between. ;)
That's probably an aluminum Kool Bore, in which case you can hone it, just don't go crazy as you can eat into the block if you're clumsy.
 

Hellion

Moderator
Messages
8,880
Reaction score
3,889
Hey that block looks pretty good! Looks like the brown stuff (dried sealer) above the points/condenser block is acting rather tenacious.

Be careful honing an unscored or otherwise OK bore. All I've done is wiped them out really well and on occasion given them a light touch with 1000 grit wet/dry sandpaper to break the glazing. Any more and you might introduce some oil consumption. Just be careful.


In your 4th photo you can see the gap between the valve block and the cylinder. That area is supposed to be open so cooling air flows around and through that area. I can't tell on yours but the last one I rebuilt had casting flash blocking 2 or more of those passages in between the cooling fins so I poked through the flash and filed the openings wide. Did it up nice and spiffy.


I kept quiet because I didn't want to clutter up your thread with unnecessary banter, or even a mild hijack. That's bad form so I prefer to keep it on topic, unlike those other guys :rolleyes:

Happy to help--just looking out for you on parts that don't look right. :thumbsup:
 

OldStrattonMan

New member
Messages
40
Reaction score
6
Location
Baton Rouge Cajun Baby
Does anyone have ideas on the best route to go for a mini bike to mount this engine to. I see the AZUSA kits you can buy but I just don't know if the quality is any good, I've also seen the Taco 22 mini bike kits on the Taco website. Or would I be better off trying to find an old vintage rupp, bonanza, lil indian ect.
 

OldStrattonMan

New member
Messages
40
Reaction score
6
Location
Baton Rouge Cajun Baby
So me not knowing alot about these engine's is making me spend more money than i should, so i bought a new crank and side cover with bearing, well the bearing is to small and so the cover does me no good either so i guess what i need is the newer style large bearing and side cover. The cover part number seems to be 555209. If anyone has one of these laying around i would be glad to purchase it. Ive already ordered the correct larger bearing. Also i have the small bearing and crank over if anyone needs one.
 

Hellion

Moderator
Messages
8,880
Reaction score
3,889
Bummer, man.

Don't hold yourself back from showing us your potential purchases before buying so one of us can spot any potential mistakes.

There's some on that popular auction site under "Briggs 555209".
Otherwise, put up a want ad here and on other sites like OMB.

=======================

Azusa minibikes are ok. No personal experience with them but I've read decent reviews

Maybe a Baja Doodlebug? The early imports would be a good choice.
Or... a classic minibike but that's a crap shoot. Some of them are made out of gold.
 

Hellion

Moderator
Messages
8,880
Reaction score
3,889
I really like those Tacos, the old and the new classics, but not the kit prices so much.

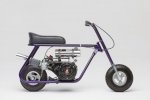
Dig that Taco purple too. But come on, a rear scrub brake? Hope that's not the only option...
 

Attachments

  • 836964723.jpg
    836964723.jpg
    38.2 KB · Views: 4

OldStrattonMan

New member
Messages
40
Reaction score
6
Location
Baton Rouge Cajun Baby
Things haven't been moving like I want them to because of life but hopefully I can finish up all the painting this week other than the new sump cover im waiting on. Anyway has anyone ever heard of bad dog mini bikes, they are kits that you can buy like the Azusa but to me they look to be of better quality. Also I purchased a Baja doodle bug on eBay that I will be re doing for my son and the best part of it is it came with a nice raptor 3. So my sons project has now turned in to me building one for me also.
 

OldStrattonMan

New member
Messages
40
Reaction score
6
Location
Baton Rouge Cajun Baby
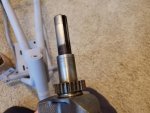
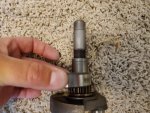
Hopefully someone can give me some help but take a look at the pics of the crankshaft and bearing and tell me if that looks like it will work. To me once the bearing is pressed against the crank gear there is to much of the bug part of the shaft sticking out. Im waiting on the larger sump cover to come in still but something just doesnt look right, hopefully im wrong but anyway some of yall chime in and give me your thoughts.
 

Attachments

  • 20190617_184707.jpg
    20190617_184707.jpg
    237.6 KB · Views: 3
  • 20190617_184733.jpg
    20190617_184733.jpg
    364.9 KB · Views: 4

OldStrattonMan

New member
Messages
40
Reaction score
6
Location
Baton Rouge Cajun Baby
I decided to buy a doodlebug i found on ebay, its in decent shape but my instinct is to fully restore it. Good thing about it is the raptor 3 that comes with it, so now dad has a motor to build. Crazy since I've started this hobbie things are starting to accumulate at a fast pace but ill enjoy the time spent with my boy riding these bikes. I might get made fun of for riding such a small bike but hey i dont care. Engine painting is getting close to being finished so still moving along with the build, ill post pics later of the painting ive done.
 

Attachments

  • Screenshot_20190620-114239_eBay.jpg
    Screenshot_20190620-114239_eBay.jpg
    118.4 KB · Views: 9

Hellion

Moderator
Messages
8,880
Reaction score
3,889
Ebay mini bike, oooooh. Big Spender.


What's to restore? If you restore it, you've got to put the original 97cc engine back in place. :D


Mini bikes were made by and for adults to get around the pits at racing events.

---------- Post added at 07:27 PM ---------- Previous post was at 07:22 PM ----------

About your shaft and bearing; I can't tell from the pics if the two will fit, actually (I blame you :D).

But the bearing is supposed to fit in the recess in the side cover.

I've never done a conversion of an existing plain bearing engine, I've always had either an I/C or a plain bearing engine--no mix and match.
 

OldStrattonMan

New member
Messages
40
Reaction score
6
Location
Baton Rouge Cajun Baby
I guess when i say restore it im talking about sandi g down repainting everything and changing old hardware. Alot of pics coming this week but good news is that my cranksfaft will fit the bearing and it fits in the side cover so yes you can partially convert a plain block so that it has a bearing on the pto side. I am going to explain what slip fitting the bearing is and what and why its helpful for our application's. Everyone enjoy there last day off of work.
 

Hellion

Moderator
Messages
8,880
Reaction score
3,889
I guess when i say restore it im talking about sanding down repainting everything and changing old hardware. .....good news is that my cranksfaft will fit the bearing and it fits in the side cover so yes you can partially convert a plain block so that it has a bearing on the pto side...

I'm not saying converting from plain bearing to roller bearing couldn't be done, I'm just saying I couldn't precisely tell from your photos whether you had the right parts or not. Plus it's been a while since I've had a roller bearing Briggs in pieces.

I was just being a word-meaning stickler. Restore means restore; to put or bring back to an earlier or original state. People misuse that word a lot, then it gets regurgitated around the web and people start thinking they've seen actual restorations when in fact it was just a rebuild, repair, a 'resto-mod' or just a new coat of paint to stop it from rusting....:p
 
Status
Not open for further replies.
Top