Bird Engineering Baja Build/Restoration

Status
Not open for further replies.

Mrmonk7663

Member
Messages
456
Reaction score
5
Location
Houston, Texas
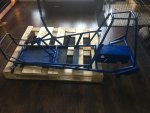
This thread will be used to document my Bird Engineering Baja Restoration and build. The kart will be named “Murder Baja”

I acquired a Bird Baja recently for $100. It was frame with a box of various parts in unuseable condition, but perfect for measurements. I had no clue what I was buying...I just liked the look of the kart. Friendly folks on here were able to identify it for me.

The plan:
Restore and modify this kart to make one **** of a street grass kart.

Progress:
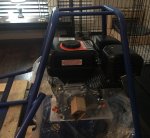
I have a spare predator 212 new in the box for the base of the build. It fits nicely within the confines of the frame structure, and should fit even better with a new header and intake.

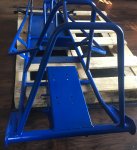
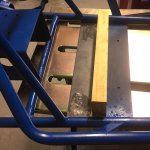
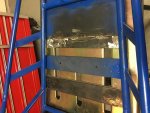
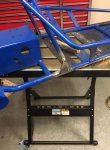
I fixed a cracked weld on the spindle mount today. I also welded in an additional 3/16” bar that will brace the seat area to have the strength for an adult. I will add one additional 3/16” plate in front of the stock seat mount, which will provide further reinforcement and also will serve to brace the thin flooor under the steering hoop. This should allow me (and moreso the kids who aren’t careful) to not have to worry about distorting the floor pan entering or exiting the kart.

I will also be adding triangular gusset on each side of the kart where the seat upright/engine cradle and lower frame come together. This should be all the frame modifications.

Paint/Protection:
After talking to a few places I have decided powderxoatimg will be the best option for my goals. I want this to be a nice looking kart that holds up for a while. The kart will be completely sandblasted and cleaned. It will be coated with matte or satin black powderxoat, and then a clear powdercoat layer will go on top of that to further protect the finish.

Theme:
As the name “Murder Baja” suggests, this kart will be all black. Black powder coating, black wheels, black predator, black filter, black ceramic coated header.

Parts:
I have made some progress with parts.
1. New front spindle setup has arrived.
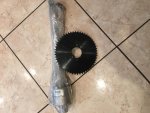
2. New Peerless differential and axles and a 54t sprocket have been ordered.
3. 8t jackshaft sprocket is here
4. Azusa Jackshaft that will be modified for the kart’s dimensions is in.
5. Custom double threaded stud for the chain tensioner setup is in.
6. 16t idler sprocket is in transit.

I still need to order 2 band brakes, throttle setup and cable, brake cable, chain, wheels, tires, and new controls for the handlebar. These items will be ordered after powderxoatimg is completed.

Engine will be straight forward. Remove governor, custom throttle setup, high flow air filter, Japanese “superjet” carb with modified circuitry, header, mod 2 cam (might change) torque converter, billet flywheel, side case studs, thin head gasket and a few other odds and ends.

Rear Wheels will be 8” with 18” tires
Front will be 6” with 15” tires.

That is it for now. I will update with new pictures and information as I make progress.
 

Attachments

  • B1202293-911D-44A7-B883-134766F0A153.jpg
    B1202293-911D-44A7-B883-134766F0A153.jpg
    277 KB · Views: 49
  • ECA4045B-B587-47E0-8CB6-5C002E8B51D2.jpg
    ECA4045B-B587-47E0-8CB6-5C002E8B51D2.jpg
    262.8 KB · Views: 42
  • 54307E18-5AB5-44B1-A16F-4583D560946A.jpg
    54307E18-5AB5-44B1-A16F-4583D560946A.jpg
    291.9 KB · Views: 42
  • C6640184-458B-4C2F-BD6A-10F594934B0D.jpg
    C6640184-458B-4C2F-BD6A-10F594934B0D.jpg
    278 KB · Views: 42
  • 3C8FF670-B391-430D-85AC-2975C030C7A8.jpg
    3C8FF670-B391-430D-85AC-2975C030C7A8.jpg
    288.8 KB · Views: 37

Mrmonk7663

Member
Messages
456
Reaction score
5
Location
Houston, Texas
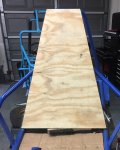
Finished adding my 2nd 3/16 floor piece. I tied it into the existing floor pan by overlapping it 1” and welding on top and bottom. Entire floor is solid now even with the thin factory floor. I am learning to weld. I’m using a Hobart 210 with flux core. I’m learning very quickly that with the flux you need an extremely clean surface to get a good bead...if not splatter fest and multiple passes.

I also repaired the front spindle mount. This area has been repaired before as evident by huge amounts of weld, so I’m not worried about a perfect looking repair weld, just functional.

Finally, I welded the floor pan in multiple places around the outside with 1 1/2” welds to take away the remaining flex in the thin floor pan. It worked great.

A couple pics after I finished up for tonight...
 

Attachments

  • AF70E840-B553-452E-AC22-07637A150CD2.jpg
    AF70E840-B553-452E-AC22-07637A150CD2.jpg
    288.7 KB · Views: 30
  • CE3597F7-50E0-45B8-9E40-8B8F1F31C8B5.jpg
    CE3597F7-50E0-45B8-9E40-8B8F1F31C8B5.jpg
    278.3 KB · Views: 21

BigWes

Member
Messages
829
Reaction score
32
Location
Alabama
Finished adding my 2nd 3/16 floor piece. I tied it into the existing floor pan by overlapping it 1” and welding on top and bottom. Entire floor is solid now even with the thin factory floor. I am learning to weld. I’m using a Hobart 210 with flux core. I’m learning very quickly that with the flux you need an extremely clean surface to get a good bead...if not splatter fest and multiple passes.

I also repaired the front spindle mount. This area has been repaired before as evident by huge amounts of weld, so I’m not worried about a perfect looking repair weld, just functional.

Finally, I welded the floor pan in multiple places around the outside with 1 1/2” welds to take away the remaining flex in the thin floor pan. It worked great.

A couple pics after I finished up for tonight...

Hey man, I have a Hobart 210 MVP as well. Dude, quit messing with that flux core and get a roll of .024 wire and a bottle of gas. Looks like you are welding in your garage anyway right? Take advantage of the fact you aren't having to deal with the wind blowing your shielding gas off the puddle. I would only use flux core if I was out in the wind. You'll have a much cleaner and easier time and you can weld than thinner metal a lot easier. And your welds will look way better too. If you can make flux wire look even halfway decent...you can make regular gas wire welding look really good. Give it a shot.

Get your money's worth out of you 800 dollar welder bro.

Wes

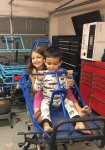
PS: Those kids make that last shot perfect! And that little girl is a heartbreaker with that smile! The boy is looking down and thinking like ok where is the gas pedal and she is playing the camera :D I can tell it wont be long he will be ready to go riding!
 

Mrmonk7663

Member
Messages
456
Reaction score
5
Location
Houston, Texas
Yes I definitely need to get a gas setup. Flux core is not fun. I also need to work on my smoothness/positioning. My biggest problem so far though is light. I have a good helmet but it is still a bit too dark for me to see my puddle like I need to. I think I’m going to get a halogen light in a stand to point at my weld area in the future. That should help.

Anyway thanks for the comments about the kids. My daughter is definitely going to be pretty which I’m sure will cause trouble. I’m white and her mother is Arab...this the natural tan haha.

A bottle of Argon/co2 is on the to-do list now.

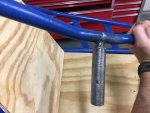
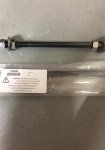
I got bored and knocked out my rear triangle gussets. Frame work is done. Next up will be sandblasting and powdercoating. I also made my tensioner setup. I got the stud from Grainger. I got a 1/2-13 die and extended the threads in one side. The other side I shortened with a cut off wheel. The stock tensioner rod was 8.5” and not available anywhere, thus the custom one. Part number is in the picture if anyone ever needs to do this with a Baja.
 

Attachments

  • 5550624C-C38D-49CE-BCBE-F26644A5CFF9.jpg
    5550624C-C38D-49CE-BCBE-F26644A5CFF9.jpg
    256.4 KB · Views: 27
  • 6B780F91-80B0-40F1-B0B9-10A149C0CF08.jpg
    6B780F91-80B0-40F1-B0B9-10A149C0CF08.jpg
    165.6 KB · Views: 25

Bansil

Painter of gnomes....
Messages
1,414
Reaction score
1,117
Location
Mnts of the farthest NE TN you can go
I have same welder also flux is designed for dirty rusty and windy conditions.
Flux rocks outside and you can get very good deep welds with it, are you pulling or pushing the weld?
With flux push it almost verticle, very little angle and watch the wire tip, make a small weave up and down as you go. Maintain same distance by also moving in and out so you don't stick it
You need to work on technique some thats all

Kids do make that picture awesome!
 

Mrmonk7663

Member
Messages
456
Reaction score
5
Location
Houston, Texas
For sure it’s all in my technique. The machine is more than adequate. I have been pulling the puddle only. I have not tried pushing yet. I did a little better today. Actually made a couple beads. I’ll get the hang of it eventually.

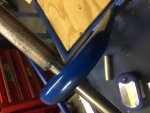
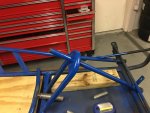
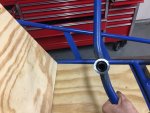
Anyway, so the frame mods were not actually complete. The small crossbar that the factory seat mounts to had a crack in the weld so I repaired that. I ordered a seat cushion and when it arrives I will make a plywood base and backing for the cushion. Plenty of mounting options for the base. The rear didn’t have a good option, so I added a section of 1/8 plate. I will have two mounting holes in this plate and one hole in the stock upper plate...basically a triangulation, to mount the seat back firmly. Additional benefit is reduced flex with the addition of the 1/8 plate.

2nd thing I did was cut off the steering shaft. The shaft was a permanent fixture and it had lots of slop. I don’t want the slop to have negative effects at 40mph so I will enlarge the upper hole to fit a bronze bushing which should remove 80% of the slop. I ordered a 24” 3/4 Od .120 wall steering tube. I will make a new pitman arm the same dimensions as the stock one. Then hopefully I can find a plug to join the handlebars to the new shaft, drill a couple holes through new and old shaft and weld them to the plug.

Here is a picture of the seat back brace I added. The weld on the right is ungrinded, and actually looks like a weld haha.

New steering shaft won’t be here till next week. As soon as it’s here and built, kart will be ready for sandblasting and powdercoating. Until then I will switch back to finalizing the 3203. Waiting on a comet green spring tomorrow to replace the Chinese spring.

I might make the jackshaft setup this weekend for the Baja. Still need to find the correct 5/8” bearings for that.

Edit-got bored so I roughcut the seatback. The seatback will end up shorter than shown...waiting in cushion to adjust final height.
 

Attachments

  • 03AE3310-B3C0-4B8F-BFA6-7ECAD79B5E25.jpg
    03AE3310-B3C0-4B8F-BFA6-7ECAD79B5E25.jpg
    244.1 KB · Views: 26
  • 9D804A06-4114-4440-9970-E40F05A74399.jpg
    9D804A06-4114-4440-9970-E40F05A74399.jpg
    285.8 KB · Views: 19

Dingocat

Broke
Messages
722
Reaction score
171
Location
NE Ohio
Flying along on this so far lol, looks good. U'll have to get a picture of the seat that was on mine. It's funky.
 

BigWes

Member
Messages
829
Reaction score
32
Location
Alabama
I like it, I've been kinda stuck working on my project lately because of the heat. Just don't add to much heavy metal to that thing! Or you'll be renaming it to 'Heavy Metal' lol! That's what I may be renaming mine too as well... but it's looking good and thanks for sharing it with us.

Wes
 

Mrmonk7663

Member
Messages
456
Reaction score
5
Location
Houston, Texas
Thank you sir. The additional metal I’ve added is about 7lbs. Nothing crazy, just needed. The kart is starting to look rough from the grinding and what not, but it will all come together soon :). The peerless differential is being delivered today along with the 54t sprocket.

I work until 10pm or 12am normally. So my kart works usually takes place after that, which keeps the heat down. I also bought a 30” Shop fan from HF which helps out a lot in the garage.

It won’t be long and I will have to start sorting out the flywheel, rod and cam. I think I am going to install the engine parts on the never ran engine which should make gasket removal cake. Need to determine how much I can safely shave the non hemi head with a .09 gasket.
 

BigWes

Member
Messages
829
Reaction score
32
Location
Alabama
Nah, just spray some cheap rattlecan paint on there for 'rust protection' until you get it done. matching color of course :) it'll ease the pain of construction.

I might have to look into one of those big fans myself. my garage is well into the triple digits in the afternoon sun it faces the west with no ventilation. its why I normally just work outside.
 

Mrmonk7663

Member
Messages
456
Reaction score
5
Location
Houston, Texas
A little update. The rear differential and 54t sprocket arrived. It’s sitting in the box for now. I cut out an upper and lower seat board. I’m waiting on the cushion to arrive this week. Also waiting on the steering shaft. Once it arrives and I make the new steering the kart will be ready for powdercoating.

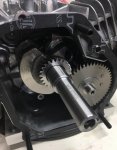
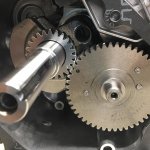
Since I’m waiting on all of that, I decided to take apart the new predator. It is completely torn down now. I even removed the govenor drive gear from the crankshaft. Govenor holes have been tapped. I will tap the low oil sensor hole tomorrow.

I placed an order today for a flattop Piston, +.040 billet rod, billet Arc low drag flywheel, mod 2 cam, head studs and side studs. If all goes well I will install it this weekend. Then I will need to figure out which head to run. I’m currently thinking about shaving the head .030 and using a .027 mls gasket which would put me at around 10.8:1 cr.

I ordered a shorter jackshaft. Also ordered the bearings for the jackshaft And differential. I forgot I needed 4 instead of 2 so I’ll have to order 2 more.

Another bird Baja popped up for sale tonight in Houston.

That’s it for today!!
 

Mrmonk7663

Member
Messages
456
Reaction score
5
Location
Houston, Texas
A couple pics from yesterday.
 

Attachments

  • 141C3209-7D0E-4DB0-95A1-A2389A205C54.jpg
    141C3209-7D0E-4DB0-95A1-A2389A205C54.jpg
    210.6 KB · Views: 24
  • 0950BF46-79D8-4159-A1CD-CF88B593AA6C.jpg
    0950BF46-79D8-4159-A1CD-CF88B593AA6C.jpg
    247.1 KB · Views: 24
  • B09305EF-6C98-40A6-A395-E289081F0A48.jpg
    B09305EF-6C98-40A6-A395-E289081F0A48.jpg
    262.8 KB · Views: 18

Mrmonk7663

Member
Messages
456
Reaction score
5
Location
Houston, Texas
That’s ok. I’ll see how it works out. And if it breaks I’ll swap to a 1” flex proof axle. The only thing that would be needed is the axle and sprocket. Brakes/hubs/wheels will transfer over. If it stays in 1 piece then great. This kart is being built for mild terrain. Flat fields and asphalt. The 3203 and Spiderbox will be for off-road riding.
 

Mrmonk7663

Member
Messages
456
Reaction score
5
Location
Houston, Texas
So the design of the Baja steering essentially makes it non removable without cutting since the 7/8” handlebars are welded to the 3/4” shaft. The steering shaft is hollow. There is a lot of slop in the upper hole. The bottom hole was inaccessible as instead of a washer and a cotter pin someone welded a washer.

I wanted to service the lower tube to clean and grease it properly. I also want to put a bronze bushing in the upper hole. So I cut the steering shaft up.

I purchased a 3/4” solid steering shaft from speedway motors. I had some old 1” DOM tubing lying around. I welded this to the cut portion of stock tubing. I friction fit the 3/4” solid shaft inside the other end and welded that too. I am happy with how it came out. Welds are far from great but much better than they were a few days ago.

Tomorrow my seat cushion comes in. After putting that on I’ll be able to set the distance of the new steering setup to make it more adult friendly. I also ordered a pitman arm from BMI that I bored out to 3/4”. Should work out perfect. A few pics to show what I did.
 

Attachments

  • 98C74A9F-5C45-4D0C-BE1E-7933E360A2ED.jpg
    98C74A9F-5C45-4D0C-BE1E-7933E360A2ED.jpg
    197.6 KB · Views: 26
  • F722A884-F8BF-42D0-B154-FC1C4E51BC78.jpg
    F722A884-F8BF-42D0-B154-FC1C4E51BC78.jpg
    268.3 KB · Views: 22
  • 08D183DD-93B8-43E6-922C-8D3681C7093E.jpg
    08D183DD-93B8-43E6-922C-8D3681C7093E.jpg
    259 KB · Views: 26
  • D95B6247-2584-40CA-9395-9EF14B6D0058.jpg
    D95B6247-2584-40CA-9395-9EF14B6D0058.jpg
    244.7 KB · Views: 24
  • A59D4402-B563-4A16-98E4-A0F4D4EA779E.jpg
    A59D4402-B563-4A16-98E4-A0F4D4EA779E.jpg
    273.2 KB · Views: 25

Mrmonk7663

Member
Messages
456
Reaction score
5
Location
Houston, Texas
Busy day today with the family which cut into the kart time...but for good reason. I took the family to a new go kart racing complex. My wife spun out a couple times. My daughter got to ride with the staff. Karts moved pretty quick around 40 mph. Scared the heck out of my wife as the previous place I took her the karts went only 20 mph haha.

Anyway, seat cushion came in. I cut the backing boards to final shape and am painting them up now. Pics of that tomorrow. I also welded one final support for were the upper portion of the seat will rest. Welds came out good.

Bought a couple brass bushings to fit into the steering column. I think the kart will get powdercoated without the steering shaft. I’ll paint it after the fact. I don’t want the brass bushing to get sandblasted, coated and heated.

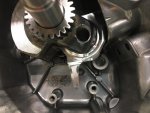
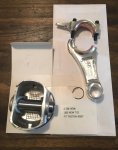
Started the engine build tonight. Arc Rod and hemi piston installed. Bearing was seated prior to installation. This was pretty straight forward except for the piston install. I have used fancy tapered aluminum ring compressors sized to the piston on car engines I’ve built. They are easy. The harbor freight band ring compressor is not as easy. Had to install it 3x. The first 2 times the top ring unloaded. The key to using this inferior tool is to tighten the living daylight out of it, and make sure it remains perfectly square. After doing that it installed fine. Tomorrow afternoon I’ll install the cam and flywheel, sidecover, and recoil assembly. The Mikuni should be arriving too. Just need to wait a week or two for the cylinder head work to be done.

I can tell that after this first build, subsequent ones will be simple.

Piston sits about .004 in the hole...will work perfect with the .027 mls gasket.

One final tip. If you plan on building an engine order some Kimwipes. These wipes leave no lint and are great for cleaning bearing surfaces, cranks, rods, inside crankcase, etc etc.


Edit-couldn’t sleep. Installed Mod2 cam from Dynocams and a side cover stud kit with fresh side gasket. Also included a photo of the wipes and assembly line I use.
 

Attachments

  • 5CB24B92-2899-4DBE-A87A-F00B0C0ADD27.jpg
    5CB24B92-2899-4DBE-A87A-F00B0C0ADD27.jpg
    223.4 KB · Views: 12
  • 02F5388A-AABF-4686-A274-6FA3EC894545.jpg
    02F5388A-AABF-4686-A274-6FA3EC894545.jpg
    230.6 KB · Views: 14
  • 500A55D3-3BD8-41F7-B5F0-87BF72F85867.jpg
    500A55D3-3BD8-41F7-B5F0-87BF72F85867.jpg
    220.7 KB · Views: 12
  • DC4E0F56-19D2-4373-8637-485E91C537FD.jpg
    DC4E0F56-19D2-4373-8637-485E91C537FD.jpg
    237.1 KB · Views: 10
  • E9BE9327-FF7B-4415-8088-6370415FF152.jpg
    E9BE9327-FF7B-4415-8088-6370415FF152.jpg
    160.8 KB · Views: 8
  • 3963BC67-EC76-4D43-8FDF-7C6D90D8EA12.jpg
    3963BC67-EC76-4D43-8FDF-7C6D90D8EA12.jpg
    243.3 KB · Views: 10
  • A94BF0EE-7841-4814-B745-CA19BAFAAA91.jpg
    A94BF0EE-7841-4814-B745-CA19BAFAAA91.jpg
    330.2 KB · Views: 11
  • F80D6DCD-2E82-42BE-9EB5-CEB8B55E2B0B.jpg
    F80D6DCD-2E82-42BE-9EB5-CEB8B55E2B0B.jpg
    264.3 KB · Views: 13
Status
Not open for further replies.
Top