Belt requirement not matching belt chart

qpgmr

New member
Messages
14
Reaction score
11
Location
Rock Hill, SC
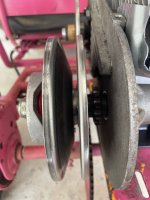
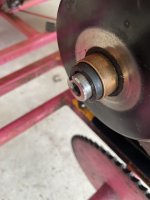
So I received the stuff I ordered and went to work. After getting the riser on, I saw that the chain sprockets weren't lining up, so I loosed the bolts holding the large sprocket and took a mini sledge and knocked the large sprocket out to the end of the leftward space available that you can see in the pic. Those are aligned now, but have another issue. The riser mount does not allow the engine to slide back enough to prevent the gas tank from hitting the bar in front of it when the frame flexes. Here is the mount I'm using. Can anyone recommend a riser that will work for this combo? I've seen others that are square tubes but they only give 1" rise and I'm not convinced that's enough. It seems ridiculous that I might have to drill holes.
 

ezcome-ezgo

G'me sumthin to write on
Messages
5,934
Reaction score
2,904
Location
Atlanta, GA
Well that frame was not designed with that engine in mind, so drilling, cutting and/or grinding might be a part of the conversion. That's actually the fun part, making it work.
 

Hellion

Moderator
Messages
8,671
Reaction score
3,734
….After getting the riser on, I saw that the chain sprockets weren't lining up ….It seems ridiculous that I might have to drill holes.

Like what Ezcome said...

In this hobby nothing is “drop-in”, nothing lines up and if it does, it’s not *perfectly* lined up. Part of the disgust comes from cutting up pristine parts you just bought; it seems a travesty. I think what really helps is doing a good job when you mill, drill, bend and twist so it looks “factory” and not like such a shade-tree Bubba hack job. That eases the mind for me. I have a decent but not total case of perfectionism.
 

qpgmr

New member
Messages
14
Reaction score
11
Location
Rock Hill, SC
After putting the torque plate back on, the available space on both shafts seem insufficient. Here’s a pic of how far the driven retaining nut can go, and the crank only accommodates a small part of the hub driver. I know people are putting 224’s on with clutch plates. Is this really OK?

IMG_3939.jpeg
 

qpgmr

New member
Messages
14
Reaction score
11
Location
Rock Hill, SC
Here’s more pictures, realized just that one wasn’t very helpful. There is MAYBE 1/4” left on the crank. Is that really going to be ok? As for the driven, what should I do?
 

Attachments

  • IMG_3940.jpeg
    IMG_3940.jpeg
    1.8 MB · Views: 11
  • IMG_3941.jpeg
    IMG_3941.jpeg
    1.8 MB · Views: 11
  • IMG_3942.jpeg
    IMG_3942.jpeg
    1.8 MB · Views: 11

qpgmr

New member
Messages
14
Reaction score
11
Location
Rock Hill, SC
The backplate, cvt and both sprockets were already on it when I bought it. It had a #40 chain. It was driven quite a few times and no issues with the chain. I'm trying to keep using the backplate so I can put a cover on it.
 

Edwin Spangler

Well-known member
Messages
881
Reaction score
850
Thats about how much room I have to put the other half of the driver onto. Pacman washer holds it real tight.

That looks exactly like the CVT kit I got from GPS so I assume its the same parts.

Did you have the driven assembled before and the nut went further on the shaft? It should stop flush.
 
Last edited:
Top