B..B..B..Bird Bird Bird, Bird is the Word!

Status
Not open for further replies.

GrojDad

Ensign, Red Shirt class
Messages
34
Reaction score
1
Location
Peoria AZ
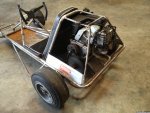
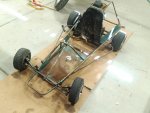
Hey everybody! Remember this guy?
IMG_20170725_165821.jpg

I haven't had much time to do anything yet, however I did want to get this restoration thread started and ask a couple of questions.

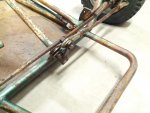
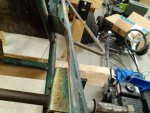
The first is this bend in the frame, how would you suggest I straighten it? I can think of a couple possibilities using maybe a bottle jack or twisting a nylon strap, but if there is a tried and true way, let me know!
IMG_20170725_165839.jpg

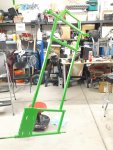
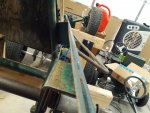
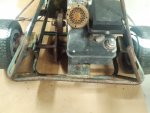
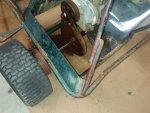
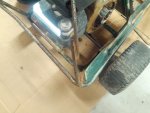
Up next are these 2 cut/weld to raise the cage, I believe it was to accommodate the briggs. Anybody know if the briggs was factory? If not, what was? Anyway, I like the lift to the top of the frame, I think it adds to the retro look. But I don't like these 2:
IMG_20170725_165854.jpg

IMG_20170725_165908.jpg

I'd like to cut them out, grind what's there to a point on either end, and weld something 'in-line' back in, the same diameter.

Here's that cage lift, presented in front of a messy workbench. I believe stock it would have been level with the back of the seat.
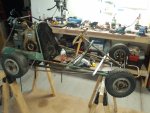
IMG_20170730_060109.jpg

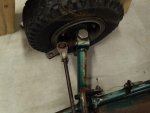
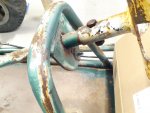
This is another one that has me scratching my head, if there is anything I can do about it. Basically, there is a ton of slop in the steering, and the reason is the size of the bore that the steering shaft goes through.
IMG_20170811_135852.jpg

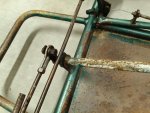
I could easily fix the top here, if it weren't for the 2 washers welded at the bottom.
IMG_20170811_135914.jpg

IMG_20170811_135959.jpg

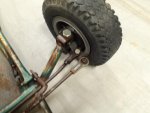
Speaking of welded stuff, these tie rod ends are fixed, hopefully the alignment will be good enough and I won't have to replace. Unless someone knows how to fix that ;)
IMG_20170811_140135.jpg

IMG_20170811_140147.jpg

Anyway, that's my 10 attachment limit, and this is the start of the Bird restoration!
 

itsid

Moderator
Staff member
Messages
11,563
Reaction score
251
Location
Ruhrpott [Germany]
Code:
Trashmen detection active.....
scanning complete....
Target found!

...Press any key to proceed!

'sid
 

GrojDad

Ensign, Red Shirt class
Messages
34
Reaction score
1
Location
Peoria AZ
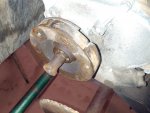
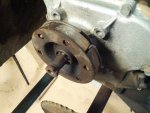
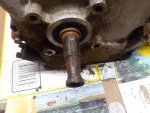
Here's a couple more pictures I forgot about. Evidently the kart was run without any needle bearings in the clutch.

IMG_20170730_055855.jpg

IMG_20170730_055904.jpg

So I'm not sure if I'll need a new crank or if there is enough meat left on this one that it might still work. The old clutch was held on by a shaft bolt and the set screw below.

IMG_20170730_055926.jpg

You guys think I should just run it, get a new crank or go get a rota-derp?
 

itsid

Moderator
Staff member
Messages
11,563
Reaction score
251
Location
Ruhrpott [Germany]
Here's a couple more pictures I forgot about. Evidently the kart was run without any needle bearings in the clutch.
So I'm not sure if I'll need a new crank or if there is enough meat left on this one that it might still work. The old clutch was held on by a shaft bolt and the set screw below.

You guys think I should just run it, get a new crank or go get a rota-derp?
Nothing on the pictures should've moved respective to the shaft;
so all that is covered by what's left of the old clutch should be "fine"
If what's left of the "rest" is enough to support your new clutch ....
there's only one way to find out really I'm afaid.
But frankly, while being at it, I'd fix that now,
talking of which:
I'd get the crankshaft before I'd buy a fresh engine to be honest, if that's financially in any way still plausible that is
(means a 40 bucks crankshaft yes, a 100 dollar crankshaft is a certain no in this case)

Are you saying fer that he should throw it out?
I'm fairly certain GrojDad got it,
and if you're curious enough and lmgtfy tells you something... well the choice is up to you then :D


Anyways, to answer the initial questions..
bent tube:
I'd try heat and a 2by4 to bend it back gently first.

engine:
AFAIK the original engine/trans is a 5hp flathead briggs with a series 30 comet Torque converter driving a peerless100 (or cometstyle) differential

yours looks indeed bigger (too big actually...) anyways, I'd still get back the TC and differential for keeping it "original" reasons more than anything.
(bad shape but for all I know all original except for the tec engine on the seat of course)
View attachment 69540

steering:
The "upper washer" on your steering shaft should be a locking washer (can be pushed in one direction, not in the other... looks like it was welded for "reasons" :(
anyways, cut it off and fix the rest ;)
the shaft is locked in position with such locking washer (on the upper bearing)
I'd upgrade to a locking collar instead.

upper bearing: nylon bushing (with collar) would do nicely IMHO

tierods: and you should replace the tierods completely (incl the ends) too much hassle to fix as far as I can see for the price those stamped ones cost new ;)

'sid
 

GrojDad

Ensign, Red Shirt class
Messages
34
Reaction score
1
Location
Peoria AZ
Here's one I found on the googler, they are saying it's a 'slingshot' by bird engineering.

image334.jpg

I honestly don't see where there would be room for a diff under the engine mount, there is only about 1" of clearance, if that.

IMG_20170811_190838.jpg

Don't get me wrong, a diff would be very cool, I wish it would fit.

One other thing is the wheels, in the million bucks thread you mentioned they weren't original, but they match what's in the photo above. Maybe they are?

Thanks for the feedback!
 

anickode

Active member
Messages
2,296
Reaction score
75
Location
S.E. Michigan
That there bend in the rear would be easy to get out. Just get yourself a good long tow strap and hook it on there, then hook the other end to a big ol' tree. Drive away. When the strap runs out, it'll straighten that tube right out.
 

itsid

Moderator
Staff member
Messages
11,563
Reaction score
251
Location
Ruhrpott [Germany]
Here's one I found on the googler, they are saying it's a 'slingshot' by bird engineering.

View attachment 87910

I honestly don't see where there would be room for a diff under the engine mount, there is only about 1" of clearance, if that.

View attachment 87911

Don't get me wrong, a diff would be very cool, I wish it would fit.

One other thing is the wheels, in the million bucks thread you mentioned they weren't original, but they match what's in the photo above. Maybe they are?

Thanks for the feedback!

Ah yes.. Model 41655.. my fault.
well the Baja (41605??) had a diff:
View attachment 69529
see that peerless 100 wedged inside there?
read here:
https://www.diygokarts.com/community/index.php?threads/32824/
or here: (thanks to photopukeit no longer with pics, still with infos)
https://www.diygokarts.com/community/index.php?threads/25722/

that's why they had two brakes on the rear...

Anyways maybe the 41655 didn't came with a diff
likely because it was needed for the tall offroad tyres, not so much on the much smaller and narrower slicks *shrugs*

'sid
 

GrojDad

Ensign, Red Shirt class
Messages
34
Reaction score
1
Location
Peoria AZ
Hey everybody, I finally found a few minutes to put into this. All I got done was pulling the engine off, however it was worth it. :worried2:

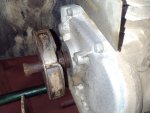
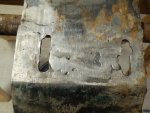
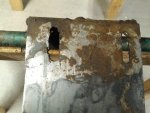
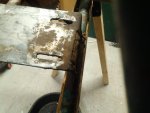
It looks like this thing was in some sort of rear end collision, that had broken the engine mount. Here's the rear slots:

IMG_20170821_220946.jpg

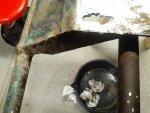
And the front:

IMG_20170821_221003.jpg
IMG_20170821_221044.jpg

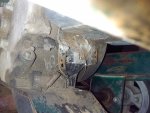
Here's another shot of the side of the rear slots, it looks like where the engine mount plate attaches to the frame on the left there, the tubing had broken completely and was re-welded the entire way around.

IMG_20170821_221014.jpg

I don't have another shot, however it looks like the tubing wasn't lined up quite right before it was welded. I'm thinking about redoing the entire engine mount plate and seeing what I can do about that tubing break, on top of the other bends that need straightening out.

Looking at the rear cage again, I'm thinking it might be easier to just cut the whole thing off, and re-create it, along with these other fixes.

My big concern is making sure it's safe.
 

GrojDad

Ensign, Red Shirt class
Messages
34
Reaction score
1
Location
Peoria AZ
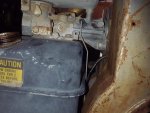
OH and here's some shots of the engine. Apologies for the mess, I haven't had time to clean off the oil. I'm not sure what to do about the rod in the 2nd picture, it's got a piece of plastic hanging on it that broke off somewhere, not sure where.

IMG_20170821_213415.jpg
IMG_20170821_213454.jpg

Here's a good shot of the crank in all its 'we don't need no stinking bearings' glory: :thumbsup:


IMG_20170821_222354.jpg
 

GrojDad

Ensign, Red Shirt class
Messages
34
Reaction score
1
Location
Peoria AZ
Hey everybody! Long time no update.

Not to say that I haven't been working on this, it just hasn't been anything very measurable.

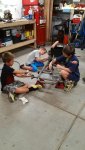
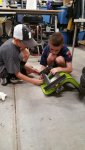
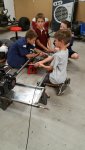
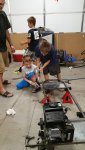
So! I had a group of 6 Bear Cub scouts descend on my shop at the beginning of September, working on earning some sort of tool badge. My little karts need a coat of paint, and my friend the scout leader thought it would be neat for his scouts to tear apart one of them, to help get it ready. So I had 6 of the cutest little mechanics in my shop, and they got the kart tore down to the frame in an hour.

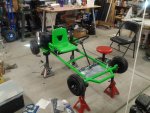
I don't have any pics of the boys in action, but here's the frame with some paint at least :)

IMG_20170927_194222.jpg

Anyway, back to the Bird....

Look! The Steel Fairy visited me a week ago! Brought me some plate to replace the engine mount, as well as some 1/2" rod to replace the rear cage!

IMG_20170920_164647.jpg

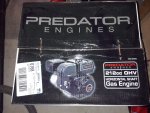
So now I can move forward with getting the frame ready. Oh and I found a unicorn at Harbor Freight!

IMG_20170927_194410.jpg

That's right, I actually found a Hemi, on the shelf, at my local HF. Every time I"m there, I'm always checking, and finally the Rota-Derp gods smiled. :thumbsup:

This was the nudge I needed to move past that old Briggs the Bird came with. It turns out the cover isn't original to that engine, and right now I don't want to invest that much research when I just found me a Hemi!

Since I'm replacing the engine mount plate, might as well make room for a torque converter.

So, when I get home tonight, I should find 4 new tires, 4 new inner tubes and a new 30 series torque converter on my front porch, according to the tracking numbers.

Oh, almost forgot. I did actually do a tiny bit of work to the Bird directly. I straightened out this side panel, getting ready to start cutting. Here it is bent off to the right...

IMG_20170827_155920.jpg

And looking a bit better :thumbsup:

IMG_20170827_162556.jpg
 

Hellion

Murderator
Messages
9,193
Reaction score
4,165
...This was the nudge I needed to move past that old Briggs the Bird came with. It turns out the cover isn't original to that engine, and right now I don't want to invest that much research when I just found me a Hemi!

Who gives a flip if the cover isn't original to the engine?!

Now you'll have a derp that isn't original to the kart! My, my, my...the nonsensical things people say...

You make it sound like you're some kind of stickler for historical accuracy, right before you contradict yourself....:D

Anyway, thanks for the update.
 

Randy H

New member
Messages
892
Reaction score
27
Hey Hellion, why are you so rude?

I know going through puberty can be rough. I went through it myself 40 years ago. Hang in there, but be careful in life outside a go kart forum. Big boys in the real world don't take kindly to unnecessary sarcasm.

GrojDad, cool kart and good on you for enlisting the help of future kart enthusiasts.
 

GrojDad

Ensign, Red Shirt class
Messages
34
Reaction score
1
Location
Peoria AZ
Oh sorry for the confusion on the cover. The model/type/code are stamped into the cover of the Briggs. The model/type indicates it should have ball bearings at the PTO side of the crank, and it's got bushings. So maybe the cover is wrong, or the side cover was swapped and I'm missing half the story (not pulled flywheel yet). Regardless I have a mismatch, and now a mystery.

Nothing that can't be overcome, however the engine needs a good bit of work. The tank is questionable, the carb is totally gone, and the coil is unknown. Combine that with a rebuild kit, and I"m way over what I"ve just purchased the hemi for.

That and time. I'd be putting as much if not more into just the briggs, than getting the kart going.

You are correct that I intended to keep it original as possible, however at this point it's more practical to upgrade/modernize. That's not to say the briggs won't be worked on, just not at this time.

So, I'll go make some custom lemonade! I consider it a nudge from the universe to drop in the hemi, since I was graced with finding it. Plus, like I said, I have to fiddle with the engine mount anyway, why not give it a 30 series :cheers2:
 

GrojDad

Ensign, Red Shirt class
Messages
34
Reaction score
1
Location
Peoria AZ
Threadjack in progress!

Hey everybody! I've been busy, just not on the Bird. I was hustling to get paint down on this Itsy Bitsy I made for my son, the one the Bear Scouts got to take apart.

The reason for it was we got to do a driving activity yesterday! :wai: I wanted the fellas to see what their work turned into :thumbsup:
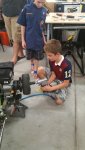
Forgive portrait mode (not the camera dude) but here's some pictures of the teardown:

20170912_174746.jpg

20170912_180142.jpg

20170912_181630.jpg

20170912_181745.jpg

20170912_182538.jpg
 

GrojDad

Ensign, Red Shirt class
Messages
34
Reaction score
1
Location
Peoria AZ
Threadjack in progress!

Aaaannnd I dub thee 'Busta-Lime'!

I used plastic primer as a tie-coat for the seat, it's made of polypropylene. The actual plastic it's adhered to is a lighter shade of green. So my thinking is, as the outer, darker 'rind' wears away, the lighter 'flesh' underneath will bust out! Turning a bug into a feature! :roflol: Plus Home was a cute movie :p

IMG_20171008_161438.jpg
 

GrojDad

Ensign, Red Shirt class
Messages
34
Reaction score
1
Location
Peoria AZ
Threadjack Complete!

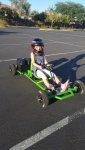
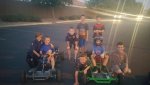
And this little lady got to ride the most, she's the scout leaders daughter and she puttered around the parking lot while we got the track setup.

20171010_165415.jpg

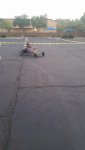
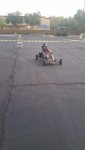
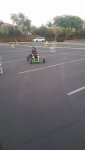
As far as the track goes, we were in a church parking lot. They had a ton of folding chairs, so we set those up and tied caution tape to them, making a super fun little track in less than an hour.

We made it a 'race yourself' type track, since we didn't want them crashing into each other around the turns. The average time around the track was about 1:10. We gave everyone 3 laps to start, the first was untimed so they got to know the kart and track, and then the next 2 were timed. The best time of their personal 2 laps went on the board.

Then we had enough time to repeat the process, everyone got another 3 laps, this time all 3 timed. The best time was 1:02 I believe.

I was amazed, a couple of them took to it like ducks to water. They were 'chirping' their way around the turns, by goosing the throttle to break the back end loose a bit. Kids these days! :smiley_omg: Needless to say, I was grinning ear to ear the whole time, it was such a treat to get to watch them.
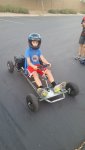
20171010_180243.jpg

20171010_180825.jpg

20171010_180826.jpg

20171010_180830.jpg

20171010_182153.jpg
 

GrojDad

Ensign, Red Shirt class
Messages
34
Reaction score
1
Location
Peoria AZ
Back to your regularly scheduled programming

OK I lied, I did get a bit done on the Bird.

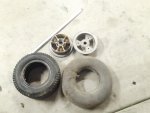
I mentioned before I got replacement sneakers for it, all 4 corners. Since they are split rims, I thought that would be an easy task.

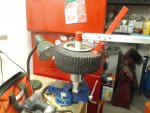
Here's me strong arming the first one (rear) to break the bead.

IMG_20170930_221623.jpg

IMG_20170930_222938.jpg

After that, I moved on to the 2 fronts, which came apart fine. The bead was already separated, so no biggie, just undo the bolts.

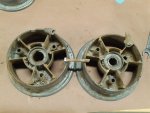
Then I got to the other rear. That guy gave me quite the fight, unfortunately it broke part of the casting.

IMG_20171011_061220.jpg

Since these are being compressed while the wheel is bolted together, I'm thinking of JB welding the pieces back in for now.

I've also ordered a replacement rear wheel, which won't get here till mid November. Gee thanks, misleading 'In-Stock' indicator! In stock at your drop shipping partner you mean! :mad2:
 
Status
Not open for further replies.
Top