American Ethos (2025) Electrathon America Racer

Functional Artist

Well-known member
Messages
5,345
Reaction score
2,834
Location
Toledo, Ohio
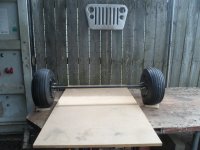
Ok we got wheels & tires :thumbsup:
...but, what about the driving & stopping...components? :unsure:

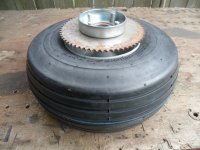
We need (2) sprockets
...& (2) brake Drums (yup, tryin to keep 'er simple)

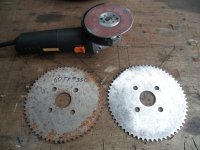
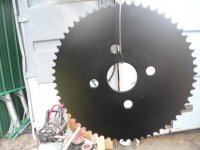
So, I got (2) 60T x #35 sprockets (BMI Karts) (w/lightly rusted surface ~$10.00 ea,)
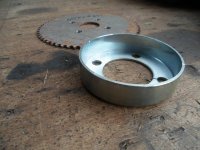
...& (2) 4" brake drums (~$10.00 ea.)

* Most 60T sprockets are over $20.00 ea.
...& I usually sand 'em off & paint them...anyways
...so, gettin' (2) for ~$20.00 is "smart/good bizness" ;)
SAM_4574 (1).JPG
Quick mock up
SAM_4576 (1).JPG
** Notice the brake drum seems ta be a bit close to the sprocket
...probably have ta "space" 'em out a bit :cheers2:
SAM_4578 (1).JPG
Quick clean up (before & after)
SAM_4580 (1).JPG
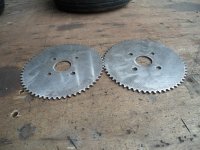
Got 'em all cleaned up
SAM_4582 (1).JPG
Wiped down, hung & painted (Satin Black)
SAM_4592 (2).JPG
 

Functional Artist

Well-known member
Messages
5,345
Reaction score
2,834
Location
Toledo, Ohio
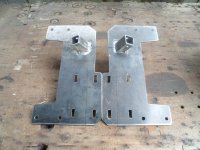
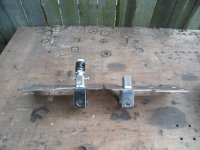
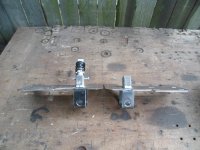
Added the lower coil-over shock mounting brackets
SAM_4677 (1).JPG
Looks like this w/coil-over shock

* Notice they are aligned right over the axle
...to help provide "direct support" ;)
SAM_4679 (2).JPG
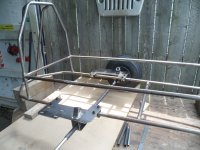
Mocked up (test fit to double check...that everything...work together) on the chassis...again :cheers2:
SAM_4693 (2).JPG
* Notice I'm workin' with a solid/straight axle (for now)
...this is to help ensure...both wheels (all associated components) stay aligned during these mock ups :2guns:
SAM_4692 (2).JPG
 

Functional Artist

Well-known member
Messages
5,345
Reaction score
2,834
Location
Toledo, Ohio
Um...don't ya think that flat "plate" might flex with the axle on one side
...& the motor on the other? :unsure:
SAM_4679 (2).JPG
Yup, I wasa thinkin' that too :cheers2:

So, maybe something like this :thumbsup:

* The screw is just for mock-up purposes
...& this under-bracket will be welded ;)
SAM_4705 (1).JPG
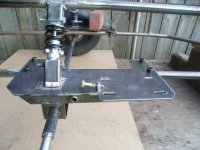
This underneath "cross brace" should help "stiffen" the plate
...add support &/or "feet" to the axle mounting brackets
...& help align & strengthen the brake-mount, bolt-bracket too
SAM_4712 (1).JPG
View with Brake Band
SAM_4714 (1).JPG
A frontal view
SAM_4706 (1).JPG
Under view
...& yup, it will "clear" the motor mounting bolts
SAM_4711 (1).JPG
 

Functional Artist

Well-known member
Messages
5,345
Reaction score
2,834
Location
Toledo, Ohio
Hello Ducky

Is there a problem??
SAM_4716 (1).JPG
Um...I'm workin' here...tryin' to get some stuff done :huh:

* Notice, I'm using a piece of steel to help align the "faces" of the shock mounts
...& a piece of wood to help align the "sides"
SAM_4723 (1).JPG
Ok I finally got the "cross brace" welded on (when Ducky got bored & moved on) :p
...& the shock mounts "tacked" in place

* I "hid" most of the welds on the other side/inside to try-n-maintain a "cleaner look" ;)
SAM_4729 (2).JPG
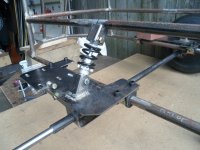
Here is the nacelle
...installed on the chassis
...w/coil-over shock
SAM_4730 (1).JPG
 

Master Hack

Well-known member
Messages
4,136
Reaction score
6,564
Location
Mountain top Labratory
The Axle "bearing" is the tube inside a tube? It certainly has enough strength cuz of the length. But how easily does it turn when "loaded" full weight? Is it going to have grease fittings? Maybe graphite instead?
 

Functional Artist

Well-known member
Messages
5,345
Reaction score
2,834
Location
Toledo, Ohio
The Axle "bearing" is the tube inside a tube? It certainly has enough strength cuz of the length. But how easily does it turn when "loaded" full weight? Is it going to have grease fittings? Maybe graphite instead?
Hey T,

Nope nuthin' fancy like that
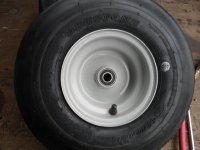
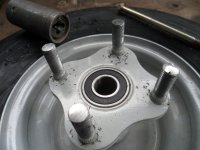
...these wheels have built in bearings (for a 5/8" axle)
Front side
SAM_4573 (1).JPG
Back side
SAM_4591 (1).JPG
The axle/spindle(s) themselves are 5/8" solid rod
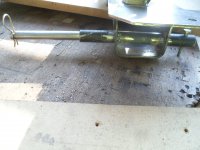
...& the axle holders (black) are 1/2" Sch 40 water pipe
I wanted the 5/8" axles/spindles, to be changeable
...& not welded on

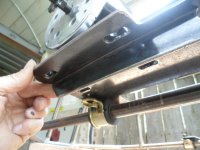
So, these "brackets" are for mounting/holding the axles
...&/also, to strengthen the axles, too ;)
SAM_4737.JPG
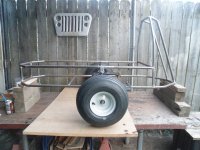
Also, notice the motor/chain adjustor :sifone:

We almost have a roller :2guns:
SAM_4741 (2).JPG
Another view
SAM_4742 (2).JPG
 

Functional Artist

Well-known member
Messages
5,345
Reaction score
2,834
Location
Toledo, Ohio
Ever notice how "side projects" seem to always "creep" into the day? :unsure:

Like this one

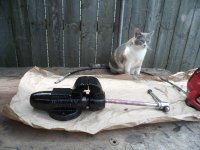
I have this Old Wilton Vise (had 'er since ~1987)
...& used 'er a lot (I mean a really lot) over the years :sifone:

Then, ~5 years ago I wasa usin' it to "smash" the end of some steel tube, nice-n-flat
...& to help get 'er "extra flat"
...I wasa usin a ~3' (36') piece of pipe, over the handle (for extra leverage)
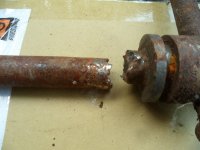
...& BROKE the main spindle/screw :eek::mad2:
SAM_4683 (1).JPG
So, I just replaced it with a cheap HF vise
...put it under the workbench
...& moved on :auto:

Recently, while cleaning up, I "found it" again
...& remembered how GOOD of a vise it was :)
...but, it wasa lookin' pretty rough
...so, I gave 'er a good wire brushin'
&
Then, went ta Googlin' :cool:

I found that Wilton Tools is still around
...& they still offer replacement parts, for these old vises :wai:

So, I gave them a call
...& the nice lady told me where to find the model # (which was #101161)
&
With this info, she was able to tell me
...that my vise was Wilton 350
...& it was made in 1975

The Screw Handle Assembly was ~120.00 w/shipping

So, while waitin' for my "new" handle assembly
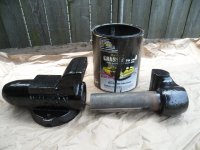
...I "sealed 'er up" with some Chassis Saver (rusty frame restorer)
...that, I had left over from sealing up a truck frame (this stuff loves rusty steel) :thumbsup:
SAM_4685 (2).JPG
After letting it dry/set for a few days
...the Screw Assembly arrived
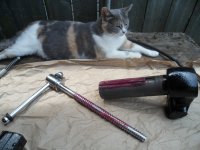
...so, I "slathered" some grease on the threads (of the screw assembly)
...& the slide "key" too

* With Ducky watchin' my every move :innocent:
SAM_4687 (2).JPG
Started re-assemble
* Ducky had ta move, to get a better view
SAM_4688 (2).JPG
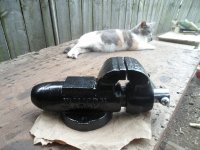
All done/back in business :2guns:
* Ducky says its "nap time" :cornut:
SAM_4691 (2).JPG
 

Functional Artist

Well-known member
Messages
5,345
Reaction score
2,834
Location
Toledo, Ohio
My wife came out ta see what I was doin'
&
When she saw my "freshly painted" shinny black vise she says,
..."what about painting the patio furniture"
..."didn't you say you wanted to re-paint the patio furniture?" :huh:

Um...yes...yes I did :innocent:
But
That wasn't really on my list of things to do today :devil2:
...then, got a wierd look (& the little gears in my head started a spinnin')

Um...would ya like me ta do "drop everything"...else
...& just do it now? :mad2:
&
She says "Great idea!" :thumbsup:

So, (in an effort to try-n-stay outta trouble) I went ahead & loaded everything on the truck
...took 'em to the DIY carwash
...& gave everything a good power washin' ;)

Then, brought 'em back
...unloaded 'em
...let everything dry out in the sunshine
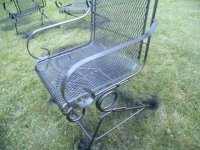
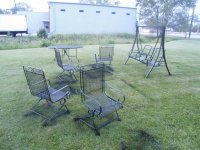
...then, gave everything a couple of nice coats of Rustoleum Satin Canyon Black (ended up usin' 8 cans) :cool:
SAM_4717 (1).JPG
Seemed ta come out pretty nice :)
SAM_4722.JPG
She liked 'em
...& that IS what counts
...'cause when she is happy "we are ALL happy" :p
 

Functional Artist

Well-known member
Messages
5,345
Reaction score
2,834
Location
Toledo, Ohio
Backin' up a bit, while loadin' the truck ta go to the carwash
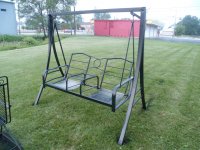
...she says "Um...didn't you say that you wanted to re-paint the porch swing too?"

Um...Yes, Dear...I'll get it :thumbsup:

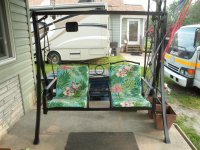
So, it got the "full treatment"...too
SAM_4719 (1).JPG
* Memory Lane:
Way back in 2005 my wife was pregnant with our twins (Desteny & Winston)
...& the Doc said she should walk...a lot

So, we were walking thru a Meijers grocery store, doing our weekly shopping
...& when we came across this porch swing on display
...& she said "this looks like a nice seat...let's stop & take a break...for a minute"
&
Then, about an hour later, we noticed that we were still sittin' there, just gabbin' & relaxin'
...& then, she said "we should get this" ;)
&/now
Almost 20 years later
...we still sit in it & gab...all the time :cheers2:

Seemed ta come out pretty good too
SAM_4720 (1).JPG
We really haven't had to do much to it, over the years
...other than changing the cushions
&
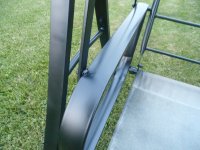
A few years back, I replaced the thin tube w/flattened ends, swing suspending bars
...with some 1" x 1/4" steel bars (Super Heavy Duty) :2guns:
SAM_4721.JPG
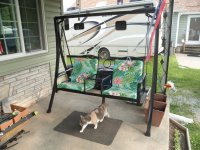
All cleaned up, re-painted & fresh cushions
Wife says..."Good Job...Honey, looks almost like new"
...& I say "GOAL!!!" :p
SAM_4756 (2).JPG
Yup, Ducky Approves too :wai:
SAM_4757 (2).JPG
 

Functional Artist

Well-known member
Messages
5,345
Reaction score
2,834
Location
Toledo, Ohio
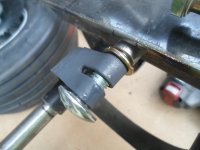
I'm using a couple of 3/8" x ~5" long Carriage bolts, for mounting the brake bands
...but, there isn't enough room for a nut
...&/also, a nut probably isn't the best choice for this situation :thumbsup:

So, I'ma gonna just drill a hole at the ends of each mounting bolt
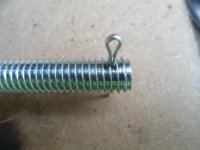
...& just use a couple of Cotter pins, to secure the bolts "in place"
SAM_4758 (2).JPG
Closer up view
SAM_4759 (2).JPG
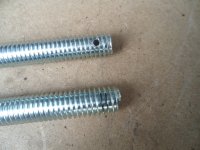
First one is done
...let's try-n-make the other one match :thumbsup:

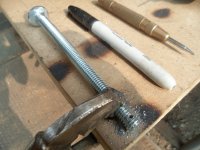
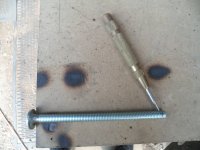
So, I marked it (with a sharpie)
SAM_4761.JPG
Used a "spring loaded" center punch, to physically "mark the spot"
SAM_4762.JPG
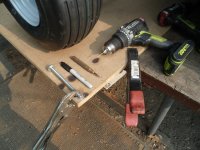
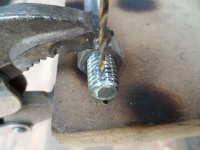
I used a 3/8" nut
...& a set of Vise Grips, for clamping purposes
SAM_4766 (2).JPG
Driller 'er out (3/32")
SAM_4767 (1).JPG
Closer up view
SAM_4768 (1).JPG
Cotter pin installed :2guns:
SAM_4770 (2).JPG
 

Functional Artist

Well-known member
Messages
5,345
Reaction score
2,834
Location
Toledo, Ohio
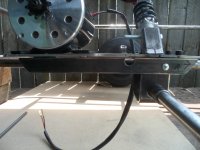
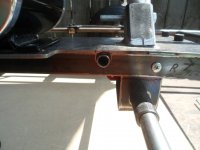
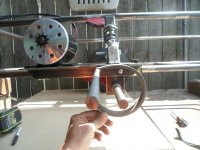
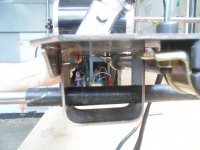
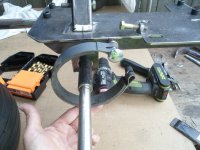
This is how the brake band will be installed :thumbsup:
SAM_4772 (1).JPG
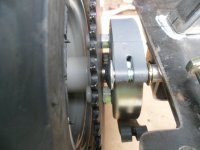
A frontal view

* Notice how the rounded head, of the Carriage bolt, "clears" the sprocket nicely? :wai:
...& I used a modified lock washer (aligned the ends, so it no longer "locks) as a friction washer & spacer ;)
SAM_4775.JPG
Up closer view :cheers2:
SAM_4773 (1).JPG
 

Functional Artist

Well-known member
Messages
5,345
Reaction score
2,834
Location
Toledo, Ohio
After triple checking the alignment of the brake drum, with the brake band
...& the chain with the sprocket
SAM_4777.JPG
I cleaned up & marked, the axle mounting tube, along the "inside edge" of the axle mounting bracket
SAM_4778.JPG
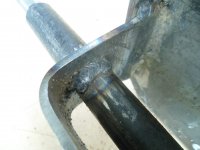
Then, welded 'em together, good-n-solid :thumbsup:

* Again, I welded 'em, on the inside edge/side of the mounting bracket. to help "hide" the welds ;)
SAM_4780 (1).JPG
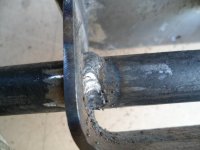
Another view
** Not a bad lookin' weld...I must say :sifone:
SAM_4781 (2).JPG
 

Functional Artist

Well-known member
Messages
5,345
Reaction score
2,834
Location
Toledo, Ohio
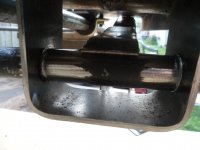
See how nice-n-clean it looks
...on the outside
...with the welds "hidden" inside?
&
It will look even better, once painted ;)
SAM_4794 (1).JPG
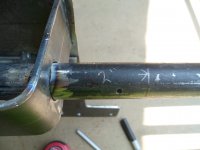
Next, I marked the "full length" axle tube at ~2' mark
...& drilled a bolt hole
...so, the inner "solid axle" can be mechanically secured (with a nut & bolt) to, the outer axle tube/housing :cheers2:
SAM_4795 (1).JPG
Then, cut 'er off :thumbsup:
SAM_4796 (1).JPG
Now, the Siamese twins have been separated :innocent::devil2:
SAM_4797.JPG
 

Functional Artist

Well-known member
Messages
5,345
Reaction score
2,834
Location
Toledo, Ohio
You have a drill press, yet yer drilling bolts by hand! and doing it well! You have center drills? V block?
there is and easier way!
Hey T,

Yup, I do
...& do
...& do
...& thanks :cheers2:

I'ma tryin' ta show folks how ta do this kinda stuff DIY style
...that "Lead by Example" thing ;)
...& to show folks that ya don't NEED big, fancy &/or expensive equipment

* Not that professional equipment is bad
...just that things CAN be done "other ways" :sifone:

My hope is that these build threads help "inspire" folks
...& continue to be, an archive (for a long time to come)
...to show folks about craftsmanship
...& having pride in your work :)
&
Give folks confidence (if this guy can do it...why can't I?)
...& show 'em how to think things thru
...or make notes & drawings
...& test theories etc.
&
How to establish a record &/or do/post a build thread
...& to just do stuff...for themselves (like repairing & refurbishing an old vise &/or makin' the wife happy) :thumbsup:
&
Just "how to" be creative
...& use your imagination
...& just imagining stuff is totally FREE :banana:
 

Denny

Canned Monster
Messages
11,633
Reaction score
8,069
Location
Mayberry, Indiana
Um, I don’t feel worthy enough to point out your mistakes. But I feel I must for your safety. Unbolt that band and rotate to until the open side is at the top please? Then hook your brake rod on to the rear most loop. This way the brake will self energize when applied and help you stop. And release properly when not applied.
 

Master Hack

Well-known member
Messages
4,136
Reaction score
6,564
Location
Mountain top Labratory
Lets appoint Denny Director of Quaity Control. Good call on the brake band.
Unlesss rotation is opposite of watcha thinkin.
Yup, I do
...& do
...& do
...& thanks
I'ma tryin' ta show folks how ta do this kinda stuff DIY style
...that "Lead by Example" thing ;)
...& to show folks that ya don't NEED big, fancy &/or expensive equipment
Ok. Thats a noble cause. Keep it up. maybe you should put a disclaimer on .....
naw nevermind. Good on you.
 
Top