2021 Build Off - Cannibal Kart

TheDADgineer

Member
Messages
35
Reaction score
14
Location
British Columbia, Canada
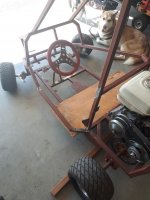
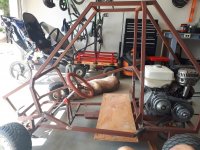
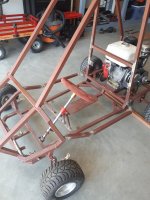
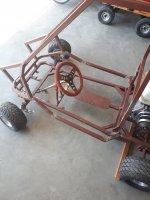
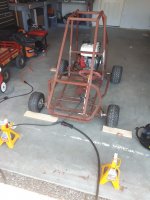
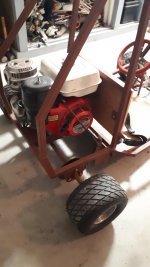
So after some thought, the kart will once again be undergoing some changes... the original goal of the kart was to be something I could ride with my kids, then ride with them as they learn to drive. So single seat isnt an option. It also turned out really fast, so not good for small kids on their own.

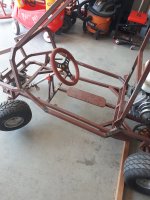
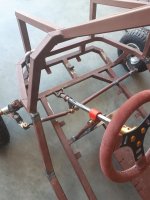
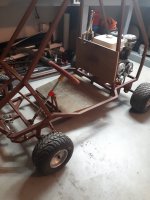
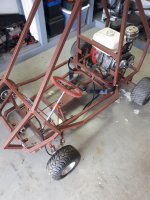
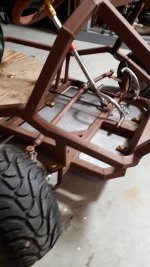
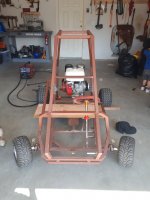
Solution: I've cut up the roll cage... again.. and reworked it on one side to allow more room for two riders. I also moved the steering and pedals to one side. Pretty much my original plan.. ugh.

It's still tight for two adults but it's much more room!! Just gotta finish up the welding and remake the tie rods and it will be back in action!

The roll cage is also not symmetrical anymore, so hopefully i didnt make it look ugly..
20210721_161125.jpg
20210721_161155.jpg20210721_163801.jpg
 

TheDADgineer

Member
Messages
35
Reaction score
14
Location
British Columbia, Canada
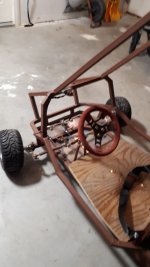
I took one look at the kart this morning and decided the asymmetrical roll cage looked really bad haha.. so I modified the passenger side rail to match the driver. Much better!!

C'mon you guys gotta tell me when something looks dumb, you're my trusted gokart advice council :)

Bansil, the eldest kid is over the moon excited to ride it! And I'm almost as excited as he is!

20210722_151431.jpg20210722_151442.jpg20210722_151500.jpg
 

Bansil

Painter of gnomes....
Messages
1,360
Reaction score
914
Location
Mnts of the farthest NE TN you can go
😮

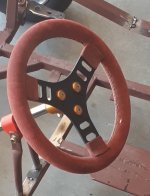
Is....is....is.....that a genuine velour steering wheel from a 1985 Chevy Montecarlo pimp mobile 🤔

"Google".....

"yes Bansil"

"What does 1985 Chevy Montecarlo pimp mobile steering wheel look like?"

"Here Bansil"
20210722_151442.jpg


"Thanks google"

:cornut:

I love it!!!!

See we can have fun :cheers2:
 

gegcorp2012

Active member
Messages
491
Reaction score
62
Location
Alabama
Another update! I haven't had a whole lot of time to work on the kart but I managed to get the roll cage made up and tacked in place.

After a few test fits I'm feeling less confident that I'll be driving this gokart. It turned out quite a bit smaller than expected :) oh well! It'll be perfect for two kids and maybe I'll be able to take it for a few uncomfortable drives.. I guess I'll just have to build another one for myself :)

Still waiting on some parts before test mounting the engine. I'm hoping to complete a lot more welding work over the holidays, time permitting.

I managed to cut my hand pretty good on a sharp burr but the work must go on!

Take care and merry Christmas!


View attachment 124578View attachment 124579
I like the injury did not stop you.
 

gegcorp2012

Active member
Messages
491
Reaction score
62
Location
Alabama
Quick update! Some parts arrived, including the torque converter and chain. Sprocket is on order. I also cut out a bunch of the smaller pieces such as gussets, seatbelt mounts, engine mount, floor mounting tabs, pedal mounts, etc. The small details truly do take the most time..

I wasn't happy with the roll cage geometry both for appearance and strength so I cut it all off to start over. In the picture below i've drawn on the proposed finished cage. I'm hoping to get it mocked up in the next few weekends. Bit of a setback but worth it!

I'm looking into some bigger tires to give it some more 'bounce'. The lack of suspension and very ridged frame will be a little harsh. Possibly atv tires? Or turf savers? I really like the big rear tires on the dingos. Any other ideas? The rims need to line up with the 3 bolt pattern in the rear.

View attachment 124844View attachment 124845View attachment 124846
View attachment 124847View attachment 124848
Hi @TheDADgineer ,
Did you get your angles sorted out ?

For a full circle (even a triangular D shaped one) the angles will add up to 360 degrees. You are showing two 90's and a 92... (ignore the 100 degree one that is over-ruled by the 90).... so that's 272 degrees.

360-272=88 degrees left for angle 1 and angle 2... my swag was around 45 degrees plus or minus a degree or two, and the math says an average of 44 degrees.

If your drawing is to scale I would say angle 1 is a little more and angle 2 is a little less.

At this point, I would mount up the engine and start making sparks on them pieces at the hoop and frame. Cut a pair of each piece at the same time so both sides will work out the same.

Building 3d stuff on 2d drawings only can lead to rework, but I'm sure you got that covered.

Are you using a chop saw for your angles ?
 

TheDADgineer

Member
Messages
35
Reaction score
14
Location
British Columbia, Canada
Thanks for the advice gegcorp! I managed to get all the angles working correctly and the roll bar actually turned out pretty good. I'm using mostly a chop saw and then an angle grinder for the really intricate cuts. Once you get the hang of working with square tube, it's not too difficult I found.

The recent changes are now all welded up and once again the kart is ready for paint. Then i just have to remake the tie rods for the two seater configuration.

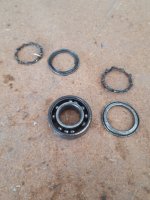
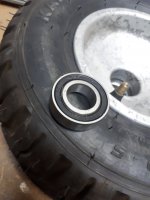
I also picked up some new bearings for the front wheels, much smoother than old ones...
20210727_151930.jpg20210727_152000.jpg20210729_062740.jpg
 

TheDADgineer

Member
Messages
35
Reaction score
14
Location
British Columbia, Canada
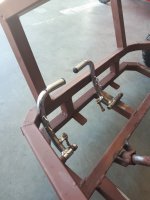
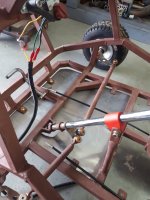
Got a little bit of free time today and decided to tackle the tie rods and pedals!

Also, two seater conversion is all done!!

Once more, the kart was back on the home garage alignment "machine" :)

Tie rods worked out nicely and steering is nice and smooth. I left the toe in about 1/16" to 1/8".

Pedals are trimmed up and in place. Time to touch up the paint then its onto the seat!
20210729_142437.jpg
20210729_143143.jpg20210729_145345.jpg
 

TheDADgineer

Member
Messages
35
Reaction score
14
Location
British Columbia, Canada
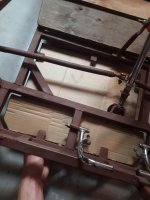
Quick update! I cut out some plywood that will become the seat and backrest. I think I'm going to upholster it in some black fake leather over some thin foam.

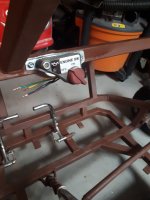
I moved the kill switch from the engine to the 'front dash' for easier access. Just gotta run some new wiring.

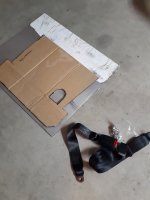
I made up a template for the underpan out of good old cardboardCAD and purchased some aluminum sheet to make it!

Also the seat belt arrived! Safety first :)

The colour is growing in me... I may just do a clear enamel overtop.. we shall see!

20210731_190303.jpg20210801_150629.jpg20210801_150710.jpg20210803_181340.jpg
 

TheDADgineer

Member
Messages
35
Reaction score
14
Location
British Columbia, Canada
I should have this thing done by now.. but free time has been at a premium these days!

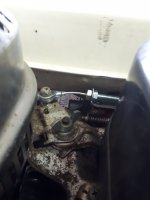
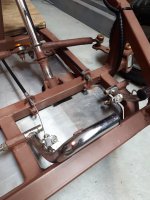
Anyways.. I finished the aluminum underpan, wired up the killswitch and started running the throttle and brake cables.

I'm working out the pedal stops and spring return system, also theres a bit of a fuel leak coming from the carb.

Getting close! Few little things left.
20210919_132430.jpg20210919_132530.jpg20210919_132630.jpg
 

TheDADgineer

Member
Messages
35
Reaction score
14
Location
British Columbia, Canada
Thanks guys! Chipping away.

I got some throttle and brake cable mounting tabs welded up.

Any tips for attaching the pedals to the cables? And adding a section of cable (brake cable is short by 3 inches)

20210929_053443.jpg
 

TheDADgineer

Member
Messages
35
Reaction score
14
Location
British Columbia, Canada
Well here it is! I'm calling it done because i never time to work on it anymore, kids it turns out, keep you busy! Theres snow on the ground but ill try to get out soon for a ride and donut video :)

20211211_140737.jpg20211211_140806.jpg20211211_140752.jpg20211211_140843.jpg
 
Top