2018 - Joe-405 Mini Buggy - Grudge Racer - SCCA Solo

Joe-405

Enjoying New Projects
Messages
2,673
Reaction score
69
Location
U.S.A.
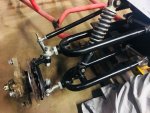
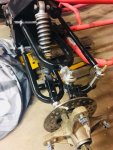
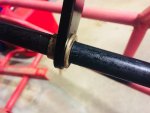
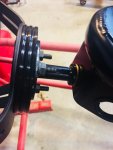
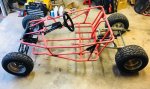
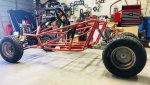
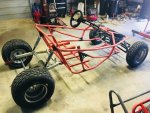
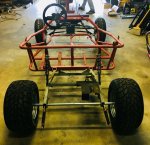
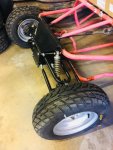
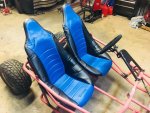
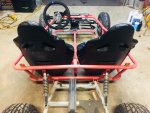
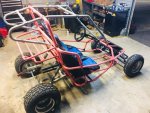
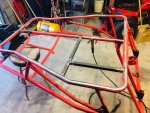
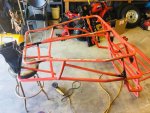
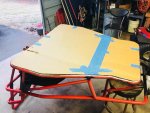
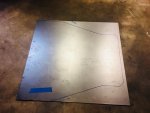
So here we go. First off I would like to merge the 2 to not confuse people. Yerf dog Spiderbox for drag racing , SCCA solo racing , autocross , and grudge drag racing. All in one package !

2018 diygk entry.
 

Attachments

  • 6A723D99-D480-440C-AD48-636A938177D8.jpeg
    6A723D99-D480-440C-AD48-636A938177D8.jpeg
    154.9 KB · Views: 346
  • 8D79B215-CB69-4C43-8292-4E6E0F9F1B54.jpeg
    8D79B215-CB69-4C43-8292-4E6E0F9F1B54.jpeg
    148.7 KB · Views: 46
  • 3714893A-EF78-4C14-B4BA-77AC9696EA8F.jpeg
    3714893A-EF78-4C14-B4BA-77AC9696EA8F.jpeg
    148.5 KB · Views: 43

Joe-405

Enjoying New Projects
Messages
2,673
Reaction score
69
Location
U.S.A.
A lot of you know I started this at about mid December. It’s been too cold for me so I been moving really slow til recently now that we got some decent weather. Got a long ways to go but I do have the front end issues that are typical for these Yerf dog spider boxes fixed.

Here is the link to the pics and front end stuff I have welded up and fixed..........it was a big mess when I got it ! But it was free so I’m not complaining.

http://www.diygokarts.com/vb/showthread.php?t=38274
 

Joe-405

Enjoying New Projects
Messages
2,673
Reaction score
69
Location
U.S.A.
Got the rear wheels and tires mounted. The front wheels will be here Monday. But seems to fit well so far. The actual axle will be here Monday or Tuesday also.............
 

Attachments

  • 17E60A43-C1CA-4595-AE58-B6541DC11ECF.jpeg
    17E60A43-C1CA-4595-AE58-B6541DC11ECF.jpeg
    171.3 KB · Views: 74

Joe-405

Enjoying New Projects
Messages
2,673
Reaction score
69
Location
U.S.A.
Finally got the right bushings for the steering column that nobody would say what size they were ! And bmi only offered the whole assembly and I had everything just no bushings.

And I did have to make my own bump steer kit to correct the steering angle.
 

Attachments

  • 2E666B03-76A2-43FB-8993-0E7EF52C5F52.jpeg
    2E666B03-76A2-43FB-8993-0E7EF52C5F52.jpeg
    145.4 KB · Views: 47
  • 604F2A49-422B-4474-9C79-8C392DD08C81.jpeg
    604F2A49-422B-4474-9C79-8C392DD08C81.jpeg
    157.6 KB · Views: 50
  • 2FEA2305-8C1E-4CC2-A9ED-AC202BF898CA.jpeg
    2FEA2305-8C1E-4CC2-A9ED-AC202BF898CA.jpeg
    89.1 KB · Views: 39
  • 03AF5BB1-0660-4816-9DF6-8D44C7B6BD3E.jpeg
    03AF5BB1-0660-4816-9DF6-8D44C7B6BD3E.jpeg
    87.7 KB · Views: 39
  • 1435832E-2CE8-4B73-AA24-DD01CD6486BF.jpeg
    1435832E-2CE8-4B73-AA24-DD01CD6486BF.jpeg
    128.4 KB · Views: 39

Joe-405

Enjoying New Projects
Messages
2,673
Reaction score
69
Location
U.S.A.
The front wheels showed up finally. And the rear axle is here so I mocked it with bearings to check ride heighth front to rear. Seems to work perfectly so I’m gonna leave it alone til it’s running with all the weight on it to make sure before I order new shocks.

Got some fresh pics also............ and the seats will be here tomorrow.
 

Attachments

  • 2317A3EC-5576-40CB-96ED-627A4A18FF07.jpeg
    2317A3EC-5576-40CB-96ED-627A4A18FF07.jpeg
    159.9 KB · Views: 44
  • 574C11F2-325A-4ED4-B57D-D2DFDBE5E165.jpeg
    574C11F2-325A-4ED4-B57D-D2DFDBE5E165.jpeg
    156.5 KB · Views: 43
  • BBE51650-4355-49B2-8CBA-A0368C7E347A.jpeg
    BBE51650-4355-49B2-8CBA-A0368C7E347A.jpeg
    185.9 KB · Views: 45
  • F119DB6C-131D-4605-BAF9-4ABBE1F16DDA.jpeg
    F119DB6C-131D-4605-BAF9-4ABBE1F16DDA.jpeg
    213 KB · Views: 42
  • C6782DFF-BD68-4AFF-BA43-B441A2EDAEDA.jpeg
    C6782DFF-BD68-4AFF-BA43-B441A2EDAEDA.jpeg
    150.7 KB · Views: 41

Joe-405

Enjoying New Projects
Messages
2,673
Reaction score
69
Location
U.S.A.
Thanks guys if I can ever get the metal place to answer their phone I can weld the new floor pan in and start on the swingarm. I’m just gonna make it longer than I need and not bolt the bearings in so I can shorten it to correct length when I get my engine. I took the measurements off the golf cart and added a foot. So that will be plenty. I wanna put a rear bumper of some kind on it also.
 

Joe-405

Enjoying New Projects
Messages
2,673
Reaction score
69
Location
U.S.A.
Got the sheet metal for the new floor and set the seats in and test fitted the oem cage to see what it looked like and see if I had head clearance or not.

The seats are a different bolt pattern so I gotta make new seat mounts and weld in some new tubing to do so.

The cage has plenty of clearance but I’m still gonna redo it for more support by welding it to the frame. Still not gonna trust the bolts and small mounting flanges.
 

Attachments

  • A2968048-FE68-461D-AD46-06065008EBE8.jpeg
    A2968048-FE68-461D-AD46-06065008EBE8.jpeg
    172 KB · Views: 40
  • 8B0C8025-5CEE-41F2-92C4-F722149E4589.jpeg
    8B0C8025-5CEE-41F2-92C4-F722149E4589.jpeg
    143.4 KB · Views: 38
  • B7DFA71D-037D-44C1-8E34-3A90B8E2B8FD.jpeg
    B7DFA71D-037D-44C1-8E34-3A90B8E2B8FD.jpeg
    185.7 KB · Views: 47

Joe-405

Enjoying New Projects
Messages
2,673
Reaction score
69
Location
U.S.A.
Finally getting the seats mounted. Will finish up tomorrow and try and get the new floor in also.

And no room for a shifter or clutch between the seats so I’m making provisions for a clutch pedal and paddle shifter on the steering column !!!
 

Attachments

  • 01FF596D-AFFC-4E75-8C89-9372A17A8829.jpeg
    01FF596D-AFFC-4E75-8C89-9372A17A8829.jpeg
    192.6 KB · Views: 39
  • D7444133-DA84-4702-A5CC-F304EA83C6C9.jpeg
    D7444133-DA84-4702-A5CC-F304EA83C6C9.jpeg
    108.9 KB · Views: 42
  • 07B29D9D-FE31-4260-B6FC-18059F2DD34A.jpeg
    07B29D9D-FE31-4260-B6FC-18059F2DD34A.jpeg
    180.2 KB · Views: 33
  • B5CBEE82-06A9-4323-B5CA-DF6A14E36F2E.jpeg
    B5CBEE82-06A9-4323-B5CA-DF6A14E36F2E.jpeg
    124.8 KB · Views: 35

Joe-405

Enjoying New Projects
Messages
2,673
Reaction score
69
Location
U.S.A.
I'm looking forward to seeing how you rig up a paddle shifter.

I’m not giving it away but it’s gonna be mechanical and not electrical. I already know how to do all of it.

And I got the seats mounted and fully welded today.............
 

Attachments

  • 883064F6-C7D8-4F55-98A8-B98151148BC4.jpeg
    883064F6-C7D8-4F55-98A8-B98151148BC4.jpeg
    144.2 KB · Views: 40
  • 540E28A2-A820-4C75-9E9E-88F587416168.jpeg
    540E28A2-A820-4C75-9E9E-88F587416168.jpeg
    147.7 KB · Views: 35

TT540

Newb
Messages
346
Reaction score
1
Location
Huntsville, AL
What are those front tires? I want a set!

I am curious to see this paddle shift concept. That's a short throw to not be electrical.

I ended up doing the bronze bushings for my steering column instead of a roller bearing. Found them all on amazon. They are called bunting bearings and can also have flanges in case others are interested. I should do a write up on it. it was these bearings:

https://www.amazon.com/gp/product/B01G8X7IX4/ref=oh_aui_detailpage_o01_s01?ie=UTF8&psc=1
 

Joe-405

Enjoying New Projects
Messages
2,673
Reaction score
69
Location
U.S.A.
Yes sir. I have the bronze flanged bushings with a lock collar on the end to hold it all in place instead of the c clip from oem.

The tires are Sun F and the style is A021 on eBay for 80 a pair.
 

Joe-405

Enjoying New Projects
Messages
2,673
Reaction score
69
Location
U.S.A.
And we almost have a floor again that isn’t rusty and it’s gonna cover up all of it this time. The original doesn’t cover under the seats. It’s ready to cut but I don’t have anything to cut it so my buddy is gonna let me use his electric shears at his shop sometime today. I’m using 18 gauge and it is perfect thickness. A little thicker and stronger than oem but not to heavy.

After the floor is in I’m gonna put it all back as a roller and start on the rear engine section and building my rear swingarm. Then it shall look like a buggy again finally.
 

Attachments

  • 99C6462A-2317-46DA-9F8C-49D92FF83227.jpeg
    99C6462A-2317-46DA-9F8C-49D92FF83227.jpeg
    147.4 KB · Views: 23
  • AD271956-896B-4836-B25A-E80C6B51DD1E.jpeg
    AD271956-896B-4836-B25A-E80C6B51DD1E.jpeg
    85 KB · Views: 22
Top