You are using an out of date browser. It may not display this or other websites correctly.
You should upgrade or use an alternative browser.
You should upgrade or use an alternative browser.
2013 - Ariel Atom Kart
- Thread starter Jay Gould
- Start date
- Status
- Not open for further replies.
mckutzy
Well-known member
Looks good,
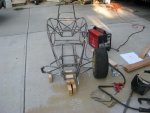
I will say You should not kink your welder lead cable like. That will(is already) damage the liner and give you the most difficult time welding as it also kinks the wire inside. Id also get a bigger(as in a bigger gauge) extension cord or weld closer to the source of power, that is looking for a fire to burn the house down due to that length coiled up like that.
I will say You should not kink your welder lead cable like. That will(is already) damage the liner and give you the most difficult time welding as it also kinks the wire inside. Id also get a bigger(as in a bigger gauge) extension cord or weld closer to the source of power, that is looking for a fire to burn the house down due to that length coiled up like that.
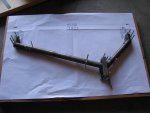
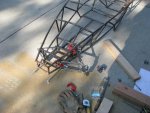
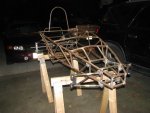
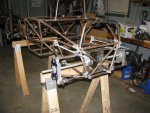
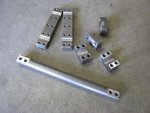
A little late night welding.
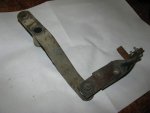
It got kind of late but I have the rest of the brackets tack welded in place for the control arms. I used a piece of ALL-Thread to keep everything in line for the rear axles.
It got kind of late but I have the rest of the brackets tack welded in place for the control arms. I used a piece of ALL-Thread to keep everything in line for the rear axles.
Attachments
-
 IMG_1447.jpg87.3 KB · Views: 73
 -
 IMG_1453.jpg77.8 KB · Views: 61
 -
 IMG_1455.jpg116.9 KB · Views: 86
OzFab
Well-known member
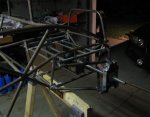
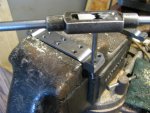
This is my "sophisticated" jig for welding the control arms.
 Hey, it doesn't matter what it looks like, as long as it works
You seem to know your stuff; the design work & engineering going into this build is amazing, not to mention all the little "tricks".
Again, great work

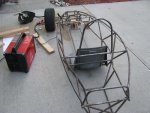
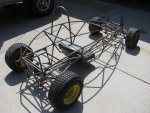
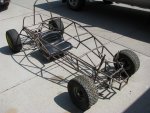
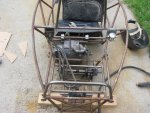
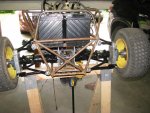
Ariel Atom Rolling Chassis
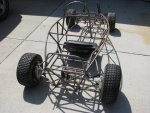
Finally have wheels on it so I can roll it around. I might have to push my son up and down the driveway in it a few times. He's been waiting quite a while for this.
Finally have wheels on it so I can roll it around. I might have to push my son up and down the driveway in it a few times. He's been waiting quite a while for this.
Attachments
-
 IMG_1506.jpg122.8 KB · Views: 81
 -
 IMG_1505.jpg120.5 KB · Views: 82
 -
 IMG_1502.jpg122.9 KB · Views: 86
danielmaxwell12
New member
- Messages
- 11
- Reaction score
- 0
This thing is top notch, again good job!
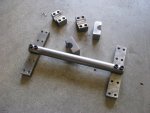

Removing parts from the 3 wheel cart
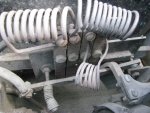
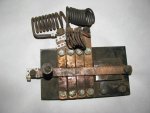
These are some of the parts we are removing from the 3 wheel cart to use on our Ariel Atom Kart. They're kind of greasy and grimy but I think we will fit them on the kart first and then take it back apart and clean and polish everything. It's definitely going to need new wiring.
These are some of the parts we are removing from the 3 wheel cart to use on our Ariel Atom Kart. They're kind of greasy and grimy but I think we will fit them on the kart first and then take it back apart and clean and polish everything. It's definitely going to need new wiring.
Attachments
-
 IMG_1583.jpg140.5 KB · Views: 31
 -
 3-wheel-cart 018.jpg123.8 KB · Views: 29
 -
 3-wheel-cart 079.jpg111.4 KB · Views: 29
 -
 IMG_0607.jpg78.5 KB · Views: 28
 -
 IMG_0630.jpg110.2 KB · Views: 29
 -
 IMG_1593.jpg52.5 KB · Views: 24
 -
 IMG_1587.jpg87.2 KB · Views: 28
 -
 IMG_1579.jpg135.1 KB · Views: 28
OzFab
Well-known member
 Man, if the finished product goes as fast as the built, it'll be lethal
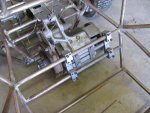
 Chain, Speed Control and Batteries
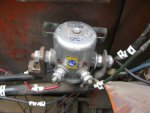
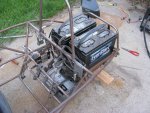
We added the chain and batteries and found a spot for the speed control. We bought the batteries last year so my son could ride the 3 wheel cart around the neighborhood. I think he will have more fun driving the go kart.
We added the chain and batteries and found a spot for the speed control. We bought the batteries last year so my son could ride the 3 wheel cart around the neighborhood. I think he will have more fun driving the go kart.
Attachments
-
 IMG_0635.jpg154.9 KB · Views: 43
 -
 IMG_0637.jpg151.9 KB · Views: 45
 -
 IMG_0643.jpg145.3 KB · Views: 53
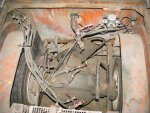
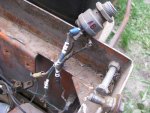
Rear axle, universal joints and testing the motor
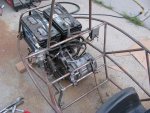
We have the rear axle connected now with the universal joints and tested the motor:
http://www.youtube.com/watch?v=LjqrhHhpMPs
We have the rear axle connected now with the universal joints and tested the motor:
http://www.youtube.com/watch?v=LjqrhHhpMPs
Attachments
-
 IMG_0659.jpg111.5 KB · Views: 60
 -
 IMG_0660.jpg138.2 KB · Views: 62
 -
 IMG_0664.jpg131.1 KB · Views: 63
 -
 IMG_0657.jpg123.9 KB · Views: 76
This build is so cool!! Keep up the good work. You should have it finished by the end of the week
souperman000
New member
Wow, great progress. From what I can see this build has been well planned. Keep it up!
mckutzy
Well-known member
Wow this is quite the cool machine, I do like this. I just have a few concerns... please dont take this the wrong way, its just a little safety notation. I really mean this...
I didnt think this was going to be an electric machine. I just didnt read this that good. Not a problem....
The problem I see, is that I see there is some major welding issues. I reckon there is a fluxcore welder being used to construct this. Whenever a fluxcore wire is being used, you need to brush and chip after each time the trigger is pulled, without fail, to make a successful weld. Its like a stick but wire feed.
On your joints you need to have a more consistent bead of weld joining each part, you have several multi point intersections of tube.
I only go into this, And like I said it is cool and its a family project, is that..
The motor of choice is an electric motor, and they have a good amount torque instantly, that is the nature of there design. I just wouldnt want it to rip itself apart while at speed or potentially on a start or while slightly stuck.
There is chains and some flex joints to slightly move to dissipate/absorb the torque, but that will only go so far.
The motor itself I reckon it'll need more secure mounting(I understand your still in construction mode), but it still comes down to the structure itself.
So in conclusion, it is a cool project, not trying to be a debbie downer, but(IMHO) I think you need to look into you welding a bit more, before continuing on.
- Status
- Not open for further replies.