1970-1980 Phoenix Kart Build and Q/A

Status
Not open for further replies.

josh7owens

New member
Messages
63
Reaction score
0
1980-ish Phoenix Kart Build and Q/A
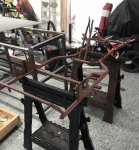
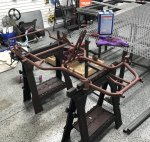
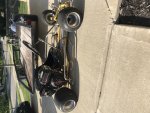
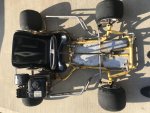
Hey guys,

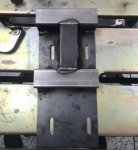
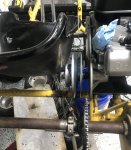
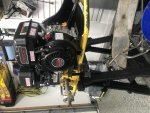
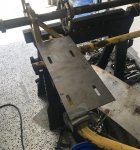
Thanks to you all I found out my craigslist find was a Phoenix Kart. I found more info on it and plan to do some reading tonight. I’m going tto use this thread as a build thread as well as an Q/A because I’m gonna need some help with the build and would like to document it as we go!

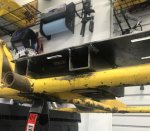
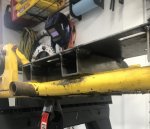
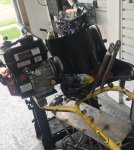
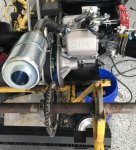
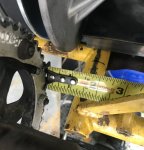
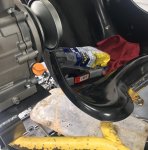
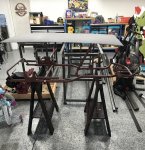
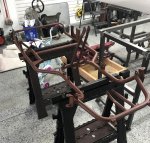
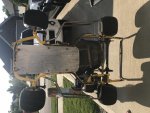
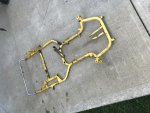
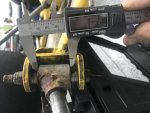
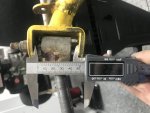
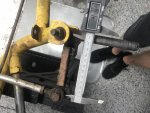
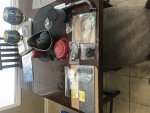
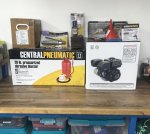
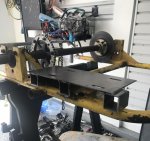
First pictures of the day I got it:
 

Attachments

  • F1211E7A-81AD-443E-AECB-AC651BD1C24F.jpg
    F1211E7A-81AD-443E-AECB-AC651BD1C24F.jpg
    535.5 KB · Views: 4
  • EA5DB397-DD0A-4CC0-A634-2E4D4C29867C.jpg
    EA5DB397-DD0A-4CC0-A634-2E4D4C29867C.jpg
    465 KB · Views: 6
  • 09C773FE-552B-4460-A088-A64FC826BDA2.jpg
    09C773FE-552B-4460-A088-A64FC826BDA2.jpg
    394.5 KB · Views: 4

josh7owens

New member
Messages
63
Reaction score
0
Next up is how it looks currently and where I’m going.

Purchase price of go kart $300

Parts ordered:
3/4 Torque converter 12T #35 chain $69.99
OMB stage 1 Hemi $82.98
10ft #35 chain $16.58
212 engine mount $28 (using it to make my own)
Autolite AR3910X spark plug $2.52
Digital tach $10
.010 head gasket $4.95
30 series Garter spring $10
30 Series Drive spring $9.95
dual Valve Spring Kit $25.99
Hemi Gasket set $15.99
Vent Filter Kit $9.95
#35 62T sprocket $18.95

Total cost $605.85

On Friday I’m picking up a Hemi to start the mild build on that and since I’m running a Torque Converter I’m not sure how my engine mount is going to go but I’m assuming I’m going have to fab one up.


Questions:

- Does the engine have to be at 7-15 degree like most mounts or can it be flat? I’m betting I have to end up tilting it for the CVT setup to work but we shall see.

- can someone help me fine a bearing cassette that will Work for this standard American kart with a 1 1/4 rear axle?

- I also need a link to spindles that will work?


Pictures below to help with answering the above questions and what the kart currently looks like.
 

Attachments

  • EC7F54A1-57EB-4F89-8073-EC018DC4C593.jpg
    EC7F54A1-57EB-4F89-8073-EC018DC4C593.jpg
    284.4 KB · Views: 1
  • 9AC9A6C4-DCCC-4C94-A84B-14187C9EFCBB.jpg
    9AC9A6C4-DCCC-4C94-A84B-14187C9EFCBB.jpg
    221.9 KB · Views: 1
  • 869B79C4-F8D3-4B86-9424-E6F64E84354D.jpg
    869B79C4-F8D3-4B86-9424-E6F64E84354D.jpg
    333.8 KB · Views: 2
  • 7B599DD9-94B4-48BD-A052-398F675763F9.jpg
    7B599DD9-94B4-48BD-A052-398F675763F9.jpg
    359.4 KB · Views: 1
  • 9951D836-D8C7-47A1-9B6B-B6C2BEEB618C.jpg
    9951D836-D8C7-47A1-9B6B-B6C2BEEB618C.jpg
    571.1 KB · Views: 3
  • BE7B456E-1A1E-4D78-A4DC-BB27FBF726CB.jpg
    BE7B456E-1A1E-4D78-A4DC-BB27FBF726CB.jpg
    241.2 KB · Views: 2
  • 0CCE45A2-25AE-4C29-8A22-1C2A2E696C8C.jpg
    0CCE45A2-25AE-4C29-8A22-1C2A2E696C8C.jpg
    227.6 KB · Views: 1
  • EC48608B-AF56-4B57-81FC-D40CF262B31D.jpg
    EC48608B-AF56-4B57-81FC-D40CF262B31D.jpg
    251.3 KB · Views: 2

josh7owens

New member
Messages
63
Reaction score
0
I got some parts in today. I plan to work on mocking up the engine mount fabing this weekend if the torque converter shows up by Friday.

I’m not sure why all my pictures are rotated?!
 

Attachments

  • EFE924AA-6D8D-4F0E-BF6E-D711C85ABE3D.jpg
    EFE924AA-6D8D-4F0E-BF6E-D711C85ABE3D.jpg
    363.3 KB · Views: 4

josh7owens

New member
Messages
63
Reaction score
0
I made a trip to Harbor Freight this morning to pick up a engine and a sand blaster so I can strip this frame and all the 40 year old dirt and rust off everything.

After that I’ll evaluate what I need to buy for the frame.

So far I know I need front spindles and axle bearings.
 

Attachments

  • D106FCE7-37DF-4725-AD48-2A345D08BA6F.jpg
    D106FCE7-37DF-4725-AD48-2A345D08BA6F.jpg
    316.5 KB · Views: 2

josh7owens

New member
Messages
63
Reaction score
0
Here’s alittle update.

I got the torque converter in today so I mounted it on the new motor and test fit it on the kart. It’s got to be raised up alittle or the converter hits the frame rail. I had some 1.5” square tube laying around so I used that to space it up.

It accommodate the torque converter the engine must get moved up some so you’ll see in the pictures how I did it. The square tube will get sandwiched on the frame rails and the front tube will probably get a hose clamp through it to hold it in place.

I guess next up is to build the motor this weekend and hopefully media blast everything on Monday. My air compressor is only 30 gallon so I’m going to go to my dads where his compressor is 80 gallon and can move more air.

I put a regulator, air/water separator, and a deadmans handle on the media blaster as recommended in the reviews on harbor freight.
 

Attachments

  • CD69EBCF-E334-427C-8F3B-FCC407211C78.jpg
    CD69EBCF-E334-427C-8F3B-FCC407211C78.jpg
    319.6 KB · Views: 3
  • 3953E620-34C2-40C5-A271-532E2EFD0B6C.jpg
    3953E620-34C2-40C5-A271-532E2EFD0B6C.jpg
    305.4 KB · Views: 8
  • 05D733DE-F3F9-4656-9645-9BFE8C3F82A1.jpg
    05D733DE-F3F9-4656-9645-9BFE8C3F82A1.jpg
    301.1 KB · Views: 5
  • 8256BF8B-B354-40B4-A290-73B382D8340F.jpg
    8256BF8B-B354-40B4-A290-73B382D8340F.jpg
    344.1 KB · Views: 5
  • 71F1CFD4-0208-46DE-BD5C-DDD1AF4F5E92.jpg
    71F1CFD4-0208-46DE-BD5C-DDD1AF4F5E92.jpg
    391.8 KB · Views: 4
  • 1673436E-FA35-4D41-ACF4-D663CC9E10CC.jpg
    1673436E-FA35-4D41-ACF4-D663CC9E10CC.jpg
    408.6 KB · Views: 3
  • 7EC5CC5F-7618-4B52-A2D3-A0007037047E.jpg
    7EC5CC5F-7618-4B52-A2D3-A0007037047E.jpg
    269.4 KB · Views: 2

anderkart

Moderator
Messages
6,382
Reaction score
219
Location
Surprise Arizona USA
Welding your motor mount on is kind of a no-no for racekarts, thats gonna hurt ts potential resale value if you ever sell it, and might even hurt the karts handling/turning ability . The long distance between your motor mounts 3 mounting points might end up acting as a brace and keep the karts frame from flexing like it was designed to.

Racekart frames are designed to flex as you turn corners, this frame flexing unloads weight from the inside-rear tire and transfers that weight diagonally across the frame to the outside front tire. This frame flex helps the kart handle better during high speed cornering in 2 ways:

1- Unloading weight from the inside-rear tire lowers the under-steer effect caused by live axles.

2- And transferring that weight to the outside front tire increases its gripping ability...

There's nothing wrong with building your own motor mount, but I'd suggest you clamp it to the frame at just 2 points, and keep those mounting points fairly narrow, similar to the locations of this motor mount:


A flat motor mount might work out fine for you, but a couple of potential advantages of 15-degree mounts are gaining the additional clearance needed to install racing type air cleaners, and the ability to adjust your right-rear hub/tire further inboard, if needed to improve the karts handling caricaturists. Another potential issue is; most all the tuned headers made for your application are shaped for use with 15-degree motor mounts, and your rear bumper might end up being in the way when using a flat motor mount...

See what I mean, this kart has a 15-degree mount:
 

josh7owens

New member
Messages
63
Reaction score
0
Think you for the input. The mount isn’t going to be welded on, it’s going to be clamped. There will be a clamp from the old mount that will be reused to sandwich the mount to the frame simular to the mount you posted. I at first I’m going to try flat, if I need to put the engine on an angle once everything gets put together I’ll cross that bridge at that time. Lucky I can make absolutely anything I need to it shouldn’t be to much trouble if I need to make changed during the build.

I understand chassis flex and trying to accommodate that as well as make a solid mount.
 

josh7owens

New member
Messages
63
Reaction score
0
To better show the illustration of how it’s going to mount. It will be like this.
 

Attachments

  • B831C09C-A066-4543-9F7A-C1856CA46267.jpg
    B831C09C-A066-4543-9F7A-C1856CA46267.jpg
    314.4 KB · Views: 2
  • 0661AE70-28C7-466A-B310-96D9210C08D0.jpg
    0661AE70-28C7-466A-B310-96D9210C08D0.jpg
    266.5 KB · Views: 1

josh7owens

New member
Messages
63
Reaction score
0
This torque converter setup is WIDE! I got the motor built and everything mounted for test firing but due to the huge size of the converter I need to move the engine over more to make room for the seat. I’ve only got 1” I can move the axle sprocket before I would need to notch the frame.

Should I move it 1” and have the seat offset or should I get out the cut off wheel and notch this frame to side the mount over more?
 

Attachments

  • 1F9F1341-16D7-4361-9DBC-6B94B49EE1FF.jpg
    1F9F1341-16D7-4361-9DBC-6B94B49EE1FF.jpg
    389.9 KB · Views: 3
  • D39A3413-E1CB-4061-9247-20836E9F5341.jpg
    D39A3413-E1CB-4061-9247-20836E9F5341.jpg
    408.2 KB · Views: 2
  • 13C43683-C6EE-49FC-A187-3653729A554F.jpg
    13C43683-C6EE-49FC-A187-3653729A554F.jpg
    347.9 KB · Views: 1
  • 40949AA0-6C38-4B50-8C29-CBCC709063EB.jpg
    40949AA0-6C38-4B50-8C29-CBCC709063EB.jpg
    308.8 KB · Views: 1

anderkart

Moderator
Messages
6,382
Reaction score
219
Location
Surprise Arizona USA
I wouldn't notch the frame, moving the seat over and/or extending the motormount outward would be the better options.

Something else to keep in mind here is trying to keep your left/right weight bias as close to equal as possible, so you wont be upsetting the karts handling & turning ability. You could use a bathroom scale under each back tire and compare the weights while sitting in the kart. This would help you decide if moving the seat over, and/or moving the engine over would be the best solution for achieving the clearance you need, while also maintaining as close to a 50-50% right/left weight bias as possible.

PS:
Your seat is probably going to flex out quite a bit on sharp high speed left-turns, so make sure you have enough clearance there... :thumbsup:
 

josh7owens

New member
Messages
63
Reaction score
0
The frame has been primed!
 

Attachments

  • 58C52D82-D5FF-4B95-8D60-D80E893B8004.jpg
    58C52D82-D5FF-4B95-8D60-D80E893B8004.jpg
    691.1 KB · Views: 4
  • FF7AA2A0-701C-4EF3-94EF-82F8236A1797.jpg
    FF7AA2A0-701C-4EF3-94EF-82F8236A1797.jpg
    597.3 KB · Views: 6
  • 87F457EB-A637-4C1F-991F-0B0846194EB1.jpg
    87F457EB-A637-4C1F-991F-0B0846194EB1.jpg
    523.9 KB · Views: 2

josh7owens

New member
Messages
63
Reaction score
0
I just sanded down the high spots in the primer and wiped it down with acetone to clean it. The plan it to get it painted today! I’m not sure if I’ll do 2-3 coats on it.
 

Attachments

  • 66465710-6A33-4F66-881E-C1BCD350A3E0.jpg
    66465710-6A33-4F66-881E-C1BCD350A3E0.jpg
    715.8 KB · Views: 2
Status
Not open for further replies.
Top