1983 B&S Flathead (130200 series) Breakdown/Rebuild

Status
Not open for further replies.

LeeMajors

New member
Messages
124
Reaction score
34
Location
Somewhere in the woods of PA between Tamaqua and L
Yeah...those Briggs carb diaphrams are CHEAP. I almost always replace them anytime I crack one open.

Yea i just found out I've got a local small engine repair shop that sells a lot of parts for Briggs engines which is really cool because it's convenient May cost a little bit more than online but definitely more convenient so I'm on my way there now to get the diaphragm and yes they ARE CHEAP which is right up my alley! Lol!

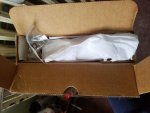
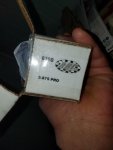
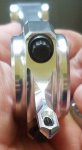
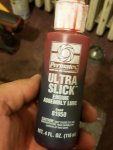
Aaannndddd..... something came early today!!! Here's just a teaser cause I'm using my phone right now. I'll upload pics in full a little later
 

Attachments

  • 20160901_115647.jpg
    20160901_115647.jpg
    306.1 KB · Views: 4

LeeMajors

New member
Messages
124
Reaction score
34
Location
Somewhere in the woods of PA between Tamaqua and L
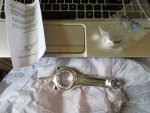
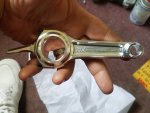
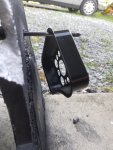
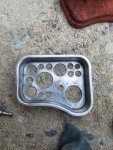
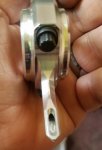
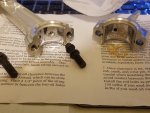
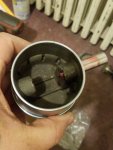
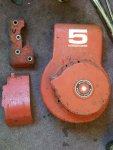
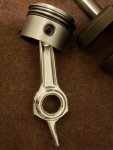
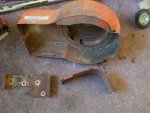
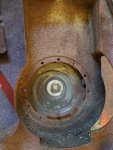
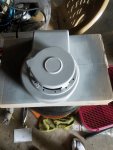
Okay quck rod pics and some work on the air box. I plan to do this to the entire motor too (strip to metal/prime/repaint).
 

Attachments

  • 20160901_115639.jpg
    20160901_115639.jpg
    169 KB · Views: 4
  • 20160901_115744.jpg
    20160901_115744.jpg
    358.6 KB · Views: 6
  • 20160901_121100.jpg
    20160901_121100.jpg
    300.1 KB · Views: 5
  • 20160901_121025.jpg
    20160901_121025.jpg
    114.2 KB · Views: 4
  • 20160901_121035.jpg
    20160901_121035.jpg
    277.7 KB · Views: 3
  • 20160901_174916.jpg
    20160901_174916.jpg
    313.2 KB · Views: 2
  • 20160901_173912.jpg
    20160901_173912.jpg
    557.5 KB · Views: 3
  • 20160901_173921.jpg
    20160901_173921.jpg
    593.3 KB · Views: 3
  • 20160901_121002.jpg
    20160901_121002.jpg
    88.6 KB · Views: 7

LeeMajors

New member
Messages
124
Reaction score
34
Location
Somewhere in the woods of PA between Tamaqua and L
I've come to love the simplicity of working on this little flathead engine. With that being said... I will NEVER again opt to paint one of these things; for the steps necessary to PREP one for paint (properly mind you) are nearly impossible to do, at home, without an autoclave, or a very good electrolysis setup. Of course I can only speak on my little Briggs which spent 99% of it's life on a Roto-tiller, leaking oil, and getting showered in dirt. So to say getting it clean enough for the painting process was a major PITA, would be an epic understatement. Anyway, I just felt the need to vent that here... Carry on.

Btw lots of updates coming soon: Checking oil clearances (con rod/crankshaft), con-rod install, governor removal, carb clean-up/rebuild/mods, valve cover/oil drain/pcv reassembly+mods, and a whole bunch more that I can't think of right now!?
 

Hellion

Moderator
Messages
8,529
Reaction score
3,619
Hey Briggs Brother--thanks for showing the closeups of the con rod and all the speed parts, the good photos, and all. They speak thousands of words and you're one of the few who 'gets it' about posting photos. For the rest of the DIY denizens, it's like pulling teeth so much so that you'd think we were living in the pre-digital era of point-and-shoot and 35mm SLR cameras that use FILM. It's like asking them to have their film developed, prints made and scanned for the forum. :rolleyes:

That con rod dipper detail is intriguing. I didn't know it was spoon-shaped at all.

Also, my engine was nasty too. A decade's worth or more of dust and dirt caked on with the help of oil and fuel leakage. When I got the block stripped down completely, I thought nothing of filling a bucket full of warm soapy water, dunking it and washing the bejeebers out of it. Also used a degreaser as well and made sure all surfaces were squeaky clean for best paint adhesion.

At each stage I was thinking: do I need to do this or go this far? I kept answering yes. :D

I didn't GAB on it though.
 

LeeMajors

New member
Messages
124
Reaction score
34
Location
Somewhere in the woods of PA between Tamaqua and L
Hey Briggs Brother--thanks for showing the closeups of the con rod and all the speed parts, the good photos, and all. They speak thousands of words and you're one of the few who 'gets it' about posting photos. For the rest of the DIY denizens, it's like pulling teeth so much so that you'd think we were living in the pre-digital era of point-and-shoot and 35mm SLR cameras that use FILM. It's like asking them to have their film developed, prints made and scanned for the forum. :rolleyes:

That con rod dipper detail is intriguing. I didn't know it was spoon-shaped at all.

I hear you on that! I never understood why folks don't post more pics? I can "GAB" (lol) about what I'm doing all day but w/o pics ppl may have no idea what I'm talking about. Plus it's like you said, "they speak thousands of words" and seeing is SOOO much better than hearing, in these cases.

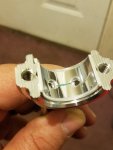
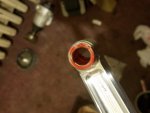
That dipper is PHENOMENAL! I'm so glad someone took note of that. It's actually the reason I took that pic. I wanted ppl to see both the craftsmanship and the sheer genius of it! I'm sure you noticed, but for anyone who may not have, the spoon in the dipper has an oiling hole in it that leads straight through to the bearing/crankshaft! It was difficult to get a decent angle by which to show it but if you look carefully you'll see the light reflecting down the inside of it! It's a gorgeous piece by ARC and I can't say enough good things about it.

Also I just caved and decided to buy upgraded (18lb) springs from Dyno Cams and I was about to grab a cam too (someone's selling a Dyno Cams 95-3 on ebay for $15!!!) but decided against it ONLY because I would then need billet lifters and a new side cover plate (mine has the "reverse" shaft/pulley through it) which was more than I wanted to spend today. But yea!.. anyone looking for a beastly cam for a flathead check out ebay right now there's quite a few (used) Dyno Cams for real cheap, just keep in mind it's recommended that you upgrade your valve-train also.
 

LeeMajors

New member
Messages
124
Reaction score
34
Location
Somewhere in the woods of PA between Tamaqua and L
Hey fellas, sorry for the lack of recent updates I've been busy with life and just haven't had the time for the engine this week. I was also waiting on the upgraded springs which arrived yesterday but now I'm stumped with a question that I've been unable to find an answer to. So before going any further I wanted to pose the question here and see if any of you might be able to help...?

The question is: Did I get the right springs?

I ask this because although the DynoCams website says they're for the Briggs flathead (here's a link to the exact springs I purchased: http://www.dynocams.com/item/dcs1420/fham-springs/) they aren't like the ones I removed at all..? After realizing this I went ahead and looked at the parts list for the Briggs 130200 series engines and found that the intake and exhaust springs are 2 different part numbers!? (Here's a link to that parts list: https://www.m-and-d.com/pdfs/briggs/130200-ms8090-0892.pdf)

Anyway, the point is that the OEM springs are 2 different sizes (1 tall, 1 short). And the upgraded springs are the same size (both tall). Does this matter? Can I run equal size/weight springs on both valves? Any help with this conundrum would be greatly appreciated fellas. Thanks in advance.
 

Hellion

Moderator
Messages
8,529
Reaction score
3,619
Anyway, the point is that the OEM springs are 2 different sizes (1 tall, 1 short). And the upgraded springs are the same size (both tall). Does this matter? Can I run equal size/weight springs on both valves? Any help with this conundrum would be greatly appreciated fellas. Thanks in advance.

I am aware of the different part numbers for the two valves and the slightly different sizes--I have no information on why this is though.

I can tell you it is the exhaust spring that is the taller of the two. At the same time they don't appear radically different from the photo at Dynocams. I will say that their springs appear to have one more coil or "rib" than the OEM Briggs (those differentiated from the coils that form the extreme top and bottom of the spring). So yeah, they appear to be stiffer.

I say go with what the aftermarket (in this case Dynocams) tells you to do.
 

LeeMajors

New member
Messages
124
Reaction score
34
Location
Somewhere in the woods of PA between Tamaqua and L
Just use your bionic hand to squeeze it down.

Lmao! I was thinking this too... but when I tried this on the original springs, I smushed'em down so tightly that the carbon separated from the steel and I was left with a flat piece of iron ore!? :oops:

I am aware of the different part numbers for the two valves and the slightly different sizes--I have no information on why this is though.

I can tell you it is the exhaust spring that is the taller of the two. At the same time they don't appear radically different from the photo at Dynocams. I will say that their springs appear to have one more coil or "rib" than the OEM Briggs (those differentiated from the coils that form the extreme top and bottom of the spring). So yeah, they appear to be stiffer.

I say go with what the aftermarket (in this case Dynocams) tells you to do.
Thanks man. And yea overall they're basically identical to the OEM exhaust spring (Just a bit stiffer) so I think I'm just going to run them? But just to be sure I will give them a call Monday morning. I'm in the process of shooting the head/block with paint now anyway so I still have some time. Alright man, thanks again.
 

LeeMajors

New member
Messages
124
Reaction score
34
Location
Somewhere in the woods of PA between Tamaqua and L
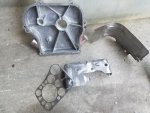
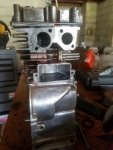
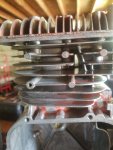
Okay so I know it's been awhile but here's some updates as promised.

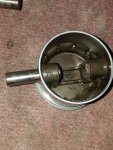
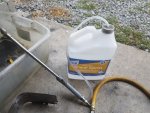
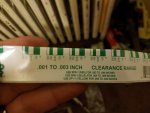
First will be the old con-rod/wrist-pin removal, then the oil clearances on the new con-rod/bearings, and reassembly. Also there's a pic of the ring compressor and the socket I had to pick up specifically for the ARC con-rod bolts, which require a 1/4in 12pt deep socket in order to torque them down.

Then my parts cleaning setup, and the parts stripped to bare metal and cleaned. Followed by a few pics of the parts being primed first with rust inhibitor and then a sandable primer. Sorry for not getting pics of the after effects of using the wire wheel on the cover but you'll be able to get the idea from the other parts and if I can find the pics (I know I took some) then I'll upload them asap.

Many more updates coming soon I just need to grab the time. Most of the work is done already and I'll be reassembling the engine this week so stay tuned.
 

Attachments

  • 20160903_013756.jpg
    20160903_013756.jpg
    233.7 KB · Views: 3
  • 20160903_013839.jpg
    20160903_013839.jpg
    234.4 KB · Views: 4
  • 20160903_013729.jpg
    20160903_013729.jpg
    345 KB · Views: 3
  • 20160902_234235.jpg
    20160902_234235.jpg
    360.8 KB · Views: 3
  • 20160902_234116.jpg
    20160902_234116.jpg
    466.3 KB · Views: 3
  • 20160903_014056.jpg
    20160903_014056.jpg
    249.6 KB · Views: 4
  • 20160903_015421.jpg
    20160903_015421.jpg
    251.3 KB · Views: 5
  • 20160903_021312.jpg
    20160903_021312.jpg
    246.8 KB · Views: 3
  • 20160903_021318.jpg
    20160903_021318.jpg
    246.4 KB · Views: 3
  • 20160903_021403.jpg
    20160903_021403.jpg
    202.8 KB · Views: 3

LeeMajors

New member
Messages
124
Reaction score
34
Location
Somewhere in the woods of PA between Tamaqua and L
pics cont.
 

Attachments

  • 20160903_163042.jpg
    20160903_163042.jpg
    479.7 KB · Views: 2
  • 20160907_181229.jpg
    20160907_181229.jpg
    398.7 KB · Views: 2
  • 20160902_104838.jpg
    20160902_104838.jpg
    238.1 KB · Views: 3
  • 20160903_022129.jpg
    20160903_022129.jpg
    323 KB · Views: 2
  • 20160903_022207.jpg
    20160903_022207.jpg
    233.6 KB · Views: 3
  • 20160903_163109.jpg
    20160903_163109.jpg
    500.6 KB · Views: 3
  • 20160903_163120.jpg
    20160903_163120.jpg
    414.9 KB · Views: 2
  • 20160903_163022.jpg
    20160903_163022.jpg
    489.6 KB · Views: 2
  • 20160907_181221.jpg
    20160907_181221.jpg
    463.8 KB · Views: 3
  • 20160904_174639.jpg
    20160904_174639.jpg
    325.2 KB · Views: 3

LeeMajors

New member
Messages
124
Reaction score
34
Location
Somewhere in the woods of PA between Tamaqua and L
and more pics...
 

Attachments

  • 20160907_123256.jpg
    20160907_123256.jpg
    291.8 KB · Views: 4
  • 20160907_123250.jpg
    20160907_123250.jpg
    281 KB · Views: 3
  • 20160907_123244.jpg
    20160907_123244.jpg
    241.9 KB · Views: 4
  • 20160907_123346.jpg
    20160907_123346.jpg
    250.3 KB · Views: 3
  • 20160904_175559.jpg
    20160904_175559.jpg
    292.2 KB · Views: 3
  • 20160907_123305.jpg
    20160907_123305.jpg
    296.1 KB · Views: 3
  • 20160907_123323.jpg
    20160907_123323.jpg
    291.9 KB · Views: 3
  • 20160907_123332.jpg
    20160907_123332.jpg
    307.9 KB · Views: 3

LeeMajors

New member
Messages
124
Reaction score
34
Location
Somewhere in the woods of PA between Tamaqua and L
Quick question for you guys (feel free to chime in here Hellion [and thx for the quick reply to the pm btw])

Is this an acceptable way of removing the flapper on the governor? And more importantly can someone plz tell me how this isn't a huge oil leak when assembled? Because (at least on mine) there's a pretty good amount of clearance between the shaft itself and the brass/bronze bearing? Thx in advance guys.
 

Attachments

  • 20160913_104638.jpg
    20160913_104638.jpg
    171.6 KB · Views: 6
  • 20160913_104631.jpg
    20160913_104631.jpg
    258.9 KB · Views: 6

big-d

New member
Messages
138
Reaction score
1
Location
Mapleton, Utah
The way I look at it is. If you feel like it is a source of a leak, you are better off taking care of it now rather then later. I am about to rebuild an 11hp flathead Briggs I/C motor. Mine was leaking from the governor shaft. Not pouring oil out, but seeping a decent amount.
 

Hellion

Moderator
Messages
8,529
Reaction score
3,619
Hi Lee.

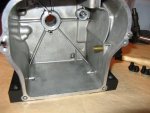
I ran into the same issue of how to plug the hole for the governor crank (as it is called). Read that some do utilize the crank rod or use JB Weld or some High Temp RTV sealant either alone or in conjunction with the rod to plug the hole.

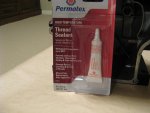
I decided to tap the hole for a 1/4" machine screw and sealed the threads with Permatex High Temperature Thread Sealant. Says it's resistant to 400°F. Some of it oozed out around the flat washer I used--it's the white substance. The screw is only 1 1/4" LOA so it doesn't protrude into the crankcase.

I used a 1/4 NC20 tap.
 

Attachments

  • IMG_1881.jpg
    IMG_1881.jpg
    284.1 KB · Views: 9
  • IMG_1882.jpg
    IMG_1882.jpg
    261.1 KB · Views: 8
  • IMG_1884.jpg
    IMG_1884.jpg
    246.9 KB · Views: 5
Status
Not open for further replies.
Top