1983 B&S Flathead (130200 series) Breakdown/Rebuild

Status
Not open for further replies.

LeeMajors

New member
Messages
124
Reaction score
34
Location
Somewhere in the woods of PA between Tamaqua and L
This is basically carrying over from my Intro thread. I recently purchased this Briggs flathead in not so great condition for a mere $20 and I plan on breaking it down and rebuilding it into a half decent power-plant for a kart I plan to build for my son and I. I'll be uploading pics as I go along. Unfortunately I don't have time for that right now though so I'll be sure to update this later this evening.
 

chancer

ɔ ɥ ɐ u ɔ ǝ ɹ
Messages
9,358
Reaction score
88
Location
COMFORT, TEXAS
When you get around to the pictures Please use thumbnails.
Looking forward to seeing this. If I can learn something (as if) I might try this next year!
 

LeeMajors

New member
Messages
124
Reaction score
34
Location
Somewhere in the woods of PA between Tamaqua and L

LMAO!!!
:wai:

---------- Post added at 09:19 PM ---------- Previous post was at 09:13 PM ----------

When you get around to the pictures Please use thumbnails.
Looking forward to seeing this. If I can learn something (as if) I might try this next year!

How exactly do the thumbnails work? I was just gonna add them through that Photo Management thing at the bottom of the page here..? Is that what you meant or is there another way to upload that makes thumbnails?
 

chancer

ɔ ɥ ɐ u ɔ ǝ ɹ
Messages
9,358
Reaction score
88
Location
COMFORT, TEXAS
Yes the manage attachments thingy.
That is best for everyone's viewing pleasure.
 

LeeMajors

New member
Messages
124
Reaction score
34
Location
Somewhere in the woods of PA between Tamaqua and L
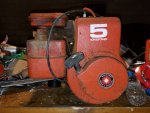
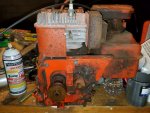
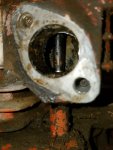
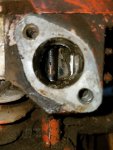
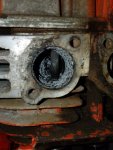
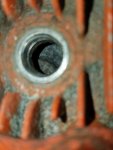
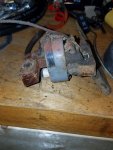
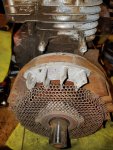
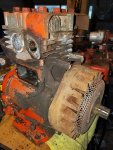
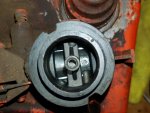
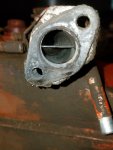
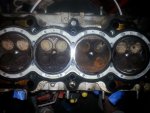
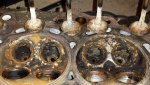
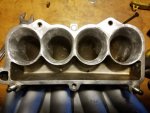
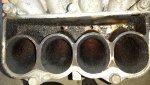
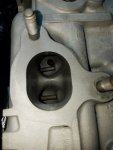
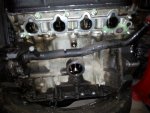
So I started breaking it down today and idk but I think I'm gonna need a new coil, flywheel, and intake/exhaust (which I was planning to replace anyway)? Lol! And possibly some new valves, depending on how they look when I get the head off? The ports definitely need some work. I thought Honda had casting issues... till I seen these!!! SHEEEEESH!
 

Attachments

  • 20160812_181516.jpg
    20160812_181516.jpg
    259.4 KB · Views: 15
  • 20160812_181510.jpg
    20160812_181510.jpg
    251.9 KB · Views: 20
  • 20160812_181503.jpg
    20160812_181503.jpg
    292.9 KB · Views: 23
  • 20160812_181459.jpg
    20160812_181459.jpg
    299.9 KB · Views: 19
  • 20160811_003519.jpg
    20160811_003519.jpg
    295.7 KB · Views: 14

LeeMajors

New member
Messages
124
Reaction score
34
Location
Somewhere in the woods of PA between Tamaqua and L
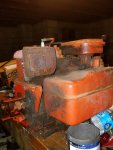
Ok here's the rest of what I've got so far. The carb doesn't look too bad, but I think I'll also need a new gas tank because I can't seem to get the cap off this one w/o cutting it? And that coil though!? Wow... As for the flywheel, idk?... I might be able to clean that up with the right blast media? We'll see. I'll update as I go along fellas. Thx for looking
 

Attachments

  • 20160812_181541.jpg
    20160812_181541.jpg
    243.1 KB · Views: 14
  • 20160812_181608.jpg
    20160812_181608.jpg
    151.1 KB · Views: 10
  • 20160812_181626.jpg
    20160812_181626.jpg
    416 KB · Views: 13
  • 20160812_181657.jpg
    20160812_181657.jpg
    305.9 KB · Views: 13
  • 20160812_181704.jpg
    20160812_181704.jpg
    230.8 KB · Views: 11
  • 20160812_181941.jpg
    20160812_181941.jpg
    384.7 KB · Views: 9
  • 20160812_181837.jpg
    20160812_181837.jpg
    390.6 KB · Views: 13
  • 20160812_181730.jpg
    20160812_181730.jpg
    268.8 KB · Views: 13
  • 20160812_181721.jpg
    20160812_181721.jpg
    207.5 KB · Views: 11
  • 20160811_003519.jpg
    20160811_003519.jpg
    295.7 KB · Views: 8

Hellion

Moderator
Messages
8,529
Reaction score
3,619
So this engine didn't run at all, even with fresh gasoline? Did it have old gas in it?

You may not need a new coil--test to see if it has a spark.

For my flywheel, I wire wheeled the rust off on the sides, in the very center (making sure to keep clear of the fan blades) and the backside. It still looked rusty when I was done but I wasn't trying to go all out on something that'll be hidden once reassembled. It was fairly smooth though, when I was done, especially for cast iron. I used a small steel wire toothbrush to knock off the flaky rust in between the fan blades. When I was satisfied that there was no loose or flaky rust remaining, I "painted" it with Rust Converter and nothing more.

Basically you're just cleaning everything and inspecting for damage.
I wouldn't start thinking about replacing major components like the valves unless they are totally toast at this point.

If you don't have a Dremel moto-tool, it might be a good time to invest in one as it is a dream to port and polish the head with one.

Soak the gas cap with penetrating oil overnight, or over several nights and then try to work the cap off with large Vise-Grips or channel-lock pliers.
 

LeeMajors

New member
Messages
124
Reaction score
34
Location
Somewhere in the woods of PA between Tamaqua and L
So this engine didn't run at all, even with fresh gasoline? Did it have old gas in it?

You may not need a new coil--test to see if it has a spark.

For my flywheel, I wire wheeled the rust off on the sides, in the very center (making sure to keep clear of the fan blades) and the backside. It still looked rusty when I was done but I wasn't trying to go all out on something that'll be hidden once reassembled. It was fairly smooth though, when I was done, especially for cast iron. I used a small steel wire toothbrush to knock off the flaky rust in between the fan blades. When I was satisfied that there was no loose or flaky rust remaining, I "painted" it with Rust Converter and nothing more.

Basically you're just cleaning everything and inspecting for damage.
I wouldn't start thinking about replacing major components like the valves unless they are totally toast at this point.

If you don't have a Dremel moto-tool, it might be a good time to invest in one as it is a dream to port and polish the head with one.

Soak the gas cap with penetrating oil overnight, or over several nights and then try to work the cap off with large Vise-Grips or channel-lock pliers.

First let me say thank you for the reply, always appreciated.

No... when I initially got it, it didn't run at all. But supposedly was running prior to being removed from the tiller? He said it'd been sitting "AWHILE".

It actually does have spark. I figured that out early on while trying to start it. :roflol: I just thought it may be in my best interest to replace it?.. If it's cheap enough that is? Which, on a side note, is something I've taken note of lately....Parts for these little engines are SOOO CHEAP! I mean billet rods for $60 w/bearings!!?? WOW! (Keep in mind fellas I just built and boosted an engine for my car and I'm not at all used to these kinds of prices) Ok, back to the topic.

Okay this is great to hear because I really wasn't prepared to replace the flywheel. I just wanted to clean it up, and like you said, throw some rust inhibitor on it or what not. So a wire wheel sounds like a great idea.

I am, but I'm not.... What I mean is; yes, I mainly just want to clean and inspect. But while I'm in there I do plan to modify it... slightly. I've been doing a good bit of research and I'm thinking of getting some different timing keys, a billet rod, MAYBE a valve job, and definitely PnP'ing the ports and head (especially after seeing those casting flaws). Now the only reason I had said I may need new valves was because, when I did my car engine the intake and exhaust ports looked very similar to the condition of these and it turned out that some of the valves not only had pitting but were rusted completely through! So depending on their condition, you know?

I don't have an electric Dremel rotary tool... I do however have a pretty decent variety of pneumatic rotary tools (die grinders, angle grinders, etc..) and tons of different carbides for doing automotive PnP work. My concern though is that these may be too much tool for the job? If you have a specific Dremel that you recommend (that's not uber expensive) I'd really appreciate it? I'm not sure it'll get a ton of use outside of this particular motor so I don't want to get the biggest craziest Dremel out there if I don't have to?

And lastly that darn gas cap! So it's actually not rusted on... It's spinning in place!!? Darn thing just WON'T thread off!? But I will try your vise grip suggestion, because cutting it seemed like a good idea at first but then I remembered there was GAS in it :roflol: Oh! That reminds me, earlier you'd asked if there was fuel or if I'd tried fresh fuel... No, I never put any fresh fuel in. BUT there sounds like there's still some old fuel in it? Who knows though that could just be water/condensation?

Again, Hellion, thx for your replies and suggestions. Plz lmk about the Dremel you'd recommend? And I'll give those suggestions a try asap and keep you all updated!
 

LeeMajors

New member
Messages
124
Reaction score
34
Location
Somewhere in the woods of PA between Tamaqua and L
The rougher they are to start the purttyierer thay are when done!

AGREED!!!

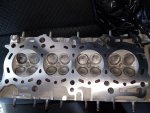
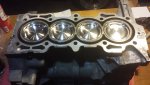
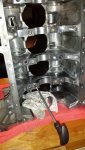
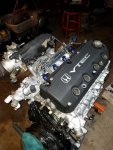
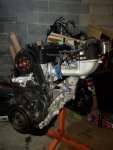
I know this is completely off topic but look at these before and after pics of the engine I built at the beginning of the year.
 

Attachments

  • 20141103_014959.jpg
    20141103_014959.jpg
    181.6 KB · Views: 8
  • 20141103_020425.jpg
    20141103_020425.jpg
    202.5 KB · Views: 7
  • 20150829_012616.jpg
    20150829_012616.jpg
    326.7 KB · Views: 7
  • 20150829_012630.jpg
    20150829_012630.jpg
    343.5 KB · Views: 9
  • 20160401_142005.jpg
    20160401_142005.jpg
    342.4 KB · Views: 9
  • 20160318_021807.jpg
    20160318_021807.jpg
    259.5 KB · Views: 6
  • 20151015_172815.jpg
    20151015_172815.jpg
    366.5 KB · Views: 7
  • 20151002_020504.jpg
    20151002_020504.jpg
    218.6 KB · Views: 10
  • 20150926_023818.jpg
    20150926_023818.jpg
    284.1 KB · Views: 8
  • 20160401_142700.jpg
    20160401_142700.jpg
    209.5 KB · Views: 7

LeeMajors

New member
Messages
124
Reaction score
34
Location
Somewhere in the woods of PA between Tamaqua and L
^^^^ cont.
Somewhere under all that is a Turbonetics 5857 :wai:
 

Attachments

  • 20160406_005401.jpg
    20160406_005401.jpg
    397 KB · Views: 7
  • 20160406_004507.jpg
    20160406_004507.jpg
    308.3 KB · Views: 7
  • 20160406_004447.jpg
    20160406_004447.jpg
    389 KB · Views: 7
  • 20140715_135258.jpg
    20140715_135258.jpg
    245.9 KB · Views: 6
  • 20140715_135237.jpg
    20140715_135237.jpg
    165.7 KB · Views: 6
  • 20160407_112140.jpg
    20160407_112140.jpg
    258.2 KB · Views: 7
  • 20160407_133648.jpg
    20160407_133648.jpg
    421.1 KB · Views: 6
  • 20160504_183712.jpg
    20160504_183712.jpg
    346.5 KB · Views: 6

DeathMachine

New member
Messages
358
Reaction score
7
Location
Eastpointe MI
3 things I do when presented with an 'unknown condition' small engine

1) Pull the cord gently to see if it is seized, and then sharply to see if it has compression

2) Pull the plug and test for spark.

3) Install fresh plug and mist some 2 stroke mix fuel in the carb and see if it will fire.

If it passes these 3 tests, then I know I have a runner with minimal work. If it fails, then I start disassembling to see if I have a builder or parts.
 

Poboy kartman

Senior Moments Member
Messages
12,461
Reaction score
65
Location
White Settlement Texas
3 things I do when presented with an 'unknown condition' small engine

1) Pull the cord gently to see if it is seized, and then sharply to see if it has compression

2) Pull the plug and test for spark.

3) Install fresh plug and mist some 2 stroke mix fuel in the carb and see if it will fire.

If it passes these 3 tests, then I know I have a runner with minimal work. If it fails, then I start disassembling to see if I have a builder or parts.

True...but I take a simpler approach....take the air filter off...shoot some carb cleaner in the carb throat....if it runs for a few seconds....I know it's good to go.

But he's already got plans to modify this engine...still...I think I'd want to hear it run first.
 

Hellion

Moderator
Messages
8,529
Reaction score
3,619
Well, you're off to a good start and are well qualified to do a Briggs based on your previous engine project. These engines are so easy to work on and everyone should do at least one--either a refurbishment to restore it to operation or a balls-to-the-walls conversion into a 27 hp monster (your mileage may vary, void where prohibited).:p

I just thought you wanted to get it running quickly and cheaply for some basic, easy go-karting fun with your son, remember?

Now you're creating a monster... Okay. I'm good with that.
 

bob58o

SuckSqueezeBangBlow
Messages
9,646
Reaction score
1,830
Location
Chicago-town USA
$22 Harbor Freight

Sanding cones smooth out hard to reach places so your parts look brand new again! This 52-piece cone set features 80 and 120 grit bits and tough carbon steel shanks that allow you to port and polish your engine like a professional. The sanding cone set includes two arbors, 10 tapered 80 grit bits and 10 tapered 120 grit bits.
Sanding cone- and cylinder-shaped abrasives reach into tight spaces
Make your old parts look like new
Tapered 2 in. x 1/2 in. bits in 80 and 120 grit
Carbon steel shanks with black oxide coating

I think I ended up using some better quality ones from Eastwood.
http://www.eastwood.com/abrasive-tapers.html

And I love these
320 girt finishing buffs.
http://www.walmart.com/ip/Dremel-51...75035&wl11=online&wl12=47182406&wl13=&veh=sem
 

Hellion

Moderator
Messages
8,529
Reaction score
3,619
I've got an older Dremel Sears Craftsman model where you can hang the motor drive or put it on a swivel base. It has a 3 foot flexible drive shaft that terminates in a pen style rotating chuck.

Other people have the self contained, all-in-one Dremel about the size of an old glass Coke bottle.

Word is that Harbor Freight has what might be a decent "Dremel" for the price... don't know about that one.
 
Last edited:
Status
Not open for further replies.
Top