Metal Shop Kart Pair

Status
Not open for further replies.

firemanjim

Just kartin' around....
Messages
5,247
Reaction score
87
Location
Houston Texas
So, make new ones...

Only problem with making them is there's no material TO make them at the shop, and I need to get it myself... But, on the plus side, I am almost done with the axle flip! It went a lot smoother than I though, and with minimal modding of the leaf! Rgardless of how the rest of the build goes, I am DEFINITELY getting a shock bushing overhaul kit!

I might be able to help you out..... Can you post pics of the top view and side view of those mounts/brackets..... :thumbsup:
 

OzFab

Well-known member
Messages
15,615
Reaction score
70
Location
Warwick Qld, Australia
Only problem with making them is there's no material TO make them at the shop, and I need to get it myself...

The amount of 1/8" flat steel you'd need to make two brackets shouldn't cost you more than a few dollars, then it's a simple matter of a bit of fancy cutting, some bending & drilling & you're done...

I might be able to help you out..... Can you post pics of the top view and side view of those mounts/brackets..... :thumbsup:

You're always ready to help, which is a good thing however, I refer to a phrase from the bible:

"Give a man a fish & he eats for a day; teach a man to fish & he eats for a lifetime"

Like me, you could probably whip them up in about ten minutes but, what does that teach the OP? He's in a metal class with an instructor; between them, they should be able to figure something out...

By all means, help out with the design but, IMO, in this case, it's better if you don't help any more than that...

After all, this is DIY go karts...
 

BaselessEarth12

New member
Messages
94
Reaction score
0
Location
Lovell, ME
At the level of metals I'm in, the "instructor" is more of a "supervisor"... But, I ordered a new cap-isomount. Also, I was EXTREMELY close to getting a full go kart that has everything but an engine, gas tank, and battery. Thing is, though, I have no clue who owns it, and didn't have a truck to haul it out of the woods... Also, instead of factory coil over shocks up front, would custom spring brackets and plow blade springs work? I have 2 kicking around that are a little shorter than the shock, and large enough in diameter to fit over the stock shock.

As for the A-arms, I am kindof thinking about either finding some old Ford Pinto arms, or asking if I could take a neighbor's Honda 400cc ATV off their hands as it hasn't moved in a few years judging by how far it and the plow it's behind are sunk into the ground.
 

firemanjim

Just kartin' around....
Messages
5,247
Reaction score
87
Location
Houston Texas
The amount of 1/8" flat steel you'd need to make two brackets shouldn't cost you more than a few dollars, then it's a simple matter of a bit of fancy cutting, some bending & drilling & you're done...


You're always ready to help, which is a good thing however, I refer to a phrase from the bible:

"Give a man a fish & he eats for a day; teach a man to fish & he eats for a lifetime"

Like me, you could probably whip them up in about ten minutes but, what does that teach the OP? He's in a metal class with an instructor; between them, they should be able to figure something out...

By all means, help out with the design but, IMO, in this case, it's better if you don't help any more than that...

After all, this is DIY go karts...


:thumbsup: You are correct sir! But in this case, I was merely going to suggest an easy fix until he could afford the new one. Problem solved though..... :wai:
 

BaselessEarth12

New member
Messages
94
Reaction score
0
Location
Lovell, ME
Just went for a walk around town, and found a few nifty things: an old Honda FourTrax 4X4, a full set of 24X10/8-12r tires, a Carbide 150cc, and a dinosaur unknown go kart chassis (with everything but electronics, engine, or fuel tank)... I took a bunch of pics of each, but cannot upload them until later tonight, as I do not currently have a cord to upload from my camera. Should be pretty interesting!
 

BaselessEarth12

New member
Messages
94
Reaction score
0
Location
Lovell, ME
The way of the Pinto was my grandfather's idea (he had a Pinto station wagon that he took everywhere it shouldn't have been able to)... But, without further a-due, here be the pics!


Aaaaaaaand they don't work! Because I'm a bit of a scrub when it comes to these things, and took too large of pictures... Ballocks... I'll have 'em by tomorrow, though!
 

BaselessEarth12

New member
Messages
94
Reaction score
0
Location
Lovell, ME
Wasn't able to get it to work... But, I found a pair of seats for it (Subaru WRX sedan front buckets), got the replacement isomount, and got the motor mount tabs cut and drilled for installation to the swing arm.

I found an interesting kit (http://stretchplastics.com/Links/PDF_Instructions/E-7-12.pdf) that seems like it's easy enough to build myself once I get what I have running and off the ground. As for the front, I have found another kit (http://stretchplastics.com/Links/PDF_Instructions/E-7-04_E-7-06.pdf) that is PERFECT for designing my own front end around the bell crank steering system.

The tires and wheels I want are somewhat extravagant (Carlisle Titan AT489 http://www.amazon.com/489-23x8x10-T...F8&qid=1414935925&sr=1-7&keywords=titan+at489 ; Raceline Scorpion http://www.amazon.com/Raceline-Scor...1?s=automotive&ie=UTF8&qid=1413932231&sr=1-21). Friend of mine liked the wheels, and I already have 2 practically brand new Titans on my long since dead Toro lawn tractor. But first thing's first: my other friend needs to get me my freakin' engine!
 

BaselessEarth12

New member
Messages
94
Reaction score
0
Location
Lovell, ME
Good news, everyone! I've got the custom rear crossmember of the soon-to-be-skeleton of the new subframe welded and milled to fit! The driver's side mounting plate was a little crooked, so I had to mill a small part of it off to get it to fit. The holes still lined up, though! I also have a template for the "shorty" steering column most of the way drawn out. I WILL have pictures of my progress uploaded tomorrow!
 

firemanjim

Just kartin' around....
Messages
5,247
Reaction score
87
Location
Houston Texas
Wasn't able to get it to work... But, I found a pair of seats for it (Subaru WRX sedan front buckets), got the replacement isomount, and got the motor mount tabs cut and drilled for installation to the swing arm.

I found an interesting kit (http://stretchplastics.com/Links/PDF_Instructions/E-7-12.pdf) that seems like it's easy enough to build myself once I get what I have running and off the ground. As for the front, I have found another kit (http://stretchplastics.com/Links/PDF_Instructions/E-7-04_E-7-06.pdf) that is PERFECT for designing my own front end around the bell crank steering system.

The tires and wheels I want are somewhat extravagant (Carlisle Titan AT489 http://www.amazon.com/489-23x8x10-T...F8&qid=1414935925&sr=1-7&keywords=titan+at489 ; Raceline Scorpion http://www.amazon.com/Raceline-Scor...1?s=automotive&ie=UTF8&qid=1413932231&sr=1-21). Friend of mine liked the wheels, and I already have 2 practically brand new Titans on my long since dead Toro lawn tractor. But first thing's first: my other friend needs to get me my freakin' engine!
Not to be used off road or on carts that go over 19mph......
 

BaselessEarth12

New member
Messages
94
Reaction score
0
Location
Lovell, ME
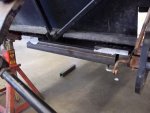
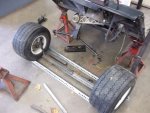
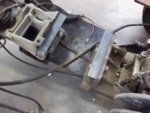
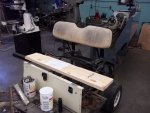
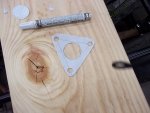
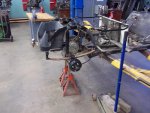
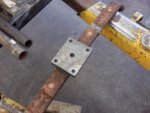
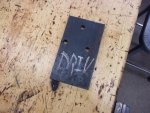
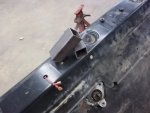
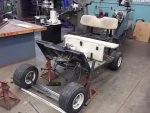
True, neither kit is meant to do either, but I would be building both COMPLETELY differently from scratch, and with far greater reinforcements. Also, the final product will more than likely have more mounting points holding it to the chassis. Anyway, without further adue, here are the pics of the most recent progress! The middle picture is my stencil for the base of a custom steering column, which I've dubbed the "shorty", as it's less than 8" tall. The last 4 pics are of the driver's side front mount, the custom lift block (which is just a 5/8" steel plate with holes drilled in it), and what it looks like out back now that the rear is mostly finished, and lastly my sweet maple bench seat.
 

Attachments

  • 100_0202.JPEG
    100_0202.JPEG
    439.8 KB · Views: 15
  • 100_0203.JPEG
    100_0203.JPEG
    494.8 KB · Views: 22
  • 100_0204.JPEG
    100_0204.JPEG
    305.4 KB · Views: 16
  • 100_0205.JPEG
    100_0205.JPEG
    428.4 KB · Views: 18
  • 100_0206.JPEG
    100_0206.JPEG
    341.1 KB · Views: 15
  • 100_0166.jpg
    100_0166.jpg
    98.5 KB · Views: 19
  • 100_0162.jpg
    100_0162.jpg
    78.4 KB · Views: 16
  • 100_0161.jpg
    100_0161.jpg
    112.7 KB · Views: 15
  • 100_0207.JPEG
    100_0207.JPEG
    378.6 KB · Views: 16
  • 100_0208.jpg
    100_0208.jpg
    91.4 KB · Views: 25

BaselessEarth12

New member
Messages
94
Reaction score
0
Location
Lovell, ME
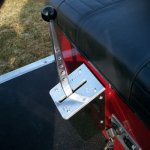
The angle iron is just a temporary rig to keep the wheels straight for the measurements. The two longer pieces are also working very well at keeping the wheels from rolling around too much. But, I will be using those pieces for a mounting bracket of a custom shifter! It's like the one from Jake's Lift Kits, only FAR cheaper, FAR easier to install, and FAR more badass!
 

Attachments

  • jakes sport shifter_1330705660.jpg
    jakes sport shifter_1330705660.jpg
    27.6 KB · Views: 7

BaselessEarth12

New member
Messages
94
Reaction score
0
Location
Lovell, ME
Good news, everyone! The engine has finally arrived! It is an older Arctic Cat Spirit motor! Not sure exact displacement, but it has a 60mm bore and stroke, so I'm assuming around 340cc's total. Either way, should be a fun, welcome addition to the cart in the long run! It seems a bit smaller than the stock motor, but then again, it does have more cooling fins, dual intake and exhaust ports, and has all of the electronics and the clutch!
 
Status
Not open for further replies.
Top