Two Stroke Mini Bike

Status
Not open for further replies.

Desertduler

Active member
Messages
1,736
Reaction score
14
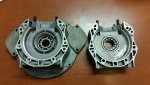
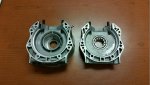
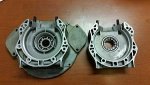
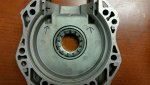
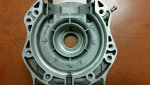
When I get done butchering this engine up the crankcase half on the left will be about the same size of the crankcase half on the right.
 

Attachments

  • Halves.jpg
    Halves.jpg
    222 KB · Views: 5

Desertduler

Active member
Messages
1,736
Reaction score
14
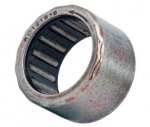
This engine will not have a recoil starter or a cooling fan, I am converting this engine over to free air cooling in order to keep the overall engine size small, I will replace the needle bearing that is in the clutch with a one way needle bearing clutch so that the mini bike can be bump started and I will have a compression release lever on the handle bar so that the engine will turn over easily while the bike is being bump started, also another benefit of using the one way needle bearing in the clutch is that the engine will brake the mini bike positively when the throttle is let off, but when the mini bike is stopped the one way needle clutch bearing will be over ran by the rotating inner bearing race that is coupled up to the crankshaft so the mini bike will stand still at a idle and then when the engine rpm increases the clutch shoes will engage in the clutch drum and then in turn rotate the drive chain.
 

Attachments

  • One Way Clutch.jpg
    One Way Clutch.jpg
    19.7 KB · Views: 1

Desertduler

Active member
Messages
1,736
Reaction score
14
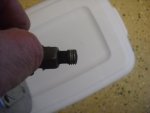
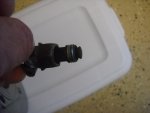
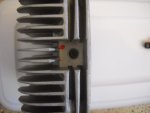
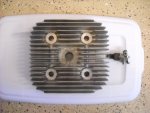
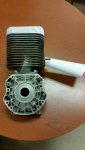
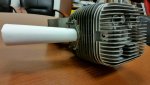
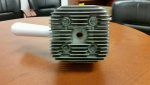
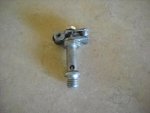
This cylinder head can be positioned four different ways on top of the cylinder, I will phase the cylinder head so that oncoming air will pass along through the cooling fins, the cylinder will be tipped forward about 5 to 7 degrees in order for the air to flow over the top of the cylinder head and along the cylinder cooling fins, there are other benefits of doing this that will come to light later on. Here is the cable activated compression release valve that I will install in this hole in the cylinder head that has not been machined yet, one can see the compression release valve in these photos in the open and closed position.
 

Attachments

  • 007.jpg
    007.jpg
    204.4 KB · Views: 2
  • 005.jpg
    005.jpg
    202.9 KB · Views: 1
  • 003.jpg
    003.jpg
    229.9 KB · Views: 3
  • 002.jpg
    002.jpg
    246.2 KB · Views: 3

Desertduler

Active member
Messages
1,736
Reaction score
14
Here one can see the profile of the engine along with the trajectory of the exhaust port as shown with the paper cone, the exhaust will exit out of the rear of the cylinder and by having the engine's cylinder tilted forward it will make for better exhaust transition into the expansion chamber, the cylinder head is installed on the cylinder in the way as to let air flow along the cooling fins as I have stated in a previous post. I will use a diaphragm type carburetor on this engine as it will be mounted on the front on the cylinder at a angle and this type of carburetor is not effected in any way of how it is mounted.
 

Attachments

  • sachs1.jpg
    sachs1.jpg
    185.1 KB · Views: 6
  • sachs2.jpg
    sachs2.jpg
    200.4 KB · Views: 7
  • sachs3.jpg
    sachs3.jpg
    184.8 KB · Views: 5
Desertduler

Active member
Messages
1,736
Reaction score
14
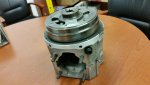
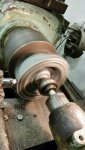
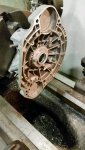
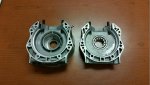
Here one can see how I butchered the crankcase half and the end results, I will make a aluminum cover for the flywheel, this engine also has a lighting coil so that I can drive the mini bike at night too!
 

Attachments

  • C&F.jpg
    C&F.jpg
    190.7 KB · Views: 11
  • R&L.jpg
    R&L.jpg
    223.3 KB · Views: 10
  • Half3.jpg
    Half3.jpg
    299.8 KB · Views: 10
  • Half2.jpg
    Half2.jpg
    232.3 KB · Views: 9
  • Half1.jpg
    Half1.jpg
    219.8 KB · Views: 8

Desertduler

Active member
Messages
1,736
Reaction score
14
Crankcase halves before (bottom picture) and after (top picture)
 

Attachments

  • Halves.jpg before.jpg
    Halves.jpg before.jpg
    12.5 KB · Views: 98
  • R&L.jpg
    R&L.jpg
    223.3 KB · Views: 5
Desertduler

Active member
Messages
1,736
Reaction score
14
These areas that I have marked with arrows in the crankcase halves will be filled with JB Weld as to reduce the crankcase volume in the crankcase and up the compression ratio in the crankcase.
 

Attachments

  • Case2.jpg
    Case2.jpg
    260.3 KB · Views: 7
  • Case1.jpg
    Case1.jpg
    247.1 KB · Views: 8

Flyinhillbilly

The great cornholio
Messages
2,468
Reaction score
132
Location
North West Arkansas
Here one can see how I butchered the crankcase half and the end results, I will make a aluminum cover for the flywheel, this engine also has a lighting coil so that I can drive the mini bike at night too!

I think you definition of butchering vs mine are significantly different, nice work.
 

bigair49

Member
Messages
226
Reaction score
9
Location
Southern Ontario Canada
Right on I love this stuff great work!
I Have built some high compression 4 stroke pit bike engines over the years and snapped a pile of kick start shafts and gears until I found out about compression release valves. We started with chainsaw valves and machining a spot in the head as you are doing, but that was a real pain without the proper tooling and equipment then I came across this deal! I thought it would be cool to show it.
 

Desertduler

Active member
Messages
1,736
Reaction score
14
Right on I love this stuff great work!
I Have built some high compression 4 stroke pit bike engines over the years and snapped a pile of kick start shafts and gears until I found out about compression release valves. We started with chainsaw valves and machining a spot in the head as you are doing, but that was a real pain without the proper tooling and equipment then I came across this deal! I thought it would be cool to show it.
Wow, thanks for sharing, I have never seen a compression release like that, they indeed would work in a lot of applications, I am using a cable activated compression release that I can control with a small finger lever on the handle bar that when the lever is pulled in the compression release is activated and then after the mini bike is rolling I will let the lever go and bump the engine over.Thank you for the compliment! :thumbsup:
 

Desertduler

Active member
Messages
1,736
Reaction score
14
So with a little work on my small lathe I was able to cross breed two different compression releases and I came up with a cable activated one that has a longer reach than the first one that I was going to use and now I will not have to mill away a larger area on the cylinder head.
Thank goodness for being a pack rat of sorts, sometimes it pays off.
 

Attachments

  • 001.jpg
    001.jpg
    233.8 KB · Views: 4

Desertduler

Active member
Messages
1,736
Reaction score
14
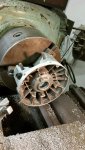
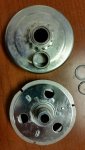
One can see here in these photos the clutch torn down along with the one way needle bearing (sitting on the clutch drum) which I have installed in place of the stock needle bearing in the clutch drum, I installed the one way bearing in the clutch drum using 638 Loctite Retaining Compound to aid the press fit of the one way clutch, the arrow on the clutch indicates the direction of lock up. With the centrifugal clutch assembled with the one way needle clutch installed in place of the stock needle bearing the clutch now as indicated with the arrows works differently, when the sprocket along with the clutch drum is rotated counterclockwise the needle bearing clutch locks down on the inner bearing race of the clutch which in turn rotates the inner drive hub of the centrifugal clutch which is connected to the engines PTO shaft therefore the engine turns over. If the clutch drum becomes stationary and the engine is running the inner drive hub and shoes will rotate freely as indicated by the arrows and when the clutch shoes engage into the clutch drum the entire clutch rotates together as one assembly.
 

Attachments

  • Clutch1.jpg
    Clutch1.jpg
    280.5 KB · Views: 2
  • clutch2.jpg
    clutch2.jpg
    198.8 KB · Views: 4
  • clutch3.jpg
    clutch3.jpg
    213 KB · Views: 2
  • clutch4.jpg
    clutch4.jpg
    218 KB · Views: 2

chancer

ɔ ɥ ɐ u ɔ ǝ ɹ
Messages
9,358
Reaction score
93
Location
COMFORT, TEXAS
I wish I could think like that.
All your stuff is so simple yet so Advanced from other parts most of us use.
 
Status
Not open for further replies.
Top