Trailmaster Cheetah 8 arrived today, exactly 7 days after ordering (at 11 pm on the day of ordering, July 3rd). Pretty shocked they were that quick from Texas (to Ohio). Also appreciate the final leg shipping company called yesterday, and when I said this is to a residence and don't have a forklift or anything, they we're just like we'll make sure it has lift gate service. Too many of the websites you can order from want to charge extra for every little thing with shipping.
I had work today and didn't get to it till the afternoon. I would say I put about 3 hours into it, not rushing or trying too hard. Took a break for dinner, half had to hold the kids off it while assembling. I'm sure if someone was more motivated, they might finish assembly in 3 hours (or close to it).
Missed taking a picture of how it arrived, but it was your standard Chinese go kart box and metal crate to secure everything.
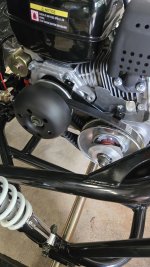
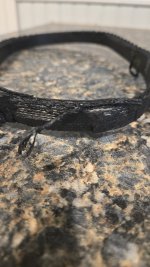
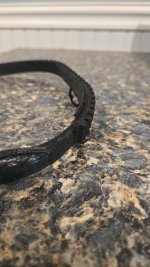
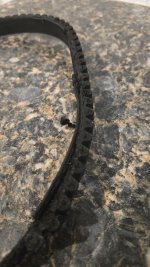
My general plan was to unload all the parts, get the roll cage done, shocks, and tires. Then I'll have CVT belt (I'm not sure if the one provided is an extra but I'm surprised they didn't put it on already), battery, change oil (apparently optional but heh), and whatever else.
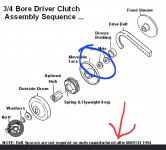
The packaging contained an operator manual for both the go kart and everyone but no assembly instructions. I already had them on my phone (attached here) and had watched a couple of videos on people assembling the mid XRX. I figured it would be pretty close (and it is).
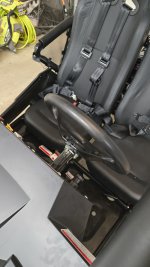
About an hour in, everything is removed from packaging and roll cage is assembled.

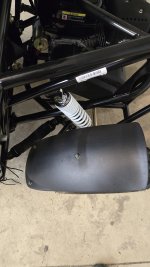
Next up were the rear shocks. They come with one attached at the bottom and a metal bar on the other.
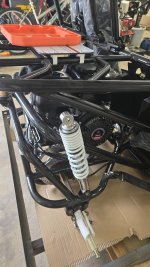
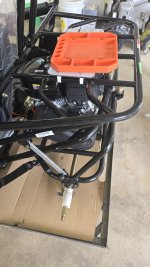
Just to show my wife how strong I was, I installed them by lifting the back with one hand and slipping the bolt through the shock.
Twenty minutes later, they were installed and torqued.
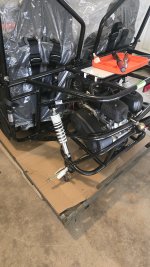
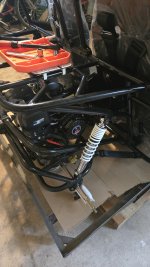
Next up were front shocks. In the assembly manual they'll say to do the front struts then shocks, but as you can see, it's still laying on the metal crate. I didn't have a plan to get out off of that yet.
Front shocks went the same as the rear, though I did have the missus slide the top bolts in while I lifted the front end after i attached the shocks on the bottom.
To get the kart off of the metal crate, or more appropriately put, get the metal crate away from the kart, I went with this:
1. The missus slide a slightly raised jack under the back end while I lifted it. Metal crate still in place but while back end off of it and Jack is sticking out from the back, so not in the way.
2. I lifted the entire front end while my wife pulled the pallet and metal crate bottom out the side.
3. Side then put a couple back stands under the front end.
Besides a little leaning (back is supported by a single point), it worked extremely well.
From there, I was able to get the rear tires on. This is where I ran into my only problem so far. They attach by a 24mm castle nut. Don't have that, didn't catch it on the video I watched where they say it. Didn't realize my tire iron doesn't have that size. Oh well, tires on, used a large adjustable wrench to tighten. Order a 24mm socket so I can torque em correctly.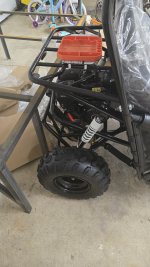
Took the Jack down and the back end was done for today.
Did the front struts. There's a square nut thingy that fits into a square hole and then tighten and torque a castle nut and cotter pin.
Installed the front tires. And call it a day.
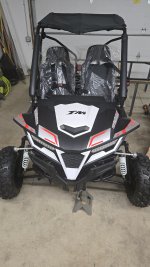
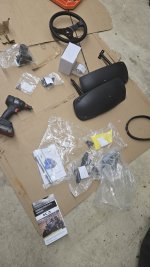
Parts left: fenders, steering wheel, battery, belt, cotter pins and hub caps for the wheels, and some odds and ends
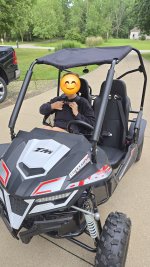
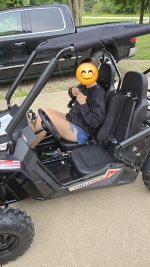
Wife (5'6") sat in it and had tons of head and leg room. I (6'2") sat in it and would say I have 4"or so until my head would hit the roll cage. With the seat all the way forward, my older kid (48") is right on the cusp of driving it. The shorter one (40") might be another year or two, depending on what I can rig up for him.
Have to work tomorrow but should still be able to finish most of the other items. Socket comes on Sunday, so will finish wheels then.
I had work today and didn't get to it till the afternoon. I would say I put about 3 hours into it, not rushing or trying too hard. Took a break for dinner, half had to hold the kids off it while assembling. I'm sure if someone was more motivated, they might finish assembly in 3 hours (or close to it).
Missed taking a picture of how it arrived, but it was your standard Chinese go kart box and metal crate to secure everything.
My general plan was to unload all the parts, get the roll cage done, shocks, and tires. Then I'll have CVT belt (I'm not sure if the one provided is an extra but I'm surprised they didn't put it on already), battery, change oil (apparently optional but heh), and whatever else.
The packaging contained an operator manual for both the go kart and everyone but no assembly instructions. I already had them on my phone (attached here) and had watched a couple of videos on people assembling the mid XRX. I figured it would be pretty close (and it is).
About an hour in, everything is removed from packaging and roll cage is assembled.
Next up were the rear shocks. They come with one attached at the bottom and a metal bar on the other.
Just to show my wife how strong I was, I installed them by lifting the back with one hand and slipping the bolt through the shock.
Twenty minutes later, they were installed and torqued.
Next up were front shocks. In the assembly manual they'll say to do the front struts then shocks, but as you can see, it's still laying on the metal crate. I didn't have a plan to get out off of that yet.
Front shocks went the same as the rear, though I did have the missus slide the top bolts in while I lifted the front end after i attached the shocks on the bottom.
To get the kart off of the metal crate, or more appropriately put, get the metal crate away from the kart, I went with this:
1. The missus slide a slightly raised jack under the back end while I lifted it. Metal crate still in place but while back end off of it and Jack is sticking out from the back, so not in the way.
2. I lifted the entire front end while my wife pulled the pallet and metal crate bottom out the side.
3. Side then put a couple back stands under the front end.
Besides a little leaning (back is supported by a single point), it worked extremely well.
From there, I was able to get the rear tires on. This is where I ran into my only problem so far. They attach by a 24mm castle nut. Don't have that, didn't catch it on the video I watched where they say it. Didn't realize my tire iron doesn't have that size. Oh well, tires on, used a large adjustable wrench to tighten. Order a 24mm socket so I can torque em correctly.
Took the Jack down and the back end was done for today.
Did the front struts. There's a square nut thingy that fits into a square hole and then tighten and torque a castle nut and cotter pin.
Installed the front tires. And call it a day.
Parts left: fenders, steering wheel, battery, belt, cotter pins and hub caps for the wheels, and some odds and ends
Wife (5'6") sat in it and had tons of head and leg room. I (6'2") sat in it and would say I have 4"or so until my head would hit the roll cage. With the seat all the way forward, my older kid (48") is right on the cusp of driving it. The shorter one (40") might be another year or two, depending on what I can rig up for him.
Have to work tomorrow but should still be able to finish most of the other items. Socket comes on Sunday, so will finish wheels then.