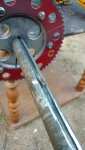
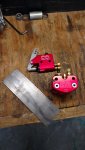
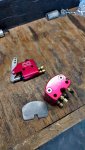
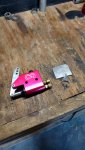
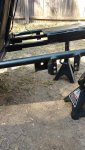
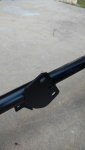
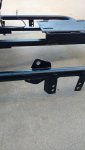
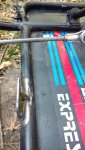
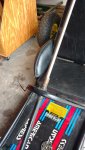
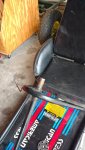
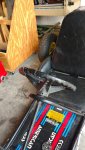
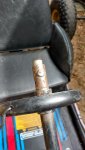
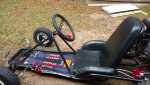
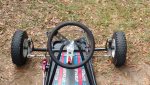
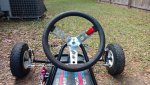
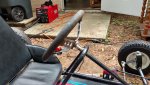
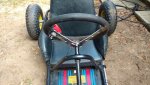
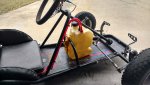
The AmEx gets a brake job.

Status
Not open for further replies.

chevyboy

New member
Messages
21
Reaction score
0
Location
Florida
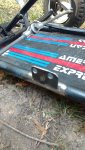
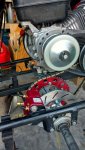
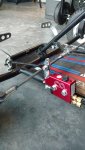
So the drum brake was at best, ok. I could make it work just making sure I stayed out of sticky situations. But my son now driving the kart a lot was a different story. So for some added insurance, and because we love to fabricate, hydraulic brakes were ordered.

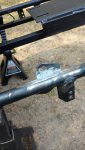
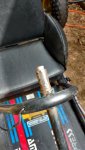
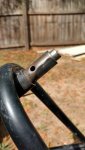
First, whoever had the kart before me, welded the drum to the axle. Or maybe they just welded a glob in the key way to prevent it from moving and it broke off. Either way I needed the key way space, so I had to carefully remove it.

Then I had to remove the old brake bracket. My angle grinder skills are growing fast. My welding skills.... well its functional. :thumbsup:

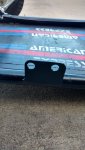
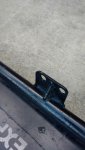
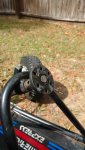
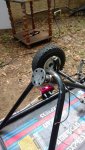
Next I had to make my own brackets. I cut them out of 3/16" steel. (At least I think its 3/16") The first race kart I bought was from the late 80s or early 90s I believe. It had an engienetics brake kit on it, which I think is now MCP or maybe one bought the other. Regardless, I used its mounting for inspiration for my brackets. The front more so than the rear. For the rear I wanted simple, yet strong. Its definitely simple. After I welded it up I beat on it, and I feel its pretty strong too.

After it cooled, I cleaned it up and hit it with some black paint. Im pretty happy with the end result.

Its plumbed now and Im currently tweaking the pad gap. The stopping power is nice and much improved.

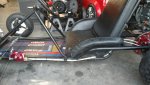
I have a lot of plans for this AmEx. We call it the Black Stallion.
 

Attachments

  • IMG_20170923_185651381.jpg
    IMG_20170923_185651381.jpg
    220.8 KB · Views: 10
  • IMG_20170924_141514360.jpg
    IMG_20170924_141514360.jpg
    289.5 KB · Views: 4
  • IMG_20170924_143122027_HDR.jpg
    IMG_20170924_143122027_HDR.jpg
    348.1 KB · Views: 5
  • IMG_20170924_150033057_HDR.jpg
    IMG_20170924_150033057_HDR.jpg
    291.1 KB · Views: 3
  • IMG_20170924_154205027.jpg
    IMG_20170924_154205027.jpg
    493.4 KB · Views: 10

chevyboy

New member
Messages
21
Reaction score
0
Location
Florida
Here's some more
 

Attachments

  • IMG_20170924_170455082.jpg
    IMG_20170924_170455082.jpg
    167.6 KB · Views: 3
  • IMG_20170924_170447006.jpg
    IMG_20170924_170447006.jpg
    334.2 KB · Views: 4
  • IMG_20170924_164939379.jpg
    IMG_20170924_164939379.jpg
    273.3 KB · Views: 7
  • IMG_20170924_164936947.jpg
    IMG_20170924_164936947.jpg
    278.9 KB · Views: 5
  • IMG_20170924_164927608.jpg
    IMG_20170924_164927608.jpg
    212.5 KB · Views: 4

chevyboy

New member
Messages
21
Reaction score
0
Location
Florida
And the rest
 

Attachments

  • IMG_20170924_170503562_HDR.jpg
    IMG_20170924_170503562_HDR.jpg
    258.2 KB · Views: 6
  • IMG_20170924_170509075.jpg
    IMG_20170924_170509075.jpg
    210.2 KB · Views: 7
  • IMG_20170924_174355969_HDR.jpg
    IMG_20170924_174355969_HDR.jpg
    277 KB · Views: 23
  • IMG_20170924_192011572.jpg
    IMG_20170924_192011572.jpg
    275.4 KB · Views: 15
  • IMG_20170926_192304258.jpg
    IMG_20170926_192304258.jpg
    259.8 KB · Views: 15

pRoFiT

Can't buy it?, build it!
Messages
1,151
Reaction score
63
Location
California
Brakes look great! My disc brakes could use some improvements. Feel i really have to push hard if i really want to stop. Disc brakes are the way to go.

looks like you axle took a turn for the worse. Was that from drum brakes??
 

chevyboy

New member
Messages
21
Reaction score
0
Location
Florida
The axle is ok. I had to remove a weld from the previous owner, that was in the key way. I'm not sure if he was trying to weld the old brake drum in place or what. But it ended up right where the disc needed to be.

Ezcome-ezgo, how'd that make your day? And you're welcome.
 

ezcome-ezgo

G'me sumthin to write on
Messages
5,976
Reaction score
2,973
Location
Atlanta, GA
It's just nice to see a well executed modification. Sort of refreshing, if you know what I mean.
 

pRoFiT

Can't buy it?, build it!
Messages
1,151
Reaction score
63
Location
California
Yah much better then the daily. "what kart is this", "my engine wont start","should i buy this". which the answer is almost always, "A kart", "show a pic/clean the carb","yes!".
 

chevyboy

New member
Messages
21
Reaction score
0
Location
Florida
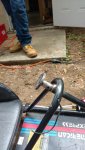
Now the AmEx gets a new steering wheel

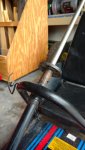
The old steering wheel is a stock piece I believe. Its completely plastic, and Ive felt it flex in my hands for years. Recently it finally broke. I knew it was coming so Ive been planning what to do for a while.

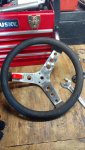
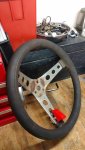
I couldn't just by a new one because the mount and wheel are all in one. So once again I took inspiration from my old race kart, :idea2: (and by inspiration I mean parts this time). Its an old coyote chassis, and I picked it up about 8 years ago. The guy I bought it from had it sitting out in the yard for so long it had vegetation growing through it. My point is it was old and abused, but... the steering wheel, all things considered, is in pretty darn good shape. Light rust, and the rubber feels quite nice in the hands. No dry rot at all, its actually squishy, in a supportive kind of way.
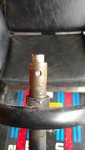
So anyway, I had to figure out how to adapt it to the AmEx. If successful, Ill have a mount and bolt pattern that should allow me to just change the wheel in the future. Its the same bolt pattern and spacing as the racing wheel on my margay. So here's what I did...

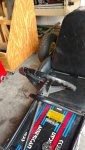
Taking the old wheel off, the stock shaft is hollow. The steering wheel mount from the coyote is splined, for a solid shaft, and wont fit over the hollow shaft. I remembered I had a steel shaft that I salvaged from something long ago, and it fit inside the hollow shaft pretty good.
So i cut a slug out of it, and cut the flange off the steering wheel mount. I also drilled a hole in the hollow steering shaft to give me a place to weld the slug.

There was a small amount of slop. It was workable though, and in the end, I cant tell if the steering wheel is off any at all.
 

Attachments

  • IMG_20171001_141838317.jpg
    IMG_20171001_141838317.jpg
    190.5 KB · Views: 4
  • IMG_20171001_140823918.jpg
    IMG_20171001_140823918.jpg
    195.9 KB · Views: 4
  • IMG_20171001_140755268.jpg
    IMG_20171001_140755268.jpg
    304.8 KB · Views: 4
  • IMG_20171001_140739339.jpg
    IMG_20171001_140739339.jpg
    283.7 KB · Views: 5
  • IMG_20171001_140730455.jpg
    IMG_20171001_140730455.jpg
    318 KB · Views: 5

chevyboy

New member
Messages
21
Reaction score
0
Location
Florida
Then I welded the holes around the slug, and welded the face of the steering wheel mount. My son ground the welds down, and we sprayed it all black.
 

Attachments

  • IMG_20171001_143751157_HDR.jpg
    IMG_20171001_143751157_HDR.jpg
    196.8 KB · Views: 5
  • IMG_20171001_144524052_HDR.jpg
    IMG_20171001_144524052_HDR.jpg
    199.5 KB · Views: 5
  • IMG_20171001_144533363_HDR.jpg
    IMG_20171001_144533363_HDR.jpg
    169.4 KB · Views: 5
  • IMG_20171001_144550728.jpg
    IMG_20171001_144550728.jpg
    216.8 KB · Views: 6
  • IMG_20171001_151700995.jpg
    IMG_20171001_151700995.jpg
    271.1 KB · Views: 5
  • IMG_20171001_151705972.jpg
    IMG_20171001_151705972.jpg
    228.7 KB · Views: 7

chevyboy

New member
Messages
21
Reaction score
0
Location
Florida
This is the old wheel, the new wheel, and the new wheel cleaned up.
 

Attachments

  • IMG_20171001_151735204.jpg
    IMG_20171001_151735204.jpg
    349.1 KB · Views: 4
  • IMG_20171001_143931852.jpg
    IMG_20171001_143931852.jpg
    282.9 KB · Views: 4
  • IMG_20171001_140730455.jpg
    IMG_20171001_140730455.jpg
    318 KB · Views: 3

chevyboy

New member
Messages
21
Reaction score
0
Location
Florida
The end result. I think it came out ok. Feels a lot better, that's for sure. Its also about an inch bigger than the old one, and I wasn't sure how'd Id like that. Turns out its great.

Also, my son really liked the kill switch I used on my race kart. So I got him the same for the AmEx. I haven't been to the store to get the proper connectors yet. I hooked it up to make sure my ground was ok.

Thanks for looking.
 

Attachments

  • IMG_20171001_151555001.jpg
    IMG_20171001_151555001.jpg
    514.7 KB · Views: 12
  • IMG_20171001_151602160.jpg
    IMG_20171001_151602160.jpg
    596.5 KB · Views: 5
  • IMG_20171001_153556155.jpg
    IMG_20171001_153556155.jpg
    580 KB · Views: 7
  • IMG_20171001_151609664_HDR.jpg
    IMG_20171001_151609664_HDR.jpg
    428.2 KB · Views: 5
  • IMG_20171001_153608379.jpg
    IMG_20171001_153608379.jpg
    346.5 KB · Views: 5

Hellion

Murderator
Messages
9,060
Reaction score
4,053
Hey, lookin' good. I like the change and especially how you used an older wheel that had some rust on it. Seems most people cannot even be bothered to tidy up something like that so it is usually tossed away.

I really like the kill switch at the 6 o'clock position though. FIX IT. :p
 

OzFab

Well-known member
Messages
15,615
Reaction score
70
Location
Warwick Qld, Australia
Chevyboy, in case you haven't noticed, we like to keep app posts relating to the same kart in the same thread...

Threads merged...
 

chevyboy

New member
Messages
21
Reaction score
0
Location
Florida
Back at it again. This time I addressed the horrible throttle linkage, and put a mild cam in.

During the first round of upgrades I could only find 1 linkage kit that would install with the stock gas tank still on the engine. I may have found another, but I had doubts about it so I took a chance on this other one. Looking back, the kit I passed on would have worked, provided I kept the stock linkage. :mad2: Initial install took about 5 hours. I kept feeling like I was missing something because it just would not work as pictured. The picture, lol, the only instructions was a picture of the installed product. Horrible quality also. It looked like it was printed out on a dot matrix printer, with those faded horizontal lines. I had to add parts, modify parts, and get rid of some parts to have a throttle that would open fully, and return to the idle position. I got it to do its job, but it required consistent maintenance.
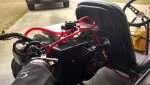
I just looked back at the auction site, and the same kit now has more pictures. Some of those would of been very helpful, but its gone now, and this is the final product. Much, much better. :thumbsup:
 

Attachments

  • IMG_20180204_130248730_HDR.jpg
    IMG_20180204_130248730_HDR.jpg
    188 KB · Views: 3

chevyboy

New member
Messages
21
Reaction score
0
Location
Florida
Since I went with a top plate, I had to move the gas tank. Im currently in the process of over hauling my race kart, so I robbed the fuel pump and gas tank for the yard kart. A good friend of mine came over, and after tossing ideas around for an hour we settled on this.
 

Attachments

  • IMG_20180204_130236775_HDR.jpg
    IMG_20180204_130236775_HDR.jpg
    296.8 KB · Views: 5
Status
Not open for further replies.
Top