Side project for my little kart

5814SpeedCo

Member
Messages
150
Reaction score
2
Location
Fort Worth, TX
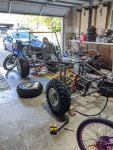
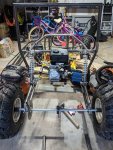
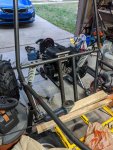
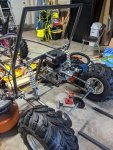
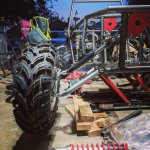
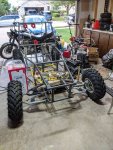
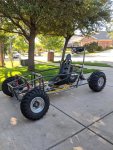
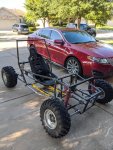
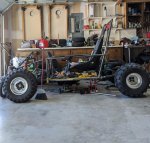
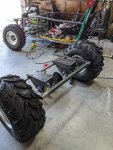
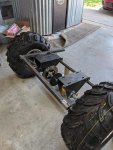
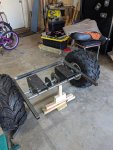
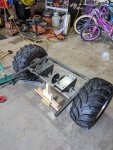
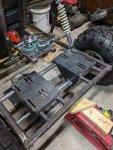
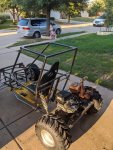
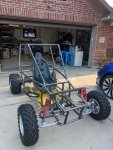
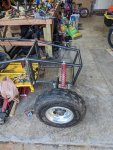
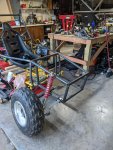
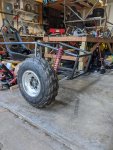
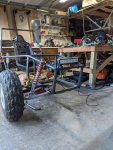
Had to take the front end and make the mounting for the suspension wider or else I would of had a 52" rear width and a 43" front width. Now the front will be an couple inches wider than the front.

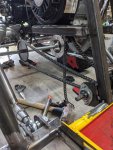
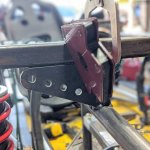
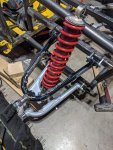
Still going to use the ATV lower a-arm but will be using a single upper control arm that will have adjustable caster. All heim joints on the end for full camber adjustability as well.

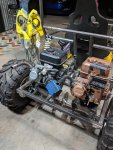
Also keeping the 12" light bar at the front and will have a 28"-30" light bar on top when I finish the cage.
 

Attachments

  • Buggy 2.jpg
    Buggy 2.jpg
    109.6 KB · Views: 4
  • Buggy 1.jpg
    Buggy 1.jpg
    110.2 KB · Views: 4
  • Buggy 3.jpg
    Buggy 3.jpg
    105.8 KB · Views: 3
  • Buggy 4.jpg
    Buggy 4.jpg
    101.9 KB · Views: 4

5814SpeedCo

Member
Messages
150
Reaction score
2
Location
Fort Worth, TX
Been a little bit but about the only thing that has happened is I got all the tires replaces with some AWESOME Swamp Fox tires. I will be working on it more now that this college semester is over and this whole Corona stuff has screwed up my classes.
 

Attachments

  • Buggy 1.jpg
    Buggy 1.jpg
    158.1 KB · Views: 7

5814SpeedCo

Member
Messages
150
Reaction score
2
Location
Fort Worth, TX
Got a good bit of work done on the rear end. In the final stages of it now! Got the motor mount in place and will have more bracing added to it today. I got the chain done for the jackshaft to the axle. I need to pull the tank off the motor to be able to do the final length on the T/C to the jackshaft as I will be adjusting tension on that one by moving the motor. I can actually adjust the tension on the chain by lengthening or shorten the heim joints on the trailing arms. It's a heavy duty #40 chain so it will stretch a little and then will need slight adjusting.

Had to order some different a-arms to be able to complete the front end. Should be done with that portion by the end of the weekend.
 

Attachments

  • Buggy 4.jpg
    Buggy 4.jpg
    113.1 KB · Views: 3
  • Buggy 3.jpg
    Buggy 3.jpg
    108.8 KB · Views: 3
  • Buggy 2.jpg
    Buggy 2.jpg
    89.1 KB · Views: 4
  • Buggy 5.jpg
    Buggy 5.jpg
    112.8 KB · Views: 4

5814SpeedCo

Member
Messages
150
Reaction score
2
Location
Fort Worth, TX
Here is another view of the engine. I have bracing supports being cut out at work that will be getting welded the motor mount for additional support.
 

Attachments

  • Buggy 5.jpg
    Buggy 5.jpg
    112.8 KB · Views: 2

5814SpeedCo

Member
Messages
150
Reaction score
2
Location
Fort Worth, TX
Up on the front now. Got all the a-arms mounted with the spindles on hi-misalignment spaces. I"m using all lower a-arms and then took the shock mount out of the top arms. The travel is good, no binding and the wheels stays pretty straight through the whole range of motion. And yes I'll be cleaning up the top a-arm and adding a bar across it more towards the mounts for a little more stability and strength for them.

The shocks will be mounted up this evening hopefully. I'm using some upper shock mounts with different hole positions for adjustability.

All in all I'm loving how it is turning out.
 

Attachments

  • Buggy 3.jpg
    Buggy 3.jpg
    113.7 KB · Views: 3
  • Buggy 2.jpg
    Buggy 2.jpg
    148.5 KB · Views: 3
  • Buggy 6.jpg
    Buggy 6.jpg
    146.4 KB · Views: 3
  • Buggy 5.jpg
    Buggy 5.jpg
    198 KB · Views: 4
  • Buggy 1.jpg
    Buggy 1.jpg
    148.7 KB · Views: 3

5814SpeedCo

Member
Messages
150
Reaction score
2
Location
Fort Worth, TX
And we got a roller! The front end still needs a little work and things adjusted here and there. but at least I can push it around now. Steering is up next!
 

Attachments

  • 1.jpg
    1.jpg
    124.7 KB · Views: 5
  • 2.jpg
    2.jpg
    116.2 KB · Views: 8

5814SpeedCo

Member
Messages
150
Reaction score
2
Location
Fort Worth, TX
Engine cradle is just about done. Decided one wasn't going to be enough, so I designed this in Solidworks and now it' a real thing. Little more to do to it and then I can up the engines on.
 

Attachments

  • 5.jpg
    5.jpg
    109.1 KB · Views: 5
  • 4.jpg
    4.jpg
    87.8 KB · Views: 4
  • 3.jpg
    3.jpg
    76.4 KB · Views: 4
  • 2.jpg
    2.jpg
    84.9 KB · Views: 4
  • 1.jpg
    1.jpg
    101.3 KB · Views: 4

gegcorp2012

Active member
Messages
491
Reaction score
62
Location
Alabama
Nice work on the buggy ( or is this the kart?)

Just curious about the changes to the rear suspension, like taking the engine off the frame and mounting two on the swingarm ... was that so you can have two engines side by side ?

I really liked the way you had the stationary engine with the jackshaft at the swingarm pivot looking. That's a design I considered, but had not seen built.<A thanks goes there>

I'm still rootin' for you. Keep up the good work !


Sent from my SM-J700T using Tapatalk
 

5814SpeedCo

Member
Messages
150
Reaction score
2
Location
Fort Worth, TX
The original idea I had for suspension and motor mounting was being problematic and more of a headache than I wanted. So I scrapped it and yes decided to go with two motors instead of one. It's going to be a best when finished!
 

5814SpeedCo

Member
Messages
150
Reaction score
2
Location
Fort Worth, TX
Did a little revision on the dual engine cradle. Hmm...beefy motor mounts! Except the top plate on the right engine mount needs to be turned 180°, got ahead of myself as on the last one lol. Set up for a 212 or 420! I also need to move the outside bearing mounts back a little to line up with the bearings that will be on the motor mounts. I'll have 6 bearings total across the engine. Should have the engine cradle finished up by the weekend. Then it's getting down to the little things!

Things left to do:

-Mount the seat
-Finish the steering
-Running brake lines front and rear
-Finish the roll cage
-Weld everything
-Mount the engines and torque converts
-Probably more to the list I can't think of yet
 

Attachments

  • 1.jpg
    1.jpg
    86.9 KB · Views: 5

5814SpeedCo

Member
Messages
150
Reaction score
2
Location
Fort Worth, TX
More work done on the cage this weekend. Going to add a few more braces in a couple areas. Also getting the motors set up as a Stage 1.....for now! hahah!
 

Attachments

  • 5.jpg
    5.jpg
    97 KB · Views: 5
  • 4.jpg
    4.jpg
    110.6 KB · Views: 5
  • 3.jpg
    3.jpg
    114.9 KB · Views: 3
  • 2.jpg
    2.jpg
    114.1 KB · Views: 3
  • 1.jpg
    1.jpg
    102.9 KB · Views: 3
Top