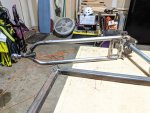
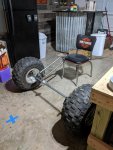
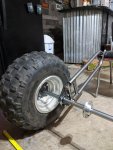
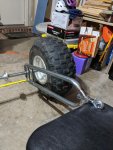
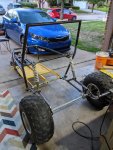
Side project for my little kart

5814SpeedCo

Member
Messages
150
Reaction score
8
Location
Fort Worth, TX
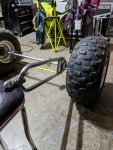
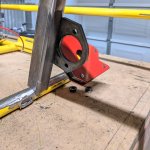
Just something I've been messing around with on the side in between waiting on parts for my big buggy build. Will be one on each side and both have adjustable plates. This is an added benefit of my job, can design my parts and have them cut out fairly quick!

There will be a link going to each swingarm to aid in side to side motion. Also more bracing to it and a shock mount.

All hardware will be Grade 8 bolts as well. Still have a few more ideas for it but this is all for now!

https://www.youtube.com/watch?v=1NmVjzR2XP8
 

Attachments

  • Swingarm.jpg
    Swingarm.jpg
    129.9 KB · Views: 19

5814SpeedCo

Member
Messages
150
Reaction score
8
Location
Fort Worth, TX
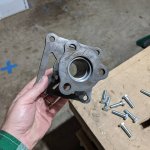
Have a few things to order to finish the hubs, make some shock mounts, and then make the other side. After that re work the rear end of the kart to adapt this on and add suspension to the front and we got a lifted fun kart!
 

Attachments

  • IMG_20200109_185937.jpg
    IMG_20200109_185937.jpg
    365.4 KB · Views: 11
  • IMG_20200109_190223.jpg
    IMG_20200109_190223.jpg
    369.9 KB · Views: 10
  • IMG_20200109_190158.jpg
    IMG_20200109_190158.jpg
    367.7 KB · Views: 9
  • IMG_20200109_190148.jpg
    IMG_20200109_190148.jpg
    406.8 KB · Views: 8

5814SpeedCo

Member
Messages
150
Reaction score
8
Location
Fort Worth, TX
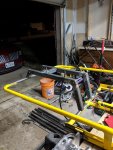
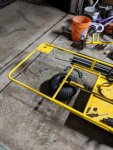
Been a while since I've gotten to this but I have made some progress the past week.

Got the old rear end cut out in preparation for the new one, stared getting the new engine mount built along with the jackshaft setup.

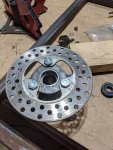
Also to further my front hubs I had some plates cut out for the disc brake using a trx400 front rotors and will be using YFZ450 front calipers. All of which I have laying around so free for me!!!

The swingarm jig is welded together...mostly. just have to tweak a couple of things and I can build new and a little shorter length arms. May use it for the front a-arms as well.

All of this has been designed by me and has been actually pretty cheap to do, benefits of cutting your own parts!
 

Attachments

  • IMG_20200219_084758.jpg
    IMG_20200219_084758.jpg
    401 KB · Views: 6
  • IMG_20200218_200810_011.jpg
    IMG_20200218_200810_011.jpg
    85.4 KB · Views: 6
  • IMG_20200219_111651_043.jpg
    IMG_20200219_111651_043.jpg
    115.4 KB · Views: 7
  • IMG_20200215_193414.jpg
    IMG_20200215_193414.jpg
    363.1 KB · Views: 8
  • IMG_20200207_192645.jpg
    IMG_20200207_192645.jpg
    405.3 KB · Views: 8

5814SpeedCo

Member
Messages
150
Reaction score
8
Location
Fort Worth, TX
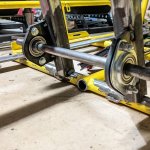
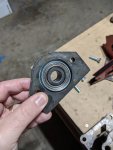
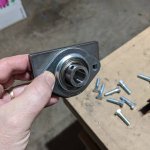
Here are a few shots of the jackshaft bearing mount plates. All the plates. I'll be adding a gusset top and bottom for additional strength to alleviate any flexibility that may occur
 

Attachments

  • IMG_20200218_195654.jpg
    IMG_20200218_195654.jpg
    246.5 KB · Views: 6
  • IMG_20200218_200809_986.jpg
    IMG_20200218_200809_986.jpg
    80.1 KB · Views: 5
  • IMG_20200218_200809_987.jpg
    IMG_20200218_200809_987.jpg
    138.9 KB · Views: 5

Bansil

Painter of gnomes....
Messages
1,414
Reaction score
1,117
Location
Mnts of the farthest NE TN you can go
:innocent:You need to fire your laser/plasma guy for giving you parts with dross on them still ;)

BUT...free means you cant complain :popcorn:

So do you have a build thread or just a bunch of random threads on various landscapes associated with a kart?

I couldnt find one
 

5814SpeedCo

Member
Messages
150
Reaction score
8
Location
Fort Worth, TX
:innocent:You need to fire your laser/plasma guy for giving you parts with dross on them still ;)

BUT...free means you cant complain :popcorn:

So do you have a build thread or just a bunch of random threads on various landscapes associated with a kart?

I couldnt find one

Yeah by free it means I do all the cleaning of the parts which is fine by me if keeps cash in my pocket!

I don't have an actual build thread but I will keep it all contained to this one from here on out.
 

5814SpeedCo

Member
Messages
150
Reaction score
8
Location
Fort Worth, TX
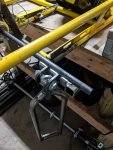
Started working on the pivot points for the trailing arms. I'll have gussets added to connect the square tube to back to the frame. But after looking at it and was so wrapped up in my head that I realized after I tacked the mounts in place I need them on the same horizontal plane as the jackshaft.

Which is fine, I"ll be adding a roll cage to this one and part of the original side rail will be removed. I have it figured out how to move the mounts. Just need time this weekend to do it!

So sort of back to the drawing board a little.
 

Attachments

  • IMG_20200223_203127_886.jpg
    IMG_20200223_203127_886.jpg
    83.4 KB · Views: 10
  • IMG_20200223_201957.jpg
    IMG_20200223_201957.jpg
    326.8 KB · Views: 9
  • IMG_20200223_202029.jpg
    IMG_20200223_202029.jpg
    353.8 KB · Views: 9
  • IMG_20200223_202018.jpg
    IMG_20200223_202018.jpg
    319.4 KB · Views: 6

5814SpeedCo

Member
Messages
150
Reaction score
8
Location
Fort Worth, TX
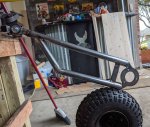
Well I had to relocate the mounts for the jackshaft setup by making the mounts a little wider and got them inline with the pivot location of the trailing arms. I still need to modify the frame a little so I can fit the sprockets on it.

No big deal though, just add a notched out area and reinforce that part of the frame. I also went back and designed a new/beefier trailing arm. I stepped up to 1 1/4" tubing and the axle mounting plates are 3/8" steel. Some bracing will be added in and also have to work on shock mounts.

So a few things to tidy up on the back end and then I can start on the front end!

If I could get the two weeks quarantine I could have all of this done....
 

Attachments

  • IMG_20200315_144724.jpg
    IMG_20200315_144724.jpg
    367.6 KB · Views: 6
  • IMG_20200315_144737.jpg
    IMG_20200315_144737.jpg
    388.2 KB · Views: 6
  • IMG_20200315_183304_459.jpg
    IMG_20200315_183304_459.jpg
    120.9 KB · Views: 5

5814SpeedCo

Member
Messages
150
Reaction score
8
Location
Fort Worth, TX
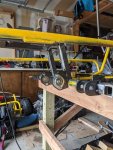
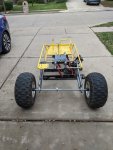
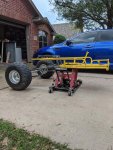
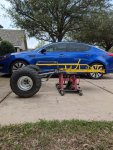
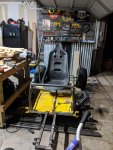
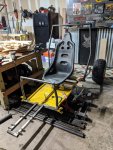
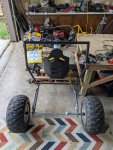
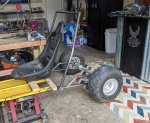
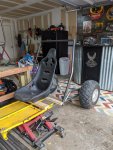
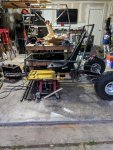
Had to stay home for a few days and got some work done. With the support of a bike lift she is standing on her hind legs! Still got a lot to do and yes there will be more work done on the rear end.

The small yellow plate will be cut off and there will be a full cage added to it as well. It's actually pretty light right now and predict the end weight won't be as much either.
 

Attachments

  • kart 3.jpg
    kart 3.jpg
    80.8 KB · Views: 8
  • kart 2.jpg
    kart 2.jpg
    102.2 KB · Views: 7
  • kart 1.jpg
    kart 1.jpg
    126.3 KB · Views: 9

5814SpeedCo

Member
Messages
150
Reaction score
8
Location
Fort Worth, TX
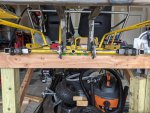
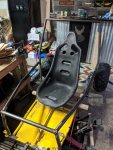
Been slow building with all this virus stuff going on and still working every day. But I had some time the past couple of days to do the front and rear of the roll cage.

I'm waiting on a few more brackets to be cut out to be able to sit the rear end on the ground on it's own support. Should be able to by the weekend.

As far as the front I need to work on the upper spindles and get some hardware then I'll be able to have it sitting on it's own feet all around.

For now here's where I'm at.
 

Attachments

  • Buggy 5.jpg
    Buggy 5.jpg
    92.4 KB · Views: 4
  • Buggy 4.jpg
    Buggy 4.jpg
    102.1 KB · Views: 5
  • Buggy 3.jpg
    Buggy 3.jpg
    106.8 KB · Views: 7
  • Buggy 2.jpg
    Buggy 2.jpg
    114.1 KB · Views: 9
  • Buggy 1.jpg
    Buggy 1.jpg
    97.6 KB · Views: 5

Bansil

Painter of gnomes....
Messages
1,414
Reaction score
1,117
Location
Mnts of the farthest NE TN you can go
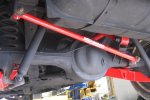
Right now using 2 hiem joints the rear can move side to side about 15* or 30*, a panhard bar locates rearend side to side.


You want it as flat as possible say 1/2 of suspension travel, to make side to side movement equal, or you can even preload it to make suspension act differently depending on terrain
 

Attachments

  • 3658-b-2.jpg
    3658-b-2.jpg
    71.1 KB · Views: 4

5814SpeedCo

Member
Messages
150
Reaction score
8
Location
Fort Worth, TX
Ok I see what you are saying. Yeah I plan on adding in some links to prevent lateral movement. I have to get the engine mount back in and all the sprockets and chain on to see where exactly I will be putting them.
 

5814SpeedCo

Member
Messages
150
Reaction score
8
Location
Fort Worth, TX
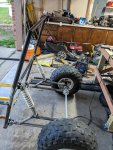
Got the side rails in and the rear end supporting itself. Have to make a couple of adjustments on it and then it will be time to finish the front.

Then on to tweaking the motor mount setup. Loving the custom built rear end!
 

Attachments

  • IMG_20200409_195340.jpg
    IMG_20200409_195340.jpg
    428.6 KB · Views: 9
  • IMG_20200409_200014.jpg
    IMG_20200409_200014.jpg
    420.2 KB · Views: 8
  • IMG_20200410_195032.jpg
    IMG_20200410_195032.jpg
    482.7 KB · Views: 9
  • IMG_20200410_195304.jpg
    IMG_20200410_195304.jpg
    486.7 KB · Views: 8
Top