Shifter Cart Inventor Design

Status
Not open for further replies.

Thedude

New member
Messages
102
Reaction score
0
Location
Washington State
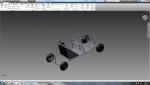
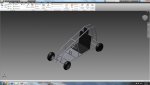
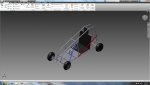
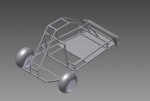
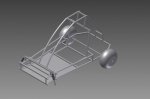
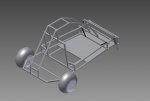
Hi everyone, last week I decided I wanted to start building go karts/mini bikes again. This is the design for a shifter kart I came up with. I didn't put the pedals or the motor mounts in the design yet because I don't know what motor I'll be able to get yet. What do you guys think will/won't work?

I'm 14 and have almost no money right now so I won't start building it for a while. Right now I just want to get a solid design so that when I have the money I can just start building.
 

Attachments

  • 32012.jpg
    32012.jpg
    44.1 KB · Views: 39
  • 320122.jpg
    320122.jpg
    43.9 KB · Views: 25

Jake.B

New member
Messages
495
Reaction score
0
Location
California-USA
Seems like a nice design maybe larger tires. I would go with around 250cc - 400cc quad or dirtbike engine to give sufficient power and a good gearing. Take the wheels off of the quad if you use one to give it the correct gearing.
 

exenos

Project Nut
Messages
1,217
Reaction score
0
Location
Ontario, Canada
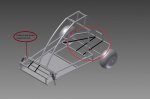
I would make it about 12 inches wider because it only looks about 2.5-3 feet wide and will be very tippy past 20-25 mph. secondly reverser the front steering, you want the tie rods to be behind so the frame will protect them if you run into something (you will). Also i would move the rear axle up to within 6 inches of the seat to shorten the turning radius as much as possible because a wide turning radius is a complete nightmare on go karts. Next consider where the roll cage is, it's right where you put your head. It really should be around 3 inches above your head when you sit in it, and since your 14 i would add quite a bit of space for you to grow. Speaking from experience, it's very annoying to find out that you grew 5 inches in the 6 months it took you to build the kart and that it's now too small to be comfortable. Since you have no suspension i would suggest using larger wheels than what you have in the drawing, just take a look at any of bighead's honda oddy's 18 inch or so balloon tires in the back to act as suspension. You should also think about a real seat and not a home made one (not sure if the one in the model is just a place holder or not) the home made one will work fine but it might hurt your back while riding it. If you want to save some money the pillow block bearings on the steering shaft are over kill and can be replaced with bushings if you wish since it will not have to withstand any rapid rotational motion. And just as a word of caution i would not go with any thing above 10 hp unless you added some bracing like i put in the picture. The red line is a brace that almost needs to be put in and the blue line is a brace that i would suggest putting in but not necessary.

Sorry about the wall of text but it's just some stuff that will probably save you a lot of searching.(i hope)
 

Attachments

  • 320122.jpg
    320122.jpg
    78.2 KB · Views: 15

Thedude

New member
Messages
102
Reaction score
0
Location
Washington State
Thanks for the detailed response, helps alot. I'm making revisions to the frame right now. How hard would it be to add front suspension? I don't wana mess with rear yet so I'll put on some big tires.
 

exenos

Project Nut
Messages
1,217
Reaction score
0
Location
Ontario, Canada
Putting front suspension on is not that hard,it is just time consuming. I would use some short travel A arms since you plan on having no rear suspension. And since you stated that you have time before you build it i would do some research into proper steering geometry such as proper king pin inclination, ackerman angle ( some info on ackeram http://www.auto-ware.com/setup/ack_rac.htm ) and different length A arms.
 

exenos

Project Nut
Messages
1,217
Reaction score
0
Location
Ontario, Canada
Looks much sturdier now. I like how you added a flat section at the top of the roll bar so your head wont stick out. The only possible problem with the roll bar that i see is the two large radius bends in the metal that are needed, how are you going to make them? I don't like the large open area in the rear (red oval). Adding some bracing like the black lines would increase the strength and reduce the possibility of the frame warping while under stress, as a benefit from that the two parallel bars that I drew in can be used as the engine mount. You might also want to put a third pillow block for the axle where I put the red dot to reduce the stress on the axle, then you can put the sprocket and brake disk in between that and the closest wheel.

The shock mount in the front looks fine as long as it is made out of 1" square tubing or larger. Also where the roll bars connect to the front i would remove that bar and move the roll bars up to the suspension bar and put two diagonal braces on the suspension bar like i have in the picture. Then add two 45 degree diagonals like i have in the second picture to brace the top A arm mounts. Hope that last part was clear enough, if not just ask.
 

Attachments

  • Design 2(2).jpg
    Design 2(2).jpg
    67 KB · Views: 6
  • Desgin 2 2.jpg
    Desgin 2 2.jpg
    76.4 KB · Views: 2
Status
Not open for further replies.
Top