Metal_Rott
New member
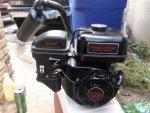
Hey ya'll I just bought this Pred 212 for $30 at the flea market. Guy couldn't get it to start so he practically gave it to me. I knew what was the problem but I wasn't going to say. It was the low oil level shutoff. He didn't add enough oil or simply d/c the wire.
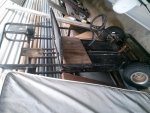
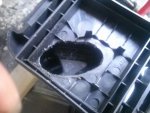
Anyhow It started like a match when I removed Oil sensor. I also went ahead and removed governor. I removed everything that had to do with it and the oil sensor. First real mod I did was re-jett the carb, and Man did it make a difference. But it was still a little sluggish. I noticed the Air filter box is extremely restrictive so I sawed out a much larger hole (see pic) I also gasket matched the carb spacer(no pic yet)
The ports were pretty big but I went ahead an honed them a bit larger and removed most of the valve bumps on both sides. I re-lapped the valves and hammered the intake rocker arm a little bit for some extra lift. lol.
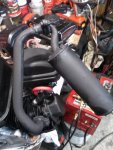
The exhaust was horribly restrictive so I modified an old Vanguard header and attached an empty brake cleaner can for some sound. ( i love the sound lol) I have put baffling inside and it shut the tin pop sound completely. So it has two tones, loud and quite.
I advanced timing my 8 degrees by notching the key.
Removed head gasket for a little more compression.
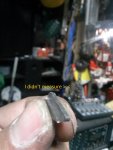
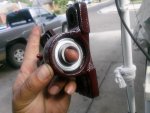
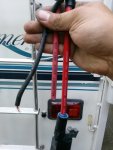
I made this BAD*** Dragon Fire 10.5 mm spark plug wire that my dad had lying around from his twin turbo impala.(see pic for comparison)
I tried to adapt a vacuum fuel pump but it wasn't working it's too old. but I left the Screw tap there ready for when I/if/I get one.
Everything done and buttoned up and it's a real rowdy bastard garage junky lunatic of a motor. I can imagine if I actually had good parts to install ! So far I am $30 deep and I'm pretty sure it's hitting the 9-10 hp range.
I would love to get an aluminum flywheel some springs and a cam but you know...money. I ain't got non !
Let me know what else I can do to maybe push this thing to it's breaking point. I really would like to know it's max rpm in this stage. It get's pretty high up there.
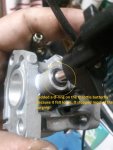
Ended up boring the carb out 5/8 inch. I think it still had more room but I didn't want to push it till I have one for scrap. Put an O-ring on top of the throttle butterfly shaft. It looked leakyish to me.(see pic)
Anyhow It started like a match when I removed Oil sensor. I also went ahead and removed governor. I removed everything that had to do with it and the oil sensor. First real mod I did was re-jett the carb, and Man did it make a difference. But it was still a little sluggish. I noticed the Air filter box is extremely restrictive so I sawed out a much larger hole (see pic) I also gasket matched the carb spacer(no pic yet)
The ports were pretty big but I went ahead an honed them a bit larger and removed most of the valve bumps on both sides. I re-lapped the valves and hammered the intake rocker arm a little bit for some extra lift. lol.
The exhaust was horribly restrictive so I modified an old Vanguard header and attached an empty brake cleaner can for some sound. ( i love the sound lol) I have put baffling inside and it shut the tin pop sound completely. So it has two tones, loud and quite.
I advanced timing my 8 degrees by notching the key.
Removed head gasket for a little more compression.
I made this BAD*** Dragon Fire 10.5 mm spark plug wire that my dad had lying around from his twin turbo impala.(see pic for comparison)
I tried to adapt a vacuum fuel pump but it wasn't working it's too old. but I left the Screw tap there ready for when I/if/I get one.
Everything done and buttoned up and it's a real rowdy bastard garage junky lunatic of a motor. I can imagine if I actually had good parts to install ! So far I am $30 deep and I'm pretty sure it's hitting the 9-10 hp range.
I would love to get an aluminum flywheel some springs and a cam but you know...money. I ain't got non !
Let me know what else I can do to maybe push this thing to it's breaking point. I really would like to know it's max rpm in this stage. It get's pretty high up there.
Ended up boring the carb out 5/8 inch. I think it still had more room but I didn't want to push it till I have one for scrap. Put an O-ring on top of the throttle butterfly shaft. It looked leakyish to me.(see pic)
Attachments
-
 040.jpg82.9 KB · Views: 43
 -
 049.jpg80.1 KB · Views: 28
 -
 046.jpg70.3 KB · Views: 45
 -
 044.jpg101.4 KB · Views: 40
 Right now I'm on a mission to blow one up(I get excited to see something surp*** it's potential) I don't want to spend as much as I would like to spend, I'm not cheap i'm poor