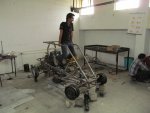
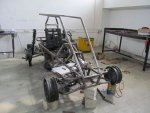
Off road buggy ...

Status
Not open for further replies.

OzFab

Well-known member
Messages
15,615
Reaction score
67
Location
Warwick Qld, Australia
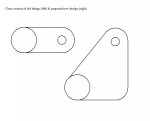
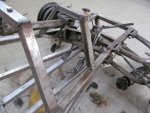
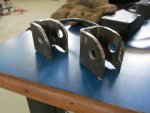
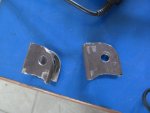
The new design control arm should do the trick but, keep in mind that modifying them in that way will effectively shorten them because the pivot point has moved; may I suggest you simply raise the pivot hole by using a triangular piece of steel (see pic below)

I would also suggest you look at the upper arms too, it appears you may have a clearance issue there too; to me, the mounting bracket seems to be on the wrong angle, almost like you mixed up the two arms (left arm is on the right, etc...)
 

Attachments

  • Rear Hub Lower Mount.jpg
    Rear Hub Lower Mount.jpg
    32.9 KB · Views: 5

rvndraju

New member
Messages
63
Reaction score
0
Location
india (bangalore)
The new design control arm should do the trick but, keep in mind that modifying them in that way will effectively shorten them because the pivot point has moved; may I suggest you simply raise the pivot hole by using a triangular piece of steel (see pic below)

I would also suggest you look at the upper arms too, it appears you may have a clearance issue there too; to me, the mounting bracket seems to be on the wrong angle, almost like you mixed up the two arms (left arm is on the right, etc...)

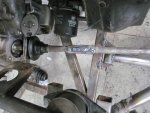
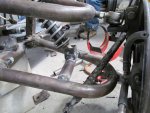
thanks a lot for your advice fabroman. :iagree: I was aware of the change in control arm length when the pivot is raised. actually the arm length between two pivot is 340mm so i raised the hole up by maintaining the above dimension and it came out well. We made the modification today and we mounted the CV successfully :wai:.

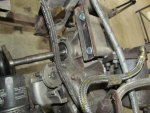
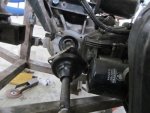
In the picture due to the CV touching the lower arm it seems to be raised a bit (U can observe that spline on the shaft is not in line with the hub) due to which clearance has reduced between upper arm & CV. But when we mounted it today there was a good clearance between the CV & upper arm also the lower arm. :cheers2:
 

rvndraju

New member
Messages
63
Reaction score
0
Location
india (bangalore)
You have two holes in the spindle

Go the top hole
Surely?

It could have been done but now since we have fabricated the upper arm to match the lower mount on the spindle changing the mount to upper hole will change the camber anger of the wheel, like we designed it to get a optimal negative camber, if the mounts are changed camber will go positive :(
 

rvndraju

New member
Messages
63
Reaction score
0
Location
india (bangalore)
After a long time :)

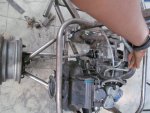
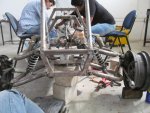
Hi mates i got busy with my seminar presentation so we did not work from past 2 days. But We worked on Tuesday & wednesday and could complete the rear end.

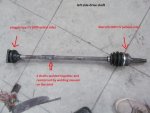
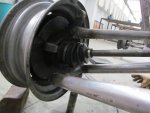
The axles where giving us lot of trouble so we had to work on it a lot and wasted too much time on it. Sines two different axles had to be welded together to suite our requirement it was a time consuming job :( .

The right side axle was too short and more inclined so the axle plunge which we got was too less so it restricted the wheel travel to 100mm :( . But the left side had a good travel because the length of the axle was big and was also less inclined.

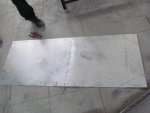
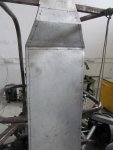
After completing the rear end we started of with some body work. Brought a 4ft*8ft GI sheet from a scrap yard near my place it was weighing around 12.5 kg and shop guy charged us $8

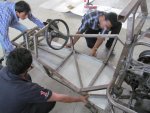
started covering the base and firewall. the sheets will be screwed to the frame. We tried welding it but 50amps current (least in out m/c) was melting of the sheet with just a touch of the torch.

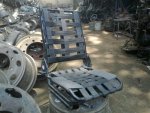
Tomorrow we are heading to buy seat :wai:. We are buying a truck seat actually but it suits best for off-road also. I will post pic of the seat tommorw
 

Attachments

  • IMG_2096 (Medium).jpg
    IMG_2096 (Medium).jpg
    94 KB · Views: 18
  • IMG_2097 (Medium).jpg
    IMG_2097 (Medium).jpg
    79.6 KB · Views: 16
  • IMG_2104 (Medium).jpg
    IMG_2104 (Medium).jpg
    73.8 KB · Views: 25
  • IMG_2108 (Medium).jpg
    IMG_2108 (Medium).jpg
    75.5 KB · Views: 18
  • IMG_2111 (Medium).jpg
    IMG_2111 (Medium).jpg
    91.6 KB · Views: 25
  • IMG_2118 (Medium).jpg
    IMG_2118 (Medium).jpg
    91.7 KB · Views: 33
  • IMG_2117 (Medium).jpg
    IMG_2117 (Medium).jpg
    82.7 KB · Views: 22
  • IMG_2116 (Medium).jpg
    IMG_2116 (Medium).jpg
    56.4 KB · Views: 14
  • IMG_2115 (Medium).jpg
    IMG_2115 (Medium).jpg
    93.6 KB · Views: 19
  • IMG_2112 (Medium).jpg
    IMG_2112 (Medium).jpg
    99.1 KB · Views: 20

rvndraju

New member
Messages
63
Reaction score
0
Location
india (bangalore)
Seat

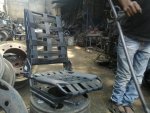
Today is holiday so could not work so we went to buy seat, clutch, throttle, gear cables. paid $17 :wai: for the seat and $10 for all the cables. the seat is actually used in trucks and modified off road jeeps it has a front-back sliding and reclining mechanism the shop guy demanded $15 extra for mounting height adjustment mechanism but we decided not to wast money for that.

Monday we will start mounting the seat and work in mounting the rear shocks.
 

Attachments

  • 05042014578 (Medium).jpg
    05042014578 (Medium).jpg
    103.3 KB · Views: 21
  • 05042014579 (Medium).jpg
    05042014579 (Medium).jpg
    98.1 KB · Views: 14

rvndraju

New member
Messages
63
Reaction score
0
Location
india (bangalore)
Progress after 2 days

Work completed in past 2 days

  • Seat was mounted.
  • The Master cylinder and pedal assembly was mounted
  • Finalized the steering column & optimal pedal position.
  • The Roll cage was permanently welded to the chassis.


Work remaining

  • Mounting front and rear suspension
  • Mounting Fuel filter & air filter
  • Fixing the base sheet and body work
  • Painting
  • MOunting tires
  • Custom manifolds for dual EXHAUST
  • Fixing brake hoses
 

Attachments

  • IMG_2152 (Medium).jpg
    IMG_2152 (Medium).jpg
    92.3 KB · Views: 12
  • IMG_2145 (Medium).jpg
    IMG_2145 (Medium).jpg
    94.6 KB · Views: 9
  • IMG_2142 (Medium).jpg
    IMG_2142 (Medium).jpg
    79.6 KB · Views: 9
  • IMG_2140 (Medium).jpg
    IMG_2140 (Medium).jpg
    70.7 KB · Views: 10
  • IMG_2131 (Medium).jpg
    IMG_2131 (Medium).jpg
    56.5 KB · Views: 11
  • IMG_2153 (Medium).jpg
    IMG_2153 (Medium).jpg
    89.2 KB · Views: 8
  • IMG_2154 (Medium).jpg
    IMG_2154 (Medium).jpg
    69.8 KB · Views: 13
  • IMG_2155 (Medium).jpg
    IMG_2155 (Medium).jpg
    62.1 KB · Views: 9
  • IMG_2159 (Medium).jpg
    IMG_2159 (Medium).jpg
    78.7 KB · Views: 11
  • IMG_2160 (Medium).jpg
    IMG_2160 (Medium).jpg
    80.7 KB · Views: 21

rvndraju

New member
Messages
63
Reaction score
0
Location
india (bangalore)
help needed

hi mates we brought Maruthi 800 front coil over shock to use it in our rear suspension. The problem is when the strut was mounted the top mount was too high, like it was above the mounting frame. so we decided to shorten the length of the strut

Any suspension experts please look into this and give some suggestions :idea2: .

we are planning to shorten the length by cutting off the tube below the spring but i was worried like what if it is the oil reservoir :(

Pictures added for more detail :popcorn:
 

Attachments

  • IMG_2123 (Medium).jpg
    IMG_2123 (Medium).jpg
    86.2 KB · Views: 18
  • IMG_2120 (Medium).jpg
    IMG_2120 (Medium).jpg
    75.9 KB · Views: 13

jslider

New member
Messages
60
Reaction score
0
Location
phoenix az
The whole section for mount is the reservoir on these typically if going to use this strut would be better to fabricate a towewr for it. I am not 100% but think if you cut where you indicated you will let out the fluids and part will be useless.
 

OzFab

Well-known member
Messages
15,615
Reaction score
67
Location
Warwick Qld, Australia
I'm unfamiliar with that particular strut but, in most cases, the whole lower section is the reservoir...

To make a proper determination, remove the cap & spring, measure the exposed extension then transfer that measurement to the lower section, that should give you an indication as to how far the shock will travel...
 

firemanjim

Just kartin' around....
Messages
5,247
Reaction score
86
Location
Houston Texas
Take the struts back and see if they will trade you for shorter ones. Or do as jslider suggested and build a tower mount, like on a competition sand rail.... Or trophy truck....
If you cut that strut, it's useless......
This is a military version.... Same principle.....
 

Attachments

  • Sandrail_-_Military_application.jpg
    Sandrail_-_Military_application.jpg
    123 KB · Views: 30

rvndraju

New member
Messages
63
Reaction score
0
Location
india (bangalore)
front shock mount

Take the struts back and see if they will trade you for shorter ones. Or do as jslider suggested and build a tower mount, like on a competition sand rail.... Or trophy truck....
If you cut that strut, it's useless......
This is a military version.... Same principle.....

Thank you mate, as you and jslider suggested i am going for the tower mount setup :thumbsup:. since it's a bit complicated i will start of with it after mounting front shocks which will be completed tomorrow.
after drilling and tapping the holes the base and firewall sheets where screwed to the frame.
 

Attachments

  • IMG_2164 (Medium).jpg
    IMG_2164 (Medium).jpg
    58.7 KB · Views: 10
  • IMG_2165 (Medium).jpg
    IMG_2165 (Medium).jpg
    67.1 KB · Views: 7
  • IMG_2180 (Medium).jpg
    IMG_2180 (Medium).jpg
    103.1 KB · Views: 15
  • IMG_2181 (Medium).jpg
    IMG_2181 (Medium).jpg
    101.1 KB · Views: 15
  • IMG_2182 (Medium).jpg
    IMG_2182 (Medium).jpg
    105.8 KB · Views: 26
  • IMG_2183 (Medium).jpg
    IMG_2183 (Medium).jpg
    61.9 KB · Views: 13
  • IMG_2184 (Medium).jpg
    IMG_2184 (Medium).jpg
    77.4 KB · Views: 12
Last edited by a moderator:

mckutzy

Well-known member
Messages
8,353
Reaction score
108
Location
bc, canada
Wow. You guys have achieved alot, but like I said before you guys should stop what your doing, put down the tools, and start researching how to use the tools you have properly.

You need a WELDING HELMET not a face shield with or with out sunglasses.
Your school should have at least tought you guy that before you started.

Here is what a helmet looks like, if you guys aren't blind yet....
http://www.directindustry.com/prod/singer-freres/welding-helmets-23460-833501.html
 

jslider

New member
Messages
60
Reaction score
0
Location
phoenix az
You really should get a good welding helmet, i know they may be more expensive if you dont have a harbor freight on the corner but protecting your eyes is very important you only get one set.
 

OzFab

Well-known member
Messages
15,615
Reaction score
67
Location
Warwick Qld, Australia
Motion carried! It doesn't matter what part of the world you're in, you should be able to pick up a suitable welding helmet for around (the equivelent to) $20-$30.

Science hasn't perfected the eye transplant yet...

In case you guys haven't noticed, we take safety VERY SERIOUSLY! As already mentioned, you are doing great work but, is the end result worth the ability to see?
 

fowler

New member
Messages
5,463
Reaction score
16
Location
Bullsbrook West Aus
We were talking to a welder in Bali when I went on a holiday with friends

I've there they didn't even know what a welding helmet was let alone where to get one

The career of a welder is from age 14 or there about
Till 20 (or there about )
When they can't see good enough to continue

The reason it hurts to look at it like it hurts to look at the sun is because it's the same as the sun

Same types of light emitted
 

landuse

Moderator
Staff member
Messages
18,747
Reaction score
520
Location
Pietermaritzburg, South Africa
Hello every one thank you so much for all ur concerns. actually that was my first time welding though, i really dint know that i should wear a welding helmet i thought just the welding goggles would be sufficient. but after 2 days of welding i felt burning sensation when ever i wash my face & then slowly skin started peeling on my forehead and cheeks then i came to know the importance of wearing a welding helmet or mask from then on i started using them. :lolgoku:

From this post of yours it looks like you guys have welding helmets. PLEASE use them!
 

Doc Sprocket

*********
Messages
15,677
Reaction score
144
Location
Ontario, Canada
I feel I have to chime in here, and repeat what others have said with regards to safety. I've had the arc burn on my skin. I've cut my own hands with a grinder. I had a metal shard lodged in my left eye for four days and it began to rust in there. Been there, done that, learned. I have been lucky, things could have been worse.

That said, we have to be careful of the image that we are projecting. Others follow this forum for inspiration and ideas, and we need to set a better example.

We can only tell you so many times to protect yourselves, and after that- well- you're basically on your own. However- when you display a disregard for safety or the proper use of PPE (personal Protective Equipment), you're setting a bad example that we just cannot condone.

I like the project and it looks like it's progressing nicely, but something must change, and immediately. Short of deleting the thread (which I do NOT want to do) I'm going to suggest that any further pictures of work being performed without proper regards to common safety practices, simply not be shown. If you wish to show pictures of the machine itself, great- by all means. But do not show pictures of work being performed improperly.

I am also going to suggest that previous posts be sorted through, with the offending pics deleted. (EDIT- I've gone ahead and done that, I think I got them all.)

Guys- we don't want to discourage you, or the build- far from it. What we wish to discourage is unsafe work practices. Thank you.
 
Status
Not open for further replies.
Top