• OFF TOPIC fun forum - NO politics - NO religion - NO jerks. It's not complicated. Thanks!

My toy hauler thread

Status
Not open for further replies.

supermanotorious

Winchmaster 5000
Messages
2,088
Reaction score
103
Location
New River, AZ
Them boys were right on it!


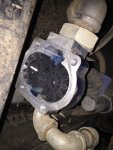
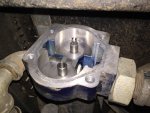
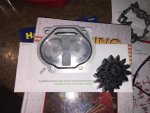
I am not sure what the width was back at that time as we have made some changes to the gears over time. The current gear measures .898 to .903.
The gear kit is Graco part 260277
Regards,

Allan
Graco Lubrication Equipment Technical Assistance
800-533-9655
www.graco.com
 

supermanotorious

Winchmaster 5000
Messages
2,088
Reaction score
103
Location
New River, AZ
UNBELIEVABLE!

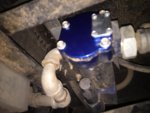
a little sanding of both faces on both gears in a figure-8 motion on 150 grit paper and the pump is whirring and spitting out a smooth high volume low pressure stream of fuel!:wai::wai::wai:

here are some additional pictures for your viewing pleasure
 

Attachments

  • 011.jpg
    011.jpg
    288.7 KB · Views: 6
  • 012.jpg
    012.jpg
    297.9 KB · Views: 5
  • 015.jpg
    015.jpg
    351.2 KB · Views: 7
  • 016.jpg
    016.jpg
    147 KB · Views: 4

supermanotorious

Winchmaster 5000
Messages
2,088
Reaction score
103
Location
New River, AZ
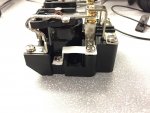
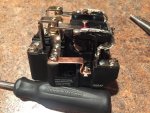
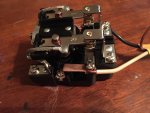
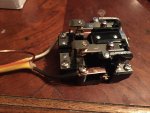
prepping the new 30amp relay for this toy hauler, realized I didn't need the "signal" cable to the relay since the 110v input goes to the normally open contacts and the relay coil, made these tabs to make the connection, when shore power comes in, it overrides the relay and passes itself on to the electric panel
 

Attachments

  • 002.jpg
    002.jpg
    258.1 KB · Views: 0
  • 005.jpg
    005.jpg
    349.8 KB · Views: 0
  • 006.jpg
    006.jpg
    332.8 KB · Views: 1

supermanotorious

Winchmaster 5000
Messages
2,088
Reaction score
103
Location
New River, AZ
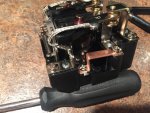
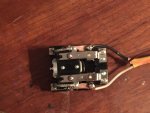
testing 10ga wire with the copper "bridge" in place, everything is playing nicely!
 

Attachments

  • 004.jpg
    004.jpg
    222.7 KB · Views: 2
  • 002.jpg
    002.jpg
    298.6 KB · Views: 1
  • 001.jpg
    001.jpg
    305.5 KB · Views: 2

chancer

ɔ ɥ ɐ u ɔ ǝ ɹ
Messages
9,358
Reaction score
93
Location
COMFORT, TEXAS
On the A-C Condensers I work on we use a 220v Contactor. Sometime it uses a single pole and the side with the "Bridge" they call a "Shunt".

So "Shunt" maybe.
 

supermanotorious

Winchmaster 5000
Messages
2,088
Reaction score
103
Location
New River, AZ
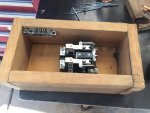
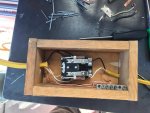
thanks mang, also I'm struggling to find an appropriate "project box" for this open frame relay, last time I used a 4x4x4 all-weather electrical box but I was never happy with it, I'm thinking something like a 8"L x 4"W x 3"H would be ideal
 

supermanotorious

Winchmaster 5000
Messages
2,088
Reaction score
103
Location
New River, AZ
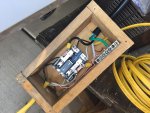
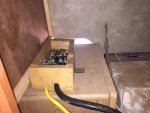
with renewed energy today I decided to change things up a bit, rather than squeeze all the new components behind the converter, I took advantage of a rather large, unused space under the kitchen sink area, above the electrical panel "box", gave me another 1' or so of shore line and cleaned up the install so well, all I do is win win win no matter what

made that "L" bracket from an old bed frame.
 

Attachments

  • 007.jpg
    007.jpg
    223.6 KB · Views: 1
  • 002.jpg
    002.jpg
    292.2 KB · Views: 3
  • 001.jpg
    001.jpg
    237.5 KB · Views: 4
  • 014.jpg
    014.jpg
    320.1 KB · Views: 2

chancer

ɔ ɥ ɐ u ɔ ǝ ɹ
Messages
9,358
Reaction score
93
Location
COMFORT, TEXAS
Win Win Win. Your gonna get so Tired of Winning!
That is a Great looking box. The whole situation is just Tremendous. I mean it is so Spectacular. Its just So Beautiful. I'm Really Really Rich.
 

supermanotorious

Winchmaster 5000
Messages
2,088
Reaction score
103
Location
New River, AZ
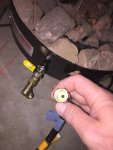
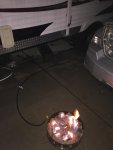
I decided to pick up a propane fire pit to use in fire restricted camp sites, this was on sale at Big 5 and I was out the door for under $70

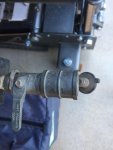
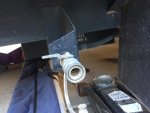
the trailer has a 1/2" LP quick disconnect I want to be able to plumb the fire ring in to

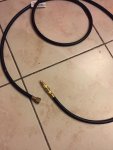
the ring came with a regulator plus 6' hose for a standard propane tank, I'll need to replace that line with one roughly 10' or more, that will connect to the quick fitting, and I'd prefer that line would also connect to a larger propane grill should I ever get one

my research so far has proved that 1/2" propane lines are really expensive, like exponentially more expensive than 3/8" lines

would it be more cost effective to get the 1/2" 'male' quick connect fitting then reduce it to 3/8", or would I be better off replacing the 1/2" 'female' with a 3/8" female?

where would be the best place to get the parts from? Amazon? locally? truth be told I've never worked with propane quite in this manner before


p.s. it's the darndest thing chancey, I'm not tired of winning!
 

Attachments

  • 054.JPG
    054.JPG
    183.7 KB · Views: 3
  • 050.JPG
    050.JPG
    310.6 KB · Views: 2
  • 055.jpg
    055.jpg
    167.1 KB · Views: 5
  • 019.jpg
    019.jpg
    193.1 KB · Views: 2
  • 015.jpg
    015.jpg
    259.3 KB · Views: 2
  • 049.jpg
    049.jpg
    349.7 KB · Views: 9

supermanotorious

Winchmaster 5000
Messages
2,088
Reaction score
103
Location
New River, AZ
well I have no idea what the thread size is on the male quick connect for the hose, it could be smaller than 1/2", I had ordered one on Amazon for $7, it wont be here for a couple weeks though
 

supermanotorious

Winchmaster 5000
Messages
2,088
Reaction score
103
Location
New River, AZ
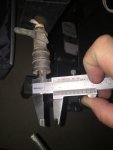
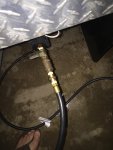
doggone it is a 1/4" male, whodathunk?! well another win for this ol' dawg, got a 9' hose at Ace, one female to female adapter (boy the clerk got excited when I asked for that, then he called it a union, ruining everyone's day) and we're quick fitted up!
 

Attachments

  • 006.jpg
    006.jpg
    195.5 KB · Views: 1
  • 005.jpg
    005.jpg
    306.2 KB · Views: 3
  • 004.jpg
    004.jpg
    244.8 KB · Views: 2
  • 003.jpg
    003.jpg
    272.2 KB · Views: 2

supermanotorious

Winchmaster 5000
Messages
2,088
Reaction score
103
Location
New River, AZ
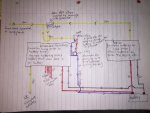
oh, and here is a diagram for my ultra brilliant automatic transfer switch I just drew for a friend to help him sell his woman on the idea of buying an inverter
 

Attachments

  • 001.jpg
    001.jpg
    259.7 KB · Views: 9

supermanotorious

Winchmaster 5000
Messages
2,088
Reaction score
103
Location
New River, AZ
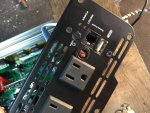
This inverter aint got no "legit" 110V ground. So I'm thinking, simply make a ground to the aluminum housing, who agrees?
 

Attachments

  • IMG_2192[1].jpg
    IMG_2192[1].jpg
    481.3 KB · Views: 1

supermanotorious

Winchmaster 5000
Messages
2,088
Reaction score
103
Location
New River, AZ
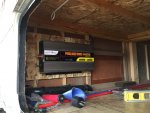
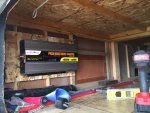
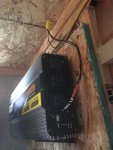
I opted to disregard the ground, alrighty then, inverter is mounted and hardwired!

I connected a temporary battery and the automatic transfer system is working perfectly, all that is left is to install the battery bank
 

Attachments

  • IMG_2197.JPG
    IMG_2197.JPG
    268.4 KB · Views: 1
  • IMG_2196.JPG
    IMG_2196.JPG
    324.9 KB · Views: 2
  • IMG_2195.JPG
    IMG_2195.JPG
    321.4 KB · Views: 1
  • IMG_2194.JPG
    IMG_2194.JPG
    284.4 KB · Views: 1
  • IMG_2193.JPG
    IMG_2193.JPG
    196.3 KB · Views: 1
  • IMG_2198.JPG
    IMG_2198.JPG
    327.2 KB · Views: 2

supermanotorious

Winchmaster 5000
Messages
2,088
Reaction score
103
Location
New River, AZ
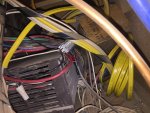
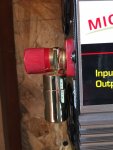
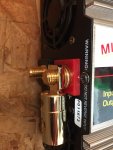
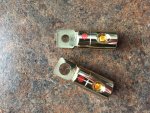
Nothing worth doing is ever easy, is it?! The termnals I bought from Amazon are great but dont fit over the inverter's lugs which are a non-standard M12 (of course). I carefully drilled them to 15/32" and they fit perfectly BUT they are not offset enough to not interfere with the lug housing on the inverter. So they need to be spaced outward. I was hoping to find some M12 nylon lock jam nuts at my Ace Hardware. They had M12 nylon locknuts and M12 jam nuts but no combo of the two as they do in standard sizes. So I'll space them out with a M12 split washer and call it good.

Now a question for you. I'm not sure how to route the remote turn on wire for the inverter. It seems all the wiring for switches etc come down from the ceiling. I have no idea how to fish the wire. How can I access anything?! I'd love to get the remote with the control panel for the water pump, gas station, generator, etc OR next to the thermostat. How would you fish the wire?


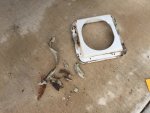
Additionally, the door and frame of the original hatch were barely keeping together. I bought a new hatch on Amazon and got some butyl tape locally. The install went well and I took extra care to clean the exterior panels of old butyl and more gunk. Upon tightening the hatch, I notice it deformed slightly which hampers the door opening and closing, likely the issue that caused the original door to fail. Should I add more strips of butyl? Is there another way?
 

Attachments

  • 002.JPG
    002.JPG
    239.4 KB · Views: 2
  • 003.JPG
    003.JPG
    187.9 KB · Views: 2
  • 004.JPG
    004.JPG
    317 KB · Views: 2
  • 005.JPG
    005.JPG
    219.7 KB · Views: 3
  • 006.JPG
    006.JPG
    278.5 KB · Views: 3
  • 007.JPG
    007.JPG
    205 KB · Views: 3

chancer

ɔ ɥ ɐ u ɔ ǝ ɹ
Messages
9,358
Reaction score
93
Location
COMFORT, TEXAS
I would add more Butyl. Probably happens due to the Corrugation on the camper siding.

As far as fishing a wire it is just that. Fishing. Some times it is easy, sometimes it takes all day.
 
Status
Not open for further replies.
Top