My latest CMB Chopper restoration Project!!

Status
Not open for further replies.

zogthegreat

New member
Messages
230
Reaction score
1
Location
Lake Wales FL/Montreal QC
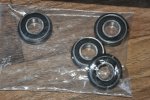
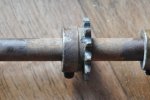
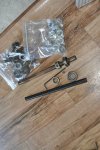
Well, today I received my second pair of awesome skull crusher custom grips w/ a throttle cable clamp. I also received my 10" X 5/8" jack-shaft!!!! I also got my new bearings, clamps, etc. etc...... I then removed the old jack shaft and they are easier to work with is not rusty at all, but, I got er done!!!

Do you have any pics? Also, what is the jack shaft for?
 

KingCobra

TROLL CRUSHER INC.
Messages
583
Reaction score
1
Location
TROLL TORTURE ROOM
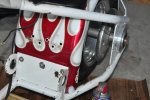
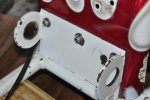
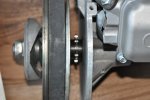
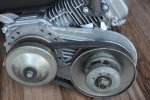
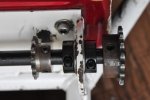
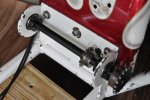
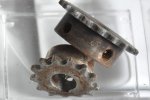
It is because I use the Comet 20 torque-a-verter and they run a secondary chain to the jack shaft and then the jack shaft runs a 'driver' sprocket to a 'driven' sprocket. It's really cool and I believe the shorter the chain runs the less apt you will have a chain fall off. I will download some more photos and I hope you buy a Jack-shaft kit. You can use it with any engine or motor you chose because you can choose any sprocket you want.
I will help you along here and I suggest a good welder for the job and you won't be disappointed. It also allows you to use a wide range of engines and placement cause you can slide the sprocket around on the jack-shaft before tightening the 'allen' set screws that hold it in place..

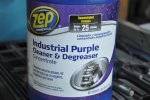
I will post the Jack-Shaft kits and the photos I took of my jack-shaft removed. See photos and enjoy. IF you need more, let me know. Also it allows you to have the rear wheel sprocket on either side of the frame or wheel.You can use a pulley system if you choose but I don't recommend it as it's easier to get a chain tight than a belt. Also, I recommend INDUSTRIAL PURPLE for your all around degreaser and oil removal from anything BUT, it says NOT to use on aluminum, but I have with no problem and I rinse quickly. I think they mean shiny pretty wheels as it might tarnish them. I leave my chains it this over night and when I pull them out the next day, they look like new!
I give a light brushing anyway with an old tooth brush. I then blow dry and let hang in the hot sun( some use their oven). Then I let the chain soak for a few days in a pail with 80w gear oil while I'm working on the vehicle so it gets in and around the rollers. THEN, I remove the chain and let it drip dry above the pail for a day or two. I then install, BUT, start slow because there is still oil inside the rollers and it does like to fling itself at you if it starts too fast. IF you have a chain guard, then don't worry other than where it will drip down onto when you put your vehicle away for the day.OK, enjoy and thanks! Scott
 

Attachments

  • Don'tMakeSkippyMadJackShaftSprockets 001.jpg
    Don'tMakeSkippyMadJackShaftSprockets 001.jpg
    349.1 KB · Views: 3
  • Don'tMakeSkippyMadJackShaftSprockets 003.jpg
    Don'tMakeSkippyMadJackShaftSprockets 003.jpg
    172.1 KB · Views: 3
  • Don'tMakeSkippyMadJackShaftSprockets 005.jpg
    Don'tMakeSkippyMadJackShaftSprockets 005.jpg
    409.9 KB · Views: 5
  • Don'tMakeSkippyMadJackShaftSprockets 002.jpg
    Don'tMakeSkippyMadJackShaftSprockets 002.jpg
    357.6 KB · Views: 4
  • Skippy IsAntiPhotoJackShaftPhotos 001.jpg
    Skippy IsAntiPhotoJackShaftPhotos 001.jpg
    231.8 KB · Views: 3

KingCobra

TROLL CRUSHER INC.
Messages
583
Reaction score
1
Location
TROLL TORTURE ROOM

Attachments

  • Skippy IsAntiPhotoJackShaftPhotos 009.jpg
    Skippy IsAntiPhotoJackShaftPhotos 009.jpg
    337.4 KB · Views: 4
  • Skippy IsAntiPhotoJackShaftPhotos 008.jpg
    Skippy IsAntiPhotoJackShaftPhotos 008.jpg
    209.2 KB · Views: 4
  • Skippy IsAntiPhotoJackShaftPhotos 006.jpg
    Skippy IsAntiPhotoJackShaftPhotos 006.jpg
    169.4 KB · Views: 5
  • Skippy IsAntiPhotoJackShaftPhotos 005.jpg
    Skippy IsAntiPhotoJackShaftPhotos 005.jpg
    180.7 KB · Views: 5
  • Skippy IsAntiPhotoJackShaftPhotos 002.jpg
    Skippy IsAntiPhotoJackShaftPhotos 002.jpg
    278.8 KB · Views: 5
  • SkippyHatesMyPhotosJackShaft 013.jpg
    SkippyHatesMyPhotosJackShaft 013.jpg
    282.4 KB · Views: 4
  • SkippyHatesMyPhotosJackShaft 012.jpg
    SkippyHatesMyPhotosJackShaft 012.jpg
    192.1 KB · Views: 3
  • SkippyHatesMyPhotosJackShaft 005.jpg
    SkippyHatesMyPhotosJackShaft 005.jpg
    184.9 KB · Views: 4
  • Skippy IsAntiPhotoJackShaftPhotos 011.jpg
    Skippy IsAntiPhotoJackShaftPhotos 011.jpg
    413.2 KB · Views: 5

zogthegreat

New member
Messages
230
Reaction score
1
Location
Lake Wales FL/Montreal QC

Bookmarked! Thanks! :)

I suggest a good welder for the job...

LOL, I'm glad that you said "good welder" and not "great welder"! I'm a "good welder", I have a little 90a 120v AC flux core mig welder that I'm hoping to upgrade to a gas mig this year. The problem with the HF 120v welders is that they are AC at the tip, which means that they cycle on and off 60 times a minute, (60hz). They work but you get some ugly welds and you really can't weld anything thicker than 3/8". My weld's aren't always the prettiest, but they are solid and have never broken.

I will download some more photos

YES!!! Please!

I always try to post as many pics as possible so that someone else can see what I have done and copy/adapt to their own needs.
 

KingCobra

TROLL CRUSHER INC.
Messages
583
Reaction score
1
Location
TROLL TORTURE ROOM
Bookmarked! Thanks! :)


LOL, I'm glad that you said "good welder" and not "great welder"! I'm a "good welder", I have a little 90a 120v AC flux core mig welder that I'm hoping to upgrade to a gas mig this year. The problem with the HF 120v welders is that they are AC at the tip, which means that they cycle on and off 60 times a minute, (60hz). They work but you get some ugly welds and you really can't weld anything thicker than 3/8". My weld's aren't always the prettiest, but they are solid and have never broken.


YES!!! Please!

I always try to post as many pics as possible so that someone else can see what I have done and copy/adapt to their own needs.

YES, I have the Mig Pro 180 by Lincoln that cost nearly $800 smack-a-roonies!! :D BUT check this 110v system out for $279 and uses Argon!!! Just remember 75%/25% Argon/Oxygen is what you need. When you go to the store and say, " I need 75/25"...... They know what you mean and once you go gas, you never go back!! Mine is a 220 volt system and I love the way it burns in. I'm not the greatest welder,but this welder makes me look darn good!! IF you ever get the chance to buy a 220/240v welder, DO IT!!

https://www.lowes.com/pd/Lincoln-Electric-230-Volt-MIG-Flux-Cored-Wire-Feed-Welder/1072947

http://www.jegs.com/p/Eastwood/East...l&utm_medium=email&utm_campaign=20171018email

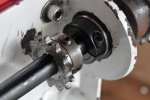
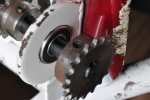
Also, new photos of my new jack-shaft installed and all I need to do is tighten the clamps and the large sprocket on the outside. The small sprocket gets tightened once I place the engine on and bolt it down so I know it's in line. I love these black clamps because they don't mar up the jack shaft!! I got the single sided slit split collars so I don't have to fumble with the, I threw in an extra cause I could :D BTW, I was told buy someone that they use GUN BLUING to get the metal to that black color and it protects the metal for a while. Anyway......yeee haww...more photos...... :D
 

Attachments

  • DontPissOffSkippyNewJackShaft 005.jpg
    DontPissOffSkippyNewJackShaft 005.jpg
    128 KB · Views: 4
  • DontPissOffSkippyNewJackShaft 006.jpg
    DontPissOffSkippyNewJackShaft 006.jpg
    169.5 KB · Views: 5
  • DontPissOffSkippyNewJackShaft 012.jpg
    DontPissOffSkippyNewJackShaft 012.jpg
    170.1 KB · Views: 4
  • DontPissOffSkippyNewJackShaft 013.jpg
    DontPissOffSkippyNewJackShaft 013.jpg
    196.7 KB · Views: 4
  • DontPissOffSkippyNewJackShaft 002.jpg
    DontPissOffSkippyNewJackShaft 002.jpg
    170.5 KB · Views: 4

Randy H

New member
Messages
892
Reaction score
27
Nice wire machine. I mean it's no substitute for a cheap machine and a pile of grinding wheels, But it should work in a pinch. :thumbsup:
 

KingCobra

TROLL CRUSHER INC.
Messages
583
Reaction score
1
Location
TROLL TORTURE ROOM
Nice wire machine. I mean it's no substitute for a cheap machine and a pile of grinding wheels, But it should work in a pinch. :thumbsup:

With my Lincoln I use .020 welding wire w/ the .025 roller attachment on auto body work when I restore a car and install a patch panel and I lay it in like butter! I love it and that is a great wire for sheet metal that many don't know about. I heard it from a metal worker when he saw that I was using .025..... I swear I could almost weld tin foil with this baby :D That was nice of him to give me that tip. The thicker the metal, the faster the drive, the thicker the wire, and hotter the setting. BUT with me welding .020, I have to turn up the speed a few to compensate. OH, for great results and make you a better welder, get an auto shield helmet!! They are inexpensive at HF and they work!! I'm not blind yet :D.... I think for sheet metal and mild steel up to 1/4" , that Eastwood or similar welder in 110/120v would work just fine. It would be a great welder for any and all mini bike and go-kart work. Feel free to post all them choppers you guys have on my thread if you want. I love choppers!!!
 

Randy H

New member
Messages
892
Reaction score
27
Cool. The smallest I recall using is .023. I have a Millermatic 135. Only 110v. Around $500 about 15 years ago.

The biggest wire I used was 7/64". That was with a beastly Miller Deltaweld 650. Also have an old boat anchor Miller Synchrowave 351 Tig/Stick machine, and a Miller Bobcat Legend.

I'm not anti Red though. Got an old stinkin' Lincoln buzz box. Some day I'll hook it up and see if it works.

Sorry, no more hijackin'
 

zogthegreat

New member
Messages
230
Reaction score
1
Location
Lake Wales FL/Montreal QC


My problem is that living full time in my RV, I don't always have access to a 220v line, usually I consider it "good" if the park has a 30a line! But that 120v looks tempting.......Come on Craigslist, gimme, gimme!

Also, new photos of my new jack-shaft installed and all I need to do is tighten the clamps and the large sprocket on the outside.

Nice work, BTW. I understand that sometimes you have to do a "hacked job" when doing a build, but nice, clean work always stands out. To me, it's the little details, like those collars, that make the difference in a build. I always like it when I have to take a second or even a third look to catch those little details.
 

KingCobra

TROLL CRUSHER INC.
Messages
583
Reaction score
1
Location
TROLL TORTURE ROOM
My problem is that living full time in my RV, I don't always have access to a 220v line, usually I consider it "good" if the park has a 30a line! But that 120v looks tempting.......Come on Craigslist, gimme, gimme!


Nice work, BTW. I understand that sometimes you have to do a "hacked job" when doing a build, but nice, clean work always stands out. To me, it's the little details, like those collars, that make the difference in a build. I always like it when I have to take a second or even a third look to catch those little details.

You will be just fine with a 120v gas system for sure!! And it can remain portable and easy to store away. They have small canisters at HF as well as other stores.

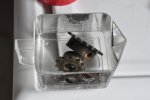
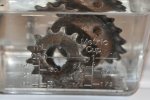
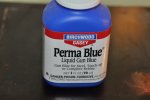
I agree about 'ATTENTION TO DETAIL' ( The USMC did that to me :D ) and before I lot it all in place tomorrow, I will drop those two sprockets in Distilled White Vinegar for a day and in the morning, I will give them a good wire brushing and give them a couple coats of gun bluing ...only cause I happen to have two bottles left over from my last rifle resto. The bluing contains oils also. I will put some AFTER VINEGAR :D photos up and then AFTER BLUING... Thanks.
 

KingCobra

TROLL CRUSHER INC.
Messages
583
Reaction score
1
Location
TROLL TORTURE ROOM
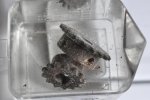
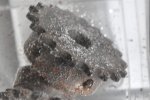
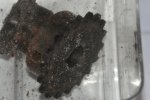
OK, I removed the 4 allen set screws and the sprocket are submerged for life!!! :D... ok, maybe just until tomorrow morning! I'm all goose bumpy just thinking about the bluing process.....Good thing I have rubber gloves :D.... Let's see what 5% acidity does...... I love Muratic acid 50/50 and could have had them done in a half hour but I don't have any. You must stand upwind when using that stuff and never indoor and always wear gloves. OH and don't use a nylon rope to lower your parts into a container LMBO!!!!!! YES, it will melt certain nylon ropes in no time flat.
 

Attachments

  • More PhotosSkippySprocketSoak 003.jpg
    More PhotosSkippySprocketSoak 003.jpg
    159.5 KB · Views: 2
  • More PhotosSkippySprocketSoak 002.jpg
    More PhotosSkippySprocketSoak 002.jpg
    178.5 KB · Views: 3
  • More PhotosSkippySprocketSoak 001.jpg
    More PhotosSkippySprocketSoak 001.jpg
    205.2 KB · Views: 2

mckutzy

Well-known member
Messages
8,353
Reaction score
110
Location
bc, canada
I dont see any keys in the shaft... Is this a mock up?
Good touch one the collars though... looks good..
 

KingCobra

TROLL CRUSHER INC.
Messages
583
Reaction score
1
Location
TROLL TORTURE ROOM
Hey, it wasn't my teeth that did that to you :D I was at Pendleton the whole time, I swear :D

And yes, just a mock up for a photo shoot.....know why?? I had to do an acid dip over night....
 

Attachments

  • JackShaftSprocketProgress 001.jpg
    JackShaftSprocketProgress 001.jpg
    205.5 KB · Views: 3
  • JackShaftSprocketProgress 002.jpg
    JackShaftSprocketProgress 002.jpg
    184 KB · Views: 3
  • JackShaftSprocketProgress 010.jpg
    JackShaftSprocketProgress 010.jpg
    201.4 KB · Views: 3
  • JackShaftSprocketProgress 009.jpg
    JackShaftSprocketProgress 009.jpg
    196.7 KB · Views: 3
  • JackShaftSprocketProgress 012.jpg
    JackShaftSprocketProgress 012.jpg
    173.7 KB · Views: 2

KingCobra

TROLL CRUSHER INC.
Messages
583
Reaction score
1
Location
TROLL TORTURE ROOM
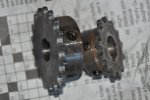
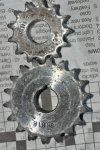
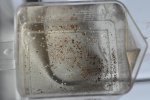
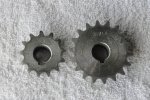
OK, update time!! I went out at noon ( 24 hours since Vinegar dip started) and I stuck my hands right in there (try that with Muratic acid) and lifted one jack-shaft sprocket out and wire brushed mildly under running water. Often you will get black stuff on your fingers but soap will remove that. It just oxidation removed by the 5% acid in the Vinegar. After I rinsed the sprocket off, I sprayed it with soapy water (DAWN) that I keep in a spray bottle for cleaning my hands in the shop sink, and then I wire brushed and then tooth brushed inside the 5/8" opening and key-way and then rinsed and dried well with a towel and then blow dried the areas that the towel could not get to and laid out in the sun. NOT too shabby.

Now I will take the 'gun parts de-greaser' treatment that comes with the bluing kit and wipe it good and then get to bluing and rinsing. The bluing will find even the slightest pores and fill and protect them from rust. This Vinegar WILL NOT damage metal and no worries of removal any time soon if you are too busy. I love the stuff. JUST a tad more work than Muratic acid and less dangerous and worth it. BTW, I neutralize with a soap bath.

ALSO, Muratic acid will not damage metal if used correctly ( 50% solution to 50% water )and most items should be removed in approx. one half hour to one hour and examined ( use rubber gloves or a tool to remove the item). I usually get 'flash' rust when using Muratic acid. BUT I avoid the flash rust by rinsing and blowing off the moisture quickly with an air compressor. ADD NO WATER to the vinegar as it is only 5% acidic already.

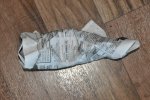
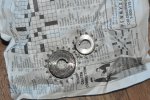
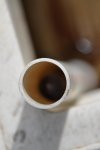
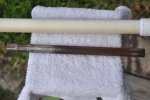
As you can see, the rust just jumped off these sprockets! WRAP all items that are 'de-rusted and exposed' in newspaper after drying completely!!! This will preserve and protect the metal until you can get to it. OK, I'm off to dip the old 10" X 5/8" jack-shaft and store until needed again. I cut some thin wall 1" pvc piping and capped one end for my rod dipping . Thanks. Scott
 

Attachments

  • NewHouseRustRemovalVinegar 068.jpg
    NewHouseRustRemovalVinegar 068.jpg
    84.3 KB · Views: 4
  • NewHouseRustRemovalVinegar 057.jpg
    NewHouseRustRemovalVinegar 057.jpg
    270.1 KB · Views: 5
  • NewHouseRustRemovalVinegar 048.jpg
    NewHouseRustRemovalVinegar 048.jpg
    356.7 KB · Views: 4
  • NewHouseRustRemovalVinegar 054.jpg
    NewHouseRustRemovalVinegar 054.jpg
    266 KB · Views: 4
  • NewHouseRustRemovalVinegar 065.jpg
    NewHouseRustRemovalVinegar 065.jpg
    254 KB · Views: 3

KingCobra

TROLL CRUSHER INC.
Messages
583
Reaction score
1
Location
TROLL TORTURE ROOM
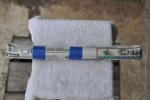
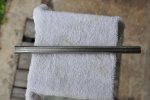
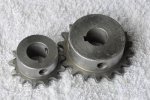
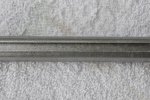
OK, by popular demand, I returned with my latest findings from last nights jack-shaft soaking episode!!!! As you all know, I took that naked rusty old jack-shaft that I had a heck of a time removing from my cool mini chopper, Only because someone tightened up the two set screws against the jack-shaft and one set screw from each was pressed into the shaft making it difficult to slide anything off it. I also found that one of the bearings was stuck onto the rusty shaft,but, with persuasion, I removed it. BTW, I used a brass hammer because you do not need to add injury to these shafts.

Now I have an extra jack-shaft and I may use it for a future build!! When I get my fat tire mini bike kit, I will make sure I utilize a jack-shaft on it and this will be the perfect specimen for that project. I have rolled it up in newspaper and taped it good for storage. This will prevent rust indefinitely and at least until I unwrap it. The distilled white vinegar I used to UN-RUST my shaft was previously used to UN-RUST those two rusty #35 JS sprockets!! That shows you how powerful that stuff is against rust and oxidation AND the jack-shaft only soaked 12 hours this time (used over and over). I'm impressed and everyone who has a kitchen pantry usually has this stuff in it. It is great for adding to eggs when you hard boil them and you want the egg shell to come off easier. Just add a few ounces to the pan of water. You can use it for removing stains from clothing. I used to be a dry cleaner manager in Michigan and that is where I learned the secret of stain removal!!!
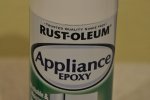
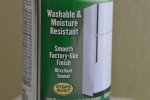
I also received my case of Rust-Oleum white EPOXY paint I found on ebay at $5 a can w/ free shipping!!!!! This hard shell enamel paint is the best stuff I have found on the market for painting metal frames as it is durable! OH, and go ahead and zoom in till your heart's content as I use one of the best cameras on the market ;)

And this has been another great tip and I hope you find it helpful and to save you money!! Thanks for watching this episode of 'Scott Does It Again'!! :D
 

Attachments

  • NewHouseMyShaftDerusted 107.jpg
    NewHouseMyShaftDerusted 107.jpg
    260.8 KB · Views: 2
  • NewHouseMyShaftDerusted 098.jpg
    NewHouseMyShaftDerusted 098.jpg
    229.9 KB · Views: 4
  • NewHouseMyShaftDerusted 093.jpg
    NewHouseMyShaftDerusted 093.jpg
    286 KB · Views: 5
  • NewHouseMyShaftDerusted 092.jpg
    NewHouseMyShaftDerusted 092.jpg
    269 KB · Views: 6
  • NewHouseMyShaftDerusted 089.jpg
    NewHouseMyShaftDerusted 089.jpg
    134.4 KB · Views: 3
  • EpoxyPaintPhotos 001.jpg
    EpoxyPaintPhotos 001.jpg
    179 KB · Views: 2
  • EpoxyPaintPhotos 002.jpg
    EpoxyPaintPhotos 002.jpg
    240 KB · Views: 3

zogthegreat

New member
Messages
230
Reaction score
1
Location
Lake Wales FL/Montreal QC
OK, by popular demand, I returned with my latest findings from last nights jack-shaft soaking episode!!!!

Hey KingCobra,

Do you think that this would work on my rusted axle?


I still have to drill out the the worm screw, but using the gun blue on the axle would make it look new again, (I've had mixed results with wire brushes and painting in the past).
 

KingCobra

TROLL CRUSHER INC.
Messages
583
Reaction score
1
Location
TROLL TORTURE ROOM
LOL, when did you serve?

And that keeps the rust off the sprockets and axle?

No, it REMOVES the rust (otherwise known as oxidation) BUT you must take care of the metal after restoring it's natural original beauty :D..... Use grease, oil, or paint( 'paint' <>unless it's an axle or jack-shaft where items need to be slid on and off). A lot of people don't know that jack-shafts are one great way to eliminate long chain runs which often result in chain derailments.. I will be using gun bluing to preserve my metal for a while anyway.

BTW, I served in 1980-84, way before your time :D :p
 

KingCobra

TROLL CRUSHER INC.
Messages
583
Reaction score
1
Location
TROLL TORTURE ROOM
Hey KingCobra,

Do you think that this would work on my rusted axle?


I still have to drill out the the worm screw, but using the gun blue on the axle would make it look new again, (I've had mixed results with wire brushes and painting in the past).

Yeh, sure. Make sure it is de-greased first before the soaking. Have a tooth brushed size stainless steel brush nearby to help in fine cleaning. You can get a cheap set of stainless and brass/copper tooth brush types at any hardware or automotive store really cheap and it sure makes the job easier. Maybe a plastic scour pad will do the same good job if not course steel wool. I've never seen a jack shaft with so many divots in it :D
LOL, I served from '85 - '92, not that long before my time!

Yeh, well I didn't bite ya LOL!!!!!!!!
 

Attachments

  • yyyyyyyyyyyyyy.jpg
    yyyyyyyyyyyyyy.jpg
    113.1 KB · Views: 2
Status
Not open for further replies.
Top