
Hello Everyone!
I was looking around for ways to make the much unappreciated used car motor starter into a much more useful actuator. So I stumbled upon Kibble's article. And I thought wat a cool idea to turn these motor starters into go kart engines - go GREEN! I went down to my favourite used autopart shop and there they were: a pile of used car motor starters - all nice and greasy .
.
I bought a couple and contacted kibble, who has been ace in getting me to start this thread. I would like to share with you my experience converting a starter motor. I picked up these motors at random with no particular brand in mind. I have very little knowledge in electrical/electronics and some knowledge in motor, but maybe a little bit more enthusiasm than I could handle. Wat the heck, it will be fun!
I've started the project using Kibble's how-to guide. Opened up the starter motor, removed the solenoid, removed the drive gear and began re-wiring the motor.
So let me describe to you what I've done so far. So here it goes!
This is how my starter motor looks like (Photo 1). (pls see attachment)
I've opened up the casing at the back of the motor and as predicted its all nice and dirty and greasy. (Photo 2).
Photo 3 and Photo 4 shows what happened when I removed the rotor from the casing. Unlike some starter motor, the motor I have used compression springs to hold the brush in contact with the rotor commutator segment. Yes... you've guessed it. When I removed the rotor, 'TOOIINNGG'.. all 4 springs went all over the place.
Photo 5 and 6 shows the rotor back into the casing but now you can see where the brushes are with respect to the rotor commutator.
After reading Kibble's article many many times I figured the key to reversing the motor is in the electronics i.e the wiring. So I'm going to spend time now talking about my wiring experience.
Photo 7 and 8 shows the difference between the brushes - more importantly how these brushes are paired up and how they are wired.
Photo 9 shows how I've chopped off the brushes from the casing. Oh yess... I've talked through this with my brain many times before making the decision.
Photo 10 and 11 shows the soldering exercise on magnet coils on the casing. In Kibble's how-to instructions, this is the connection made in 'Figure 18 and Figure 19'. The only difference in my connections here is the relative location of where I've soldered my yellow color wire. My reasoning for choosing that terminal to solder my yellow wire is because those two terminals are connected by the built in wire anyways. The other reason at the time was that I can use the same exit hole on the casing later for both the blue and yellow wires to come out.
Next, wiring up the brushes!!
Photo 12 and 13 show how I've wired up the brushes. Its a little different from Kibble's starter motor as you can see but after pondering how to do mine the easiest way, this is what I've got. You can just about see in Photo 12 how I've wired up the red wire to the yellow wire. This is the step shown in Figure 20, 21 and 22 in Kibble's how-to. But in Photo 12 and 13, you can also see the other 2 brushes being soldered with the blue wires. With the help of Kibble's new instructions I've hooked up these new blue wires to the casing of the starter motor!
Next, Photo 14 and 15. As you can see I have a lot of wires going in and out of the starter motor now. Photo 14 shows how the starter motor looks like after the shaft rotor is positioned back into the casing, and the springs and the brushes are engaged back to the commutator. Boys and girls, THIS IS REALLYY REALLY tough job!! Took me hours to tame down the springs!!! They keep popping out. And more tips.... you might not want to do this part of the project in your messy shack like mine especially if you have other springs, screws and nuts lying around. It is a nightmare trying to find THAT spring that just popped out of the starter motor!! Do it in a 'clean' room.
Photo 16 shows the scale of the amount of holes I need to drill out from the casing. I have too many wires and they need to be directed out of the moving parts. I've also marked the wires with names to avoid confusion later.
Finally, Photo 17. The final stage. I've closed up the modified starter. The wires look a little messy but I intend to clean that up once the motor works.
Well, I'm sure you would like to know what happens when I hooked up the modified starters with that big giant 12V battery at the back there. Unfortunately, at this stage... nothing happens. I tried both reverse and forward connections. But so far no sparks, no twitch. Have I wired up something wrongly? Could it be that one of my steps is wrong?
I'm wondering few things though. Have I wired up the 2 brushes (the new blue wires) correctly? I've simply connected those blue wires from the 2 brushes to the casing (hence, -ve terminal of the battery).
Well, I will be most happy to accept tips from anyone if anyone can help. Thanks for the chance to be part of the forum! And thanks kibble for getting me into this project!!
--
ZEQ
I was looking around for ways to make the much unappreciated used car motor starter into a much more useful actuator. So I stumbled upon Kibble's article. And I thought wat a cool idea to turn these motor starters into go kart engines - go GREEN! I went down to my favourite used autopart shop and there they were: a pile of used car motor starters - all nice and greasy
.I bought a couple and contacted kibble, who has been ace in getting me to start this thread. I would like to share with you my experience converting a starter motor. I picked up these motors at random with no particular brand in mind. I have very little knowledge in electrical/electronics and some knowledge in motor, but maybe a little bit more enthusiasm than I could handle
. Wat the heck, it will be fun!I've started the project using Kibble's how-to guide. Opened up the starter motor, removed the solenoid, removed the drive gear and began re-wiring the motor.
So let me describe to you what I've done so far. So here it goes!
This is how my starter motor looks like (Photo 1). (pls see attachment)
I've opened up the casing at the back of the motor and as predicted its all nice and dirty and greasy. (Photo 2).
Photo 3 and Photo 4 shows what happened when I removed the rotor from the casing. Unlike some starter motor, the motor I have used compression springs to hold the brush in contact with the rotor commutator segment. Yes... you've guessed it. When I removed the rotor, 'TOOIINNGG'.. all 4 springs went all over the place.
Photo 5 and 6 shows the rotor back into the casing but now you can see where the brushes are with respect to the rotor commutator.
After reading Kibble's article many many times I figured the key to reversing the motor is in the electronics i.e the wiring. So I'm going to spend time now talking about my wiring experience.
Photo 7 and 8 shows the difference between the brushes - more importantly how these brushes are paired up and how they are wired.
Photo 9 shows how I've chopped off the brushes from the casing. Oh yess... I've talked through this with my brain many times before making the decision.
Photo 10 and 11 shows the soldering exercise on magnet coils on the casing. In Kibble's how-to instructions, this is the connection made in 'Figure 18 and Figure 19'. The only difference in my connections here is the relative location of where I've soldered my yellow color wire. My reasoning for choosing that terminal to solder my yellow wire is because those two terminals are connected by the built in wire anyways. The other reason at the time was that I can use the same exit hole on the casing later for both the blue and yellow wires to come out.
Next, wiring up the brushes!!
Photo 12 and 13 show how I've wired up the brushes. Its a little different from Kibble's starter motor as you can see but after pondering how to do mine the easiest way, this is what I've got. You can just about see in Photo 12 how I've wired up the red wire to the yellow wire. This is the step shown in Figure 20, 21 and 22 in Kibble's how-to. But in Photo 12 and 13, you can also see the other 2 brushes being soldered with the blue wires. With the help of Kibble's new instructions I've hooked up these new blue wires to the casing of the starter motor!
Next, Photo 14 and 15. As you can see I have a lot of wires going in and out of the starter motor now. Photo 14 shows how the starter motor looks like after the shaft rotor is positioned back into the casing, and the springs and the brushes are engaged back to the commutator. Boys and girls, THIS IS REALLYY REALLY tough job!! Took me hours to tame down the springs!!! They keep popping out. And more tips.... you might not want to do this part of the project in your messy shack like mine especially if you have other springs, screws and nuts lying around. It is a nightmare trying to find THAT spring that just popped out of the starter motor!! Do it in a 'clean' room.
Photo 16 shows the scale of the amount of holes I need to drill out from the casing. I have too many wires and they need to be directed out of the moving parts. I've also marked the wires with names to avoid confusion later.
Finally, Photo 17. The final stage. I've closed up the modified starter. The wires look a little messy but I intend to clean that up once the motor works.
Well, I'm sure you would like to know what happens when I hooked up the modified starters with that big giant 12V battery at the back there. Unfortunately, at this stage... nothing happens
. I tried both reverse and forward connections. But so far no sparks, no twitch. Have I wired up something wrongly? Could it be that one of my steps is wrong?I'm wondering few things though. Have I wired up the 2 brushes (the new blue wires) correctly? I've simply connected those blue wires from the 2 brushes to the casing (hence, -ve terminal of the battery).
Well, I will be most happy to accept tips from anyone if anyone can help. Thanks for the chance to be part of the forum! And thanks kibble for getting me into this project!!
--
ZEQ
Attachments
-
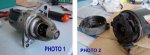 Photo1_2.JPG12.2 KB · Views: 92
 -
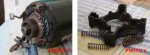 Photo3_4.JPG12.6 KB · Views: 76
 -
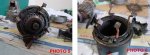 Photo5_6.JPG14.1 KB · Views: 71
 -
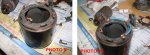 Photo9_10.JPG16.9 KB · Views: 64
 -
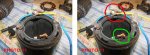 Photo11_11a.JPG17.6 KB · Views: 60
 -
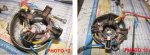 Photo12_13.JPG19.3 KB · Views: 59
 -
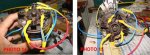 Photo14_15.JPG20.5 KB · Views: 69
 -
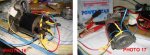 Photo16_17.JPG18.9 KB · Views: 74
 -
 Photo7_8.JPG16.4 KB · Views: 73


 maybe you should try sending a PM to kibble because i believe he was active a couple months ago if i remember right.
