Metal Shop Kart Pair

Status
Not open for further replies.

BaselessEarth12

New member
Messages
94
Reaction score
0
Location
Lovell, ME
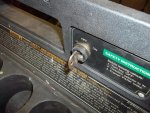
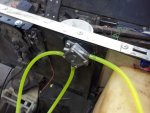
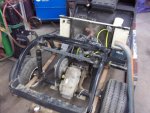
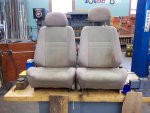
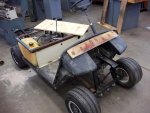
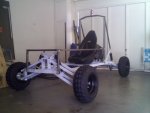
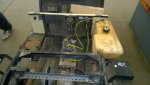
So! Quick update: freezing rain + 3 more inches of snow = testing grounds full of suck. But, the fuel lines are set, throttle cable's been hooked up, auxiliary fan switch has been installed (but not wired), ignition (shockingly!) wired up, measurements for seat base taken, alignment fiddled with, and front cowling interior installed. A lot of work has been done, indeed!
 

BaselessEarth12

New member
Messages
94
Reaction score
0
Location
Lovell, ME
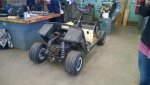
Good news, everyone! Engine is installed, belt has been tightened properly, choke cable routed, discovered seat frame damage has been repaired, exhaust pipe has been welded (but not installed, still waiting on connectors), fuel lines are in place, carburetor has been cleaned, and most of the basic wiring has been completed! I should hopefully have some pictures up by the end of the day. And, if things go well, I might just be able to have a little test drive later today...
 

BaselessEarth12

New member
Messages
94
Reaction score
0
Location
Lovell, ME
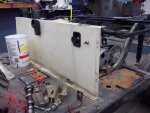
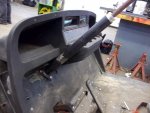
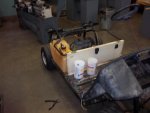
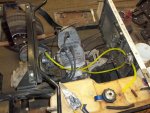
More progress today: Shifter, fuel tank mounting tab, "fancy" wooden trim, "D" ring recovery point, got the theoretical seat mounting brackets laid out, and replaced the "Big One" (a bolt that was roughly twice as long as it needed to be, with a piece of generic steel pipe used as a spacer). Sadly did not get a chance to test fire the engine today :(... But, I was able to upload some pics from yesterday!
 

Attachments

  • 100_0249.jpg
    100_0249.jpg
    57.1 KB · Views: 13
  • 100_0250.jpg
    100_0250.jpg
    120.5 KB · Views: 12
  • 100_0251.jpg
    100_0251.jpg
    148.7 KB · Views: 10
  • 100_0252.jpg
    100_0252.jpg
    103.5 KB · Views: 9
  • 100_0253.jpg
    100_0253.jpg
    81.7 KB · Views: 9
  • 100_0260.jpg
    100_0260.jpg
    103.2 KB · Views: 11
  • 100_0258.jpg
    100_0258.jpg
    103.7 KB · Views: 9
  • 100_0257.jpg
    100_0257.jpg
    96.7 KB · Views: 11
  • 100_0256.jpg
    100_0256.jpg
    46.1 KB · Views: 10
  • 100_0254.jpg
    100_0254.jpg
    96.9 KB · Views: 17

BaselessEarth12

New member
Messages
94
Reaction score
0
Location
Lovell, ME
Good news, everyone! Not only does the engine run, but it runs smoothly! The only downside is that the clutch is stuck, so I am going to have to dowse it in WD-40 tomorrow to sit over the vacation of two and a half weeks. Will more than likely get some much needed parts for it, too, so that'll be nice. SO! Plans for the not too distant future: free the clutch, install the seats, add a latch to the shifter to keep it in neutral from the vibrations, test drive it (FINALLY!!), record straight-piped roar, build the front sub frame and possibly some A-arms, then lastly new wheels and tires.
 

Attachments

  • 100_0266.jpg
    100_0266.jpg
    90.9 KB · Views: 6
  • 100_0265.jpg
    100_0265.jpg
    79.3 KB · Views: 6
  • 100_0264.jpg
    100_0264.jpg
    87.9 KB · Views: 7
  • 100_0263.jpg
    100_0263.jpg
    102.3 KB · Views: 9

BaselessEarth12

New member
Messages
94
Reaction score
0
Location
Lovell, ME
Got the clutch off, cleaned the shaft, lubed it, put it back on, fired the engine, hit the throttle, the clutch compressed the way it was supposed to, and it did NOT open back up all the way!
 

BaselessEarth12

New member
Messages
94
Reaction score
0
Location
Lovell, ME
A couple good whacks with a hammer, and the clutch was fixed! Once I get the seat hinges all welded and bolted into place, it will be all set for her maiden voyage! Next week. Because the weather has been really really cruddy...
 

BaselessEarth12

New member
Messages
94
Reaction score
0
Location
Lovell, ME
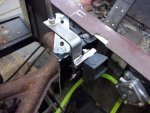
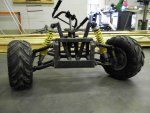
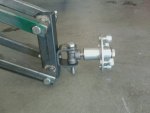
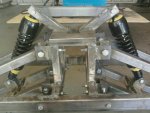
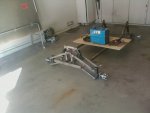
Good news, everyone! I have figured out how I am going to set up the exhaust, and have the seat hinges prepped for welding and boring. The hinges are meant for a shed door, so have holes only big enough for a wood screw (roughly 1/8"), and I am going to "bore them out" to 1/4" then drill holes through the bed frame and the firewall to hold them together, AND reinforce the bed frame at the front. Doing so will also keep the shifter from moving too much while shifting. Then, once the seats and exhaust are squared away, it's on to the front suspension! My plans are relatively simpe: 2 post arms with 3 pivots each, a 2 pivot end block, and the stock spindle brackets welded onto them. Credit for the arm design idea goes to '69 baja (original forum: http://www.diygokarts.com/vb/showthread.php?t=7633, pictures 1-4)
and credit for my subframe idea goes to Garified (original forum: http://www.diygokarts.com/vb/showthread.php?t=9689, picture 5).
 

Attachments

  • SANY0023-1.jpg
    SANY0023-1.jpg
    45.8 KB · Views: 12
  • mms_picture1.jpg
    mms_picture1.jpg
    45.8 KB · Views: 15
  • mms_picture_21.jpg
    mms_picture_21.jpg
    59.5 KB · Views: 14
  • mms_picture_1.jpg
    mms_picture_1.jpg
    36.1 KB · Views: 13
  • 0714001230a.jpg
    0714001230a.jpg
    50.5 KB · Views: 15

Denny

Canned Monster
Messages
11,896
Reaction score
8,373
Location
Mayberry, Indiana
Yes you should be able to put the stock starter/generator back on with just a simple clutch change ( put the clutch off of the original engine on the snowmobile engine and make new brackets).

Denny
 

BaselessEarth12

New member
Messages
94
Reaction score
0
Location
Lovell, ME
Good news, everyone! Yesterday I scored 2/3 of a 2005 Honda TRX450r ATV front end! Right upper/lower control arms and steering knuckle, and left arm (wasn't told if it was upper or lower, just got a call from my grandfather about it). Today, I am hoping to get the seats installed and the exhaust finished. If all goes well, I will be testing it by the end of the day or thursday! So, once I get to the front end, any suggestions for shocks? Should I use the stock EZGO hubs on the TRX450r knuckles, or use some Honda hubs with front brakes? Either way, it's going to be pretty sweet when she's done!
 

BaselessEarth12

New member
Messages
94
Reaction score
0
Location
Lovell, ME
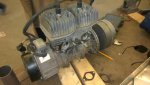
XD Now if only I could get a free exhaust setup... The guy I had weld my exhaust (who is the same "genius" I mentioned back on page 2 that burnt the bolt off the spring), while I was trying to figure out wiring and measurements for future front subframe, messed up BIG in the process. He marked the 4 pieces, but mixed them up, so instead of 1+1 and 2+2 it was 2+1 and 1+2, which means that the custom header doesn't fit. So, a big question: is it possible to flip the cylinder head (rotate it 180°), and how much work would be involved?
 

BaselessEarth12

New member
Messages
94
Reaction score
0
Location
Lovell, ME
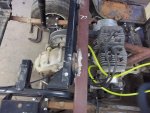
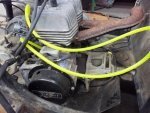
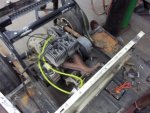
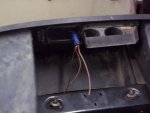
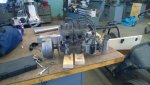
Got the cylinder heads rotated! Now all I need is a complete gasket set...
 

Attachments

  • WP_20150122_001.jpg
    WP_20150122_001.jpg
    75.7 KB · Views: 4
  • WP_20150122_002.jpg
    WP_20150122_002.jpg
    70.5 KB · Views: 7
  • WP_20150122_003.jpg
    WP_20150122_003.jpg
    56.4 KB · Views: 2
  • WP_20150122_004.jpg
    WP_20150122_004.jpg
    73.9 KB · Views: 9

Desertduler

Active member
Messages
1,736
Reaction score
14
Got the cylinder heads rotated! Now all I need is a complete gasket set...

Say, did you turn the pistons around also? because the end gaps of the piston rings MUST be located in the cylinder as they were before or the end gaps can protrude out of the exhaust ports and you will have a huge problem. Also what about the transfer ports in relation to the crankcase? is the crankcase porting symmetrical as to not make a difference of flow?
 
Status
Not open for further replies.
Top