Manco Thunderbird Resto-Mod

Status
Not open for further replies.

KartFab

Active member
Messages
3,381
Reaction score
8
Location
Dallas, TX
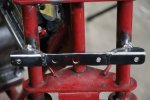
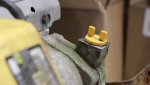
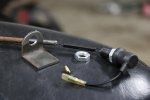
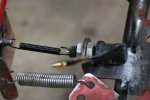
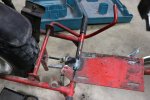
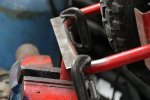
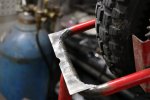
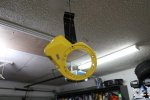
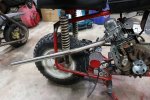
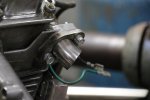
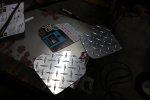
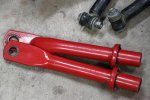
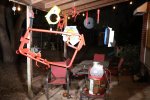
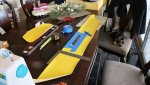
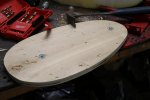
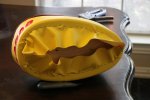
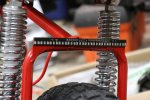
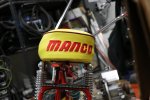
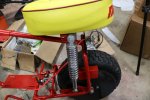
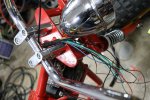
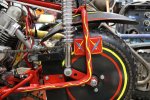
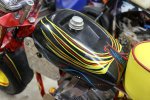
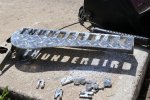
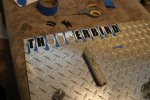
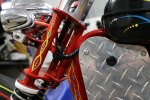
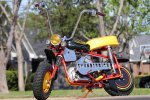
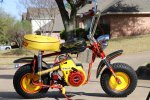
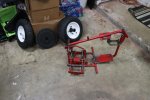
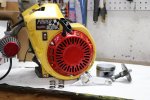
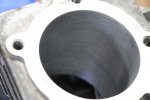
And so it begins with a seized tecumseh OHH60 with 1/8" ring gap, and an abused manco thunderbird frame with bent front forks.
 

Attachments

  • IMG_1200.jpg
    IMG_1200.jpg
    301.3 KB · Views: 6
  • IMG_8262.jpg
    IMG_8262.jpg
    250.6 KB · Views: 6
  • IMG_8248.jpg
    IMG_8248.jpg
    106.8 KB · Views: 4
  • IMG_8247.jpg
    IMG_8247.jpg
    148.6 KB · Views: 5
  • IMG_8292.jpg
    IMG_8292.jpg
    170.1 KB · Views: 3
  • IMG_0824.jpg
    IMG_0824.jpg
    259.7 KB · Views: 2
  • IMG_0822.jpg
    IMG_0822.jpg
    279.7 KB · Views: 1
  • 40d158aaf621def580fc7023a639e967.gif
    40d158aaf621def580fc7023a639e967.gif
    11.1 KB · Views: 1
  • Manco-Logo.jpg
    Manco-Logo.jpg
    24.8 KB · Views: 2
  • IMG_8311.jpg
    IMG_8311.jpg
    142.4 KB · Views: 2

KartFab

Active member
Messages
3,381
Reaction score
8
Location
Dallas, TX
Electronics and getting the plastic cam no bearings anywhere teCRAPseh engine to run were by far the biggest challenge. But first, the frame modifications had to happen to support the battery, larger risers, and all sorts of wiring that would have looked really tacky outside of the handlebars and frame.
 

Attachments

  • IMG_0868.jpg
    IMG_0868.jpg
    201.6 KB · Views: 2
  • IMG_0845.jpg
    IMG_0845.jpg
    292 KB · Views: 2
  • IMG_0843.jpg
    IMG_0843.jpg
    212.1 KB · Views: 4
  • moldy block.jpg
    moldy block.jpg
    531.3 KB · Views: 1
  • Wiring Diagram.jpg
    Wiring Diagram.jpg
    474.2 KB · Views: 9
  • IMG_0878.jpg
    IMG_0878.jpg
    231.6 KB · Views: 2
  • IMG_0890.jpg
    IMG_0890.jpg
    230.1 KB · Views: 2
  • IMG_0891.jpg
    IMG_0891.jpg
    264 KB · Views: 1
  • IMG_0905.jpg
    IMG_0905.jpg
    228.8 KB · Views: 1
  • IMG_0920.jpg
    IMG_0920.jpg
    158.8 KB · Views: 1

KartFab

Active member
Messages
3,381
Reaction score
8
Location
Dallas, TX
battery box covers cut by hand with a plasma torch, and stainless steel exhaust custom fabricated to clear not just the frame but that stupid placement of the intake (same side as exhaust). Next it was on to prepping everything for paint and figuring out just how everything was going to come together. The old seat wasn't going to be able to comfortably hold my fat butt. Needed new wood, and thicker, high density foam.
 

Attachments

  • IMG_1201.jpg
    IMG_1201.jpg
    230.1 KB · Views: 3
  • IMG_1195.jpg
    IMG_1195.jpg
    289.8 KB · Views: 4
  • IMG_1188.jpg
    IMG_1188.jpg
    223.5 KB · Views: 3
  • IMG_1185.jpg
    IMG_1185.jpg
    184.2 KB · Views: 3
  • IMG_0926.jpg
    IMG_0926.jpg
    170.3 KB · Views: 3
  • IMG_1203.jpg
    IMG_1203.jpg
    353.8 KB · Views: 3
  • IMG_1208.jpg
    IMG_1208.jpg
    218.7 KB · Views: 3
  • IMG_1234.jpg
    IMG_1234.jpg
    268.8 KB · Views: 2
  • IMG_1238.jpg
    IMG_1238.jpg
    222.3 KB · Views: 2
  • IMG_1264.jpg
    IMG_1264.jpg
    170.7 KB · Views: 2

KartFab

Active member
Messages
3,381
Reaction score
8
Location
Dallas, TX
Straight shank cover buttons added to marine vinyl with red welting separating the vertical and horizontal edges of the seat. Next the front fork springs were polished, along with the ape hangars, hand control wiring was a nightmare, but just barely was able to fit it into the long handlebar sections and shoot it down the middle of the triple tree, hidden behind the battery box cover. New chrome rear shocks, brake, turn, and tail light added to the metal section that was now painted, and the seat looks alright for any size booty.

Engine goes on the dyno, its a pos tecumseh that probably flows worese than a flathead and has the contact patch of the microscopic valves more towards the valve stem than the valve edge..... hmmm.... well at least I got the carb tuned. $20 ebay special carb(pz22?) drilled from .033" stock to .035" at 12.2:1 AFR @ WOT, and about 13.2 at idle and part throttle. clip on top position, stock pilot turned out 1.5 turns.

Things are starting to come together, but tecrapseh rears its ugly head by throwing the flywheel charge magnets at 4200 rpm..... @!#$%!@#$^ well there goes the regulator/rectifier/charge idea....Lets just bust the rest of the magnets off, and remove the coil.

Still.... this is missing a bit of flair still. What to do for that little bit of extra pop? hmmm....
 

Attachments

  • IMG_1294.jpg
    IMG_1294.jpg
    242.8 KB · Views: 4
  • IMG_1280.jpg
    IMG_1280.jpg
    225.4 KB · Views: 4
  • IMG_1277.jpg
    IMG_1277.jpg
    241.7 KB · Views: 3
  • IMG_1267.jpg
    IMG_1267.jpg
    200.4 KB · Views: 3
  • IMG_1250.jpg
    IMG_1250.jpg
    202.3 KB · Views: 3
  • IMG_1309.jpg
    IMG_1309.jpg
    258.7 KB · Views: 5
  • IMG_1307.jpg
    IMG_1307.jpg
    194.9 KB · Views: 5
  • IMG_1306.jpg
    IMG_1306.jpg
    213.2 KB · Views: 5
  • IMG_1310.jpg
    IMG_1310.jpg
    268.2 KB · Views: 3

KartFab

Active member
Messages
3,381
Reaction score
8
Location
Dallas, TX
The missing piece of the puzzle, pinstriping for the first time didnt go so bad, and tig welding and plasma cutting up a nice little clutch cover for that ankle destroying clutch. This is starting to look a bit more low rider/custom now with the apes, lights, pinstriping, and clutch cover. I had to buy a new hard drive just to fit all the footage, which is going to be a bear to edit, but Im glad I got to finish this build on schedule and this is just a nice little cruiser bike, runs on pump gas, is loud, and makes a pretty good statement. Cant wait to just cruise around at the car shows where we race, and maybe sell it after showing it off a bit. After all, I am a bit of a hoarder and i need SPACE to fix up the rest of the pieces of steel and rotten rubber in my garage.
 

Attachments

  • IMG_2824.jpg
    IMG_2824.jpg
    241.1 KB · Views: 6
  • IMG_2827.jpg
    IMG_2827.jpg
    350.3 KB · Views: 9
  • IMG_2826.jpg
    IMG_2826.jpg
    259.5 KB · Views: 8
  • IMG_2837.jpg
    IMG_2837.jpg
    481.2 KB · Views: 7
  • IMG_2819.jpg
    IMG_2819.jpg
    287.9 KB · Views: 7
  • IMG_2825.jpg
    IMG_2825.jpg
    280.9 KB · Views: 5
  • IMG_2860.jpg
    IMG_2860.jpg
    331.9 KB · Views: 10
  • IMG_2853.jpg
    IMG_2853.jpg
    391 KB · Views: 13
  • IMG_2863.jpg
    IMG_2863.jpg
    379.9 KB · Views: 10
Status
Not open for further replies.
Top