Manco Dingo Build

mapoopsie

Member
Messages
36
Reaction score
0
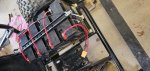
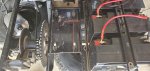
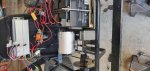
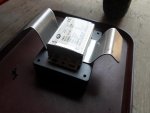
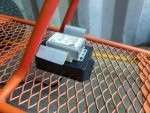
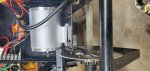
Here are a few pics of the conversion process. Kids helped get the motor removed. Then I welded in some steel to support the battery tray (along with welding some angle together to make a battery tray and painting it gold). And a final pic of the batteries mounted.

I've been frustrated with the whole drivetrain and that's probably due to my lack of experience with karts. But every time I need to make a correction to the drivetrain, I have to wait a week for a part to ship from Texas. I'm used to my next day Amazon delivery! :p

So, now I have to remove the rear axle to replace the axle sprocket with a 60 tooth #35. Any tips or tricks to removing the axle that I need worry about. Is the axle hub reverse threaded or anything?
 

Attachments

  • 20200308_181423.jpg
    20200308_181423.jpg
    253.7 KB · Views: 21
  • 20200314_144132.jpg
    20200314_144132.jpg
    357.9 KB · Views: 22
  • 20200319_140318.jpg
    20200319_140318.jpg
    333.6 KB · Views: 20
  • 20200319_140311.jpg
    20200319_140311.jpg
    307.1 KB · Views: 20

Bmr4Karts

Member
Messages
227
Reaction score
32
Buy split sprockets new time, removing the axle for gear swaps is the old news. Plus split sprockets are cheap.

The only thing reverse threaded on a Dingo is two of the steering tie rods.
 

mapoopsie

Member
Messages
36
Reaction score
0
Thanks for getting back. I didn't want to cut the existing sprocket so had to remove the axle anyway. Not that big of a deal. Good to know those split sprockets are actually a viable option.

My new issue is that the motor doesn't run efficiently in reverse, so I'm stuck clockwise rotation only. That means I need to move the sprocket and sprocket guard to the center of the kart so I can mount the motor in the other direction. Cheap motors = zero flexibility.
 

Bmr4Karts

Member
Messages
227
Reaction score
32
Thanks for getting back. I didn't want to cut the existing sprocket so had to remove the axle anyway. Not that big of a deal. Good to know those split sprockets are actually a viable option.

My new issue is that the motor doesn't run efficiently in reverse, so I'm stuck clockwise rotation only. That means I need to move the sprocket and sprocket guard to the center of the kart so I can mount the motor in the other direction. Cheap motors = zero flexibility.

So its a brushed motor? Yeah, sliding to the other side is easy when you already have the axle off. :2guns:

Oh no, does that mean you have to move the battery mount?
 

mapoopsie

Member
Messages
36
Reaction score
0
Yeah, I really don't want to move the battery tray. That would require a lot of fabrication that I don't want to do. I'm thinking of cutting out the engine mount platform as outlined in red below and hoping that the plate doesn't flex too much under the torque.

And it is a brushless motor with the hall sensor and what not. The problem is that when I do the wiring trick to reverse the motor, the power is significantly reduced and the reverse switch no longer works. i sent a note to Alfa_wheels on ebay and asked if I could reverse the motor and maintain power and they said they didn't think it was possible.
 

Attachments

  • 20200326_121940.jpg
    20200326_121940.jpg
    273.6 KB · Views: 5

Bmr4Karts

Member
Messages
227
Reaction score
32
Your brushless motor is 100% reversible doing the wiring change. You need to change two phase wires and two different hall sensor wires. Easiest thing to do is bench testing. First swap the sensor wires in the motor connector then try different phase combos until it works. This works 100% of the time.

I just swapped my 72v motor I got from alpha wheels last night. It took me 30 minutes but I did it.

Write down the phase combos and systematically go through all of them.

.C. .M.
YGB YGB
YGB YBG
YGB GYB
YGB GBY
YGB BGY
YGB BYG


If none of these work, swap two hall sensor wires and go again. Keep track of your sensor wire combos also.
 

mapoopsie

Member
Messages
36
Reaction score
0
Yeah, I thought the brushless would be reversible as well. So, if I'm reading what you're writing correctly only one of these combinations will result in a correctly reversed motor direction?

What are the sensor wires (are you talking about the hall sensor wires coming from the motor to the hall sensor plug on the controller? The reason I ask is because you say to swap two hall sensor wires at the end. Assume the phase wires are the thick green/yellow/blue wires.

Also...what is ".C. .M." ?
 

Bmr4Karts

Member
Messages
227
Reaction score
32
Yeah, I thought the brushless would be reversible as well. So, if I'm reading what you're writing correctly only one of these combinations will result in a correctly reversed motor direction?

What are the sensor wires (are you talking about the hall sensor wires coming from the motor to the hall sensor plug on the controller? The reason I ask is because you say to swap two hall sensor wires at the end. Assume the phase wires are the thick green/yellow/blue wires.

Also...what is ".C. .M." ?

There are 36 total combination possible including the phase wires and halls sensor wires.

6 combos of hall sensor wires and 6 combos of phase wires under each hall sensor combo.

Out of those, there are usually a few combinations that work for CW, and a few others that work for CCW

C = Controller
M = Motor

Hall sensors wires are the tiny Yellow Green Blue wires coming from the motor. (DO NOT swap red and black, those are for power.)


Here's combo 1 of 36 which is stock (all colors matching)

Hall Sensors YGB YGB
Phase wires YGB YGB

If that doesn't work, swap the phase wires until you get through the other 6 combos.

If none of them work, wap some of the hall sensor wires, like YGB YBG
Then go through the 6 combos of phase wires.

If that does't work you change the hall sensors again and go through the 6 combos of phase wires.

Repeat until you've gone through all of them. Like I said before though, there should be at least two combos that work in the direction you need.

This has always been the way to reverse a sensored brushless motor's main direction. Better controllers have a learning mode where they adjust themselves automatically requiring no wire swapping.

Also, these brushless motors have 0 timing. That means they make the same amount of rpm in forward and reverse. The reason why you see less speed in reverse now is you are using the reverse switch and the controller limits the amount of speed reverse goes.
 

mapoopsie

Member
Messages
36
Reaction score
0
Ok. That's what I thought. So start with the phase wires (thick ones) and try all 6 combos of that and then start switching the hall sensor wires around and all 6 combos of that (which is 36-1 (out of the box config) = 35 total combinations. Attached pic of all possible combinations. Thanks again for clarifying. Off to trial and error my way to a reversed motor :thumbsup:
 

Attachments

  • Screen Shot 2020-03-26 at 1.37.53 PM.png
    Screen Shot 2020-03-26 at 1.37.53 PM.png
    69.5 KB · Views: 6

Bmr4Karts

Member
Messages
227
Reaction score
32
Ok. That's what I thought. So start with the phase wires (thick ones) and try all 6 combos of that and then start switching the hall sensor wires around and all 6 combos of that (which is 36-1 (out of the box config) = 35 total combinations. Attached pic of all possible combinations. Thanks again for clarifying. Off to trial and error my way to a reversed motor :thumbsup:

Thanks. I need some coffee. It is 6 x 6, lol. Luckily I've never had to go that far.

I'll fix my earlier post so future visitors won't get confused.
 

mapoopsie

Member
Messages
36
Reaction score
0
So...this config seemed to work:

CP=Controller Phase Wires
MP=Motor Phase Wires
MH=Motor Hall Wires
CH=Controller Hall Wires

CP MP MH CH
BGY GBY BYG BGY

The motor rotation is reversed (CCW) and the reverse switch works (this didn't work in previous configs). The speed also seems to be on par with the original configuration. My only concern is that the motor is quieter! I'm wondering if that is a problem.

Thanks for your help Bmr4Karts
 

Bmr4Karts

Member
Messages
227
Reaction score
32
As far as sound goes, quiet can mean two things.

Smoothers operation
Less RPM

The only to way verify that is with a laser tachometer. You'll love having one.

Also, don't forget your controller likely has a 3 speed switch connector. They all work different, but most of them run the fastest with nothing connected. I have one that was middle speed with nothing connected.
 

Bmr4Karts

Member
Messages
227
Reaction score
32
I'm working on this right this very moment. This is the motor I swapped the direction on last night. Just did an rpm test, 1166 rpm unloaded with 10in tire is 34mph. Should still hit close to that with me in it since this motor has more torque than the 48v version I tried.

If you look closely you'll see how I connect my motor and controller phase wires. DIY terminal block via a piece of hard plastic with some nuts and bolts. I'll wrap it in foam and kapton tape when I finish the installation.

I'll end up cutting off a lot of the wire coming from the motor, it's super thin and way too long. A resistance nightmare especially with the 100amp controller I'm using.
 

Attachments

  • 20200326_151404.jpg
    20200326_151404.jpg
    330.3 KB · Views: 16

mapoopsie

Member
Messages
36
Reaction score
0
That's awesome! I'm running the stock 18" tires with 7.2 to 1 gearing. Not sure how fast this will go, but it's for the kids mostly so I'm fine if it doesn't top 20. I just don't want to burn out the motor. I did something similar although I pinned the terminal block to the riser on the cage right under the controller. I guess I'll have more wire management tasks in my future.

When i dropped the axle, the disc brake caliper and all the parts fell apart (so that's super fun). Doesn't appear to be a way to get the disc in to the caliper without 17 hands.
 

Attachments

  • 20200326_162927.jpg
    20200326_162927.jpg
    312.5 KB · Views: 9

mapoopsie

Member
Messages
36
Reaction score
0
Got it running! Overall I'm pretty impressed. I didn't think the motor would be able to move all that weight as efficiently as it has. Here are two videos of the first bench test and first off road ride (after we'd gone around the block a few times).

HTML:
https://youtu.be/A2EmFbzgIvo

HTML:
https://youtu.be/S-NaO4BxVXY

One thing I'll note is that the controller got really hot when my wife made a run on it. She was going up a pretty steep hill in the grass from a dead stop and the chain slipped a bit (probably need to shim the motor up a bit more to tighten the chain). I'm currently running a 50amp fuse off the batteries, so I'm guessing I'll need to drop that down to a 45amp at least (the controller is capable of handling 42amp per the listing). I'm not sure how fast it'll go, but definitely over 20. I'm running a 7.2 to 1 drive ratio and I'm still not 100% certain I've got the motor wiring perfect for optimal performance.
 

Functional Artist

Well-known member
Messages
5,654
Reaction score
3,293
Location
Toledo, Ohio

Attachments

  • SAM_1599.jpg
    SAM_1599.jpg
    212.1 KB · Views: 2
  • SAM_1602.jpg
    SAM_1602.jpg
    378.7 KB · Views: 2
  • SAM_1607.jpg
    SAM_1607.jpg
    426.5 KB · Views: 3

Bmr4Karts

Member
Messages
227
Reaction score
32
Great job.

Based on how smooth video one is, I bet you have the motor wiring perfect.

A 48v motor can easily handle 300lbs.
 

mapoopsie

Member
Messages
36
Reaction score
0
Whelp. I tightened the chain and it fell off on the first test ride. It turns out I ended up bending the motor mounts. Not sure I can bend them back and retain the metal integrity.
 

Attachments

  • 15855018490241680305971823216060.jpg
    15855018490241680305971823216060.jpg
    267.2 KB · Views: 15

Bmr4Karts

Member
Messages
227
Reaction score
32
Whelp. I tightened the chain and it fell off on the first test ride. It turns out I ended up bending the motor mounts. Not sure I can bend them back and retain the metal integrity.

How were you adjusting chain tension? Only way this can happen is if you did not have all four motor bolts tightened down.
 

mapoopsie

Member
Messages
36
Reaction score
0
Fixed. I did have all four bolts locked down. I tightened the chain by adding spacers to raise the motor.
 

Attachments

  • 15855100948823003970361926263824.jpg
    15855100948823003970361926263824.jpg
    245.5 KB · Views: 12
Top