So my wife owns a shop that sells skin/hair care products, and she has just moved into another mall in town. There is a lot more foot traffic there, and we decided to make the change. Definitely for the better.
What she needed now however was a much better sign for the shop. I have been looking at what other shops have, and they all seem to have these illuminated light boxes with their signage printed on a Perspex panel on the front. You guys know what I mean.....
So I went out and started pricing what it would cost to have one made up to the size that we wanted, and I nearly choked at the prices. So me being a guy who thinks he can make the same type of thing for cheaper, went out and after a bit of googling learned that it was not too hard to make one myself. Instead of aluminium though, I went with making it out of wood.
I wanted to make a sign that was 1.3mX0.4m. I bought a sheet of melamine that was big enough to get all the pieces out of it that I needed and had it cut. I needed 2 x (40cm X 15cm) pieces for the sides, and 2 x (130cm X 15cm) pieces for the other two sides. The back piece was 1.268m X 0.4m. I got the wood cut at a local hardware store.
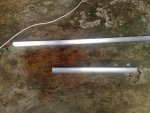
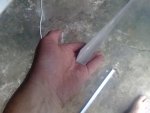
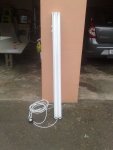
For the light, I bought a fluorescent strip light with two bulbs. It is 1.2m long, so it fits snugly in the box. I also bought a length of cord for the light as well as assorted wood screws.
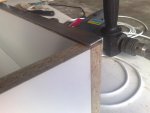
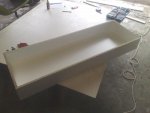
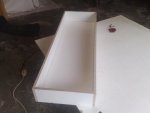
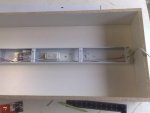
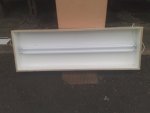
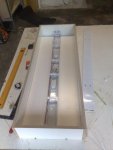
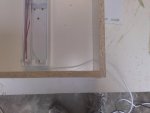
The first thing that I did was screw/glue all the sides together to make the basic frame. I then slid the back pice in at an angle and knocked it down so that it fitted snug. I then screwed it to the frame as well. I was drilling pilot holes for the screws as well as countersinking the heads.
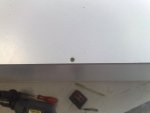
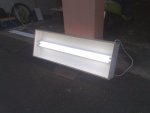
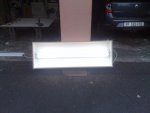
I then put the light together and screwed it to the inside of the box frame. I also drilled a hole in the top of the box for the cord to come out.
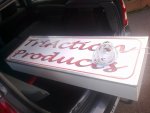
We are having the Perspex ordered and the signage done by a sign company in town, so hopefully we get that this week some time. I will then drill holes in that so that we can screw it to the edge of the box frame. I hope it will look nice.
Here are some pics of the build process. Sorry I didn't take an initial pic of all the pieces lying in a pile, but I forgot
Doing it DIY style will probably only cost me 1/4 of what a proper one would cost
What she needed now however was a much better sign for the shop. I have been looking at what other shops have, and they all seem to have these illuminated light boxes with their signage printed on a Perspex panel on the front. You guys know what I mean.....
So I went out and started pricing what it would cost to have one made up to the size that we wanted, and I nearly choked at the prices. So me being a guy who thinks he can make the same type of thing for cheaper, went out and after a bit of googling learned that it was not too hard to make one myself. Instead of aluminium though, I went with making it out of wood.
I wanted to make a sign that was 1.3mX0.4m. I bought a sheet of melamine that was big enough to get all the pieces out of it that I needed and had it cut. I needed 2 x (40cm X 15cm) pieces for the sides, and 2 x (130cm X 15cm) pieces for the other two sides. The back piece was 1.268m X 0.4m. I got the wood cut at a local hardware store.
For the light, I bought a fluorescent strip light with two bulbs. It is 1.2m long, so it fits snugly in the box. I also bought a length of cord for the light as well as assorted wood screws.
The first thing that I did was screw/glue all the sides together to make the basic frame. I then slid the back pice in at an angle and knocked it down so that it fitted snug. I then screwed it to the frame as well. I was drilling pilot holes for the screws as well as countersinking the heads.
I then put the light together and screwed it to the inside of the box frame. I also drilled a hole in the top of the box for the cord to come out.
We are having the Perspex ordered and the signage done by a sign company in town, so hopefully we get that this week some time. I will then drill holes in that so that we can screw it to the edge of the box frame. I hope it will look nice.
Here are some pics of the build process. Sorry I didn't take an initial pic of all the pieces lying in a pile, but I forgot
Doing it DIY style will probably only cost me 1/4 of what a proper one would cost
Attachments
-
 260120131182.jpg61.5 KB · Views: 8
 -
 260120131184.jpg50.1 KB · Views: 8
 -
 260120131185.jpg55.3 KB · Views: 7
 -
 260120131187.jpg85.6 KB · Views: 7
 -
 260120131189.jpg62.1 KB · Views: 7
 -
 260120131201.jpg47.7 KB · Views: 6
 -
 260120131198.jpg56.6 KB · Views: 7
 -
 260120131197.jpg66.1 KB · Views: 7
 -
 260120131194.jpg65.7 KB · Views: 7
 -
 260120131192.jpg55.6 KB · Views: 7
")

 BORING!