

firemanjim
Just kartin' around....
Not too long ago,someone asked what a jig was. Today,while thinking about a future build that will have double Aarm front suspension, I decided to build a jig to facilitate fabbing duplicate arms quickly with little effort.
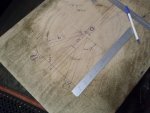
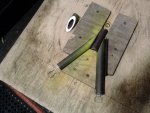
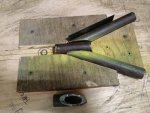
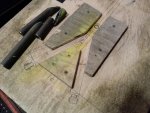
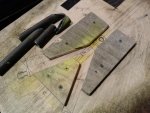
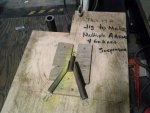
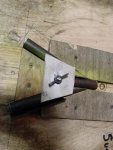
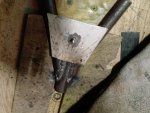
So to start,I used some 1/2" plywood and drew out what I wanted,in full scale. After that, I used templates to cut out the outer blocks. I started with the center block and screwed it into place. Then I added a couple pieces of tubing and set up the outer blocks and screwed them down. The last thing I needed was a way to clamp it all down , so I came up with a simple solution. I drilled a hole through the board and added a long bolt to the back side. I cut a triangle plate out of 1/8" material using previous template for center block. Drill a hole and add a big wingnut and you're all set..... The end of the bolt also gives you a place to put the ground lead. I think it came out pretty good for a quick throw together jig.
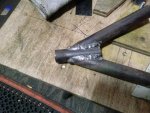
Now all I have to do is cut the tubing to length and correct angle, and slide them into jig, weld the exposed part, cool n flip, repeat weld of exposed area, then remove to finish up the welds. These arms will be threaded for 9/16"x18 heim ends to accept custom made spindles.
Hope this helps someone in a future build. If nothing else , it gives you a good idea of what you can do with a little time and thinking.....
EDIT: the note on the board is to keep from having to explain to EVERY BODY in my shop,ONE at a time, what Im doing.....
So to start,I used some 1/2" plywood and drew out what I wanted,in full scale. After that, I used templates to cut out the outer blocks. I started with the center block and screwed it into place. Then I added a couple pieces of tubing and set up the outer blocks and screwed them down. The last thing I needed was a way to clamp it all down , so I came up with a simple solution. I drilled a hole through the board and added a long bolt to the back side. I cut a triangle plate out of 1/8" material using previous template for center block. Drill a hole and add a big wingnut and you're all set..... The end of the bolt also gives you a place to put the ground lead. I think it came out pretty good for a quick throw together jig.
Now all I have to do is cut the tubing to length and correct angle, and slide them into jig, weld the exposed part, cool n flip, repeat weld of exposed area, then remove to finish up the welds. These arms will be threaded for 9/16"x18 heim ends to accept custom made spindles.
Hope this helps someone in a future build. If nothing else , it gives you a good idea of what you can do with a little time and thinking.....
EDIT: the note on the board is to keep from having to explain to EVERY BODY in my shop,ONE at a time, what Im doing.....
Attachments
-
 CAM00731.jpg90.8 KB · Views: 9
 -
 CAM00732.jpg100.6 KB · Views: 10
 -
 CAM00733.jpg104.5 KB · Views: 11
 -
 CAM00734.jpg103.6 KB · Views: 10
 -
 CAM00735.jpg106.4 KB · Views: 9
 -
 CAM00736.jpg96.2 KB · Views: 20
 -
 CAM00737.jpg101.4 KB · Views: 11
 -
 CAM00738.jpg96.8 KB · Views: 13
 -
 CAM00739.jpg115.3 KB · Views: 20


 Pat
Pat

