Mr. Casey, for someone who wanted help, you sure don't seem to be very engaged or cooraptive. I said I would help you, so here goes. If it seems too basic or elementary, remember, I don't know how much you know or don't know. I only know that you don't know enough.
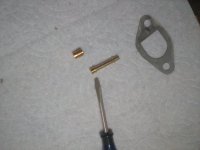
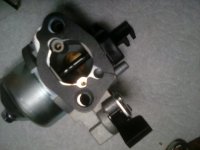
Pic #1 emulsion tube. Skinny end and fat end. ( screwdriver ) skinny in first. So the jet sits against the fat end. D shaped gasket. First thing that goes into the head.
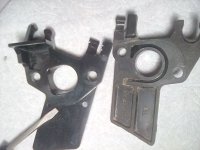
pic #2 plastic insulator. One side is flat. The other side has a channel cut into it. The flat side goes to the engine, up against the D shaped gasket. The long think part goes down.
Pic #3 gasket that goes against the channel side of the insulater. Note the small hole in the upper part. The gasket goes on exactly as orientated. When you turn put the carb on the small hole in the gasket WILL NOT be on the same as the small hole on the back side of the carb, which are shown in Pic # 4. They will be on opposite sides.
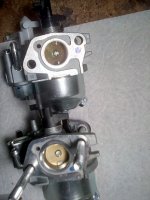
Pic #5 gasket sitting on back side of carb. Hole in gasket is NOT over hole in back of carb.
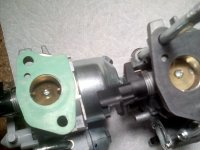
Pic #6 outside or front of carb. You may have a paper gasket ( as shown ) or you may have a thin metal plate with rubber around the edges. Doesn't matter. Put on whatever you have and then install the filter adapter that came in the kit.
Pic #7 orientation of fuel bowl should be to allow easy access to drain plug.
The engine will not run without the plastic insulator. It MUST be installed as described. Same is true for the gasket in Pic #3. Had to be put on correctly, or the engine won't run.