scott_shot
New member
So im finally starting my second build log of the same buggy as it was an absolute death trap and no way safe to handle a B&S Engine never mind a Suzuki 1100! Its in the this section of the forum under Scottish piranha if your interested though i suggest looking near the end as alot is me asking queastions, Most probably silly.
I have learned that the project log section should be for that and that only so moderators may be pleased to know this is strictly what i'm using this thread for
So here we are not much visual progress atm but i have been busy with prep, prep and more prep, mainly marking out parts (carefully) and roughly cutting leaving room for any fine tuning when comes to that part.
Biggest Holdup atm is getting a Welder, had one but decided to get rid as i want something decent and start as i mean to go on
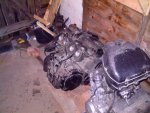
Thought i would takes some pics tonight of some of the bits and pieces that are just waiting to be used.


got more around the house etc but that's the most of it.
90% of metal ready to weld up the chassis together so big progress to come
 as it was an absolute death trap and no way safe to handle a B&S Engine never mind a Suzuki 1100! Its in the this section of the forum under Scottish piranha if your interested though i suggest looking near the end as alot is me asking queastions, Most probably silly.
I have learned that the project log section should be for that and that only

So here we are not much visual progress atm but i have been busy with prep, prep and more prep, mainly marking out parts (carefully) and roughly cutting leaving room for any fine tuning when comes to that part.
Biggest Holdup atm is getting a Welder, had one but decided to get rid as i want something decent and start as i mean to go on

Thought i would takes some pics tonight of some of the bits and pieces that are just waiting to be used.


got more around the house etc but that's the most of it.
90% of metal ready to weld up the chassis together so big progress to come


