
You are using an out of date browser. It may not display this or other websites correctly.
You should upgrade or use an alternative browser.
You should upgrade or use an alternative browser.
Hello!
- Thread starter Jsmackle
- Start date
Denny
Canned Monster
Yes! Exactly! But if the weights won’t spread apart then the shieve won’t move like it should.
That was my suspicion. I’ll remove the springs see if I can get it to move but uh it’s a bit rough…I tried to move them with a screwdriver not to much force but enough I should have for something! Looks like wire brushes are coming out! I love the smell of rust in the morning!
Is there a replacement for these?
Is there a replacement for these?
Denny
Canned Monster
GoKart Supply used to cary parts for them. Or you could pm JimD on here he owns the company that made that clutch. He’s a good guy and a great resource for 20 series stuff.
panchothedog
Well-known member
- Messages
- 2,925
- Reaction score
- 3,968
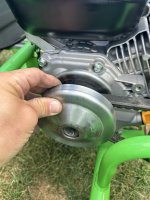
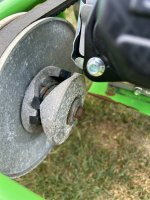
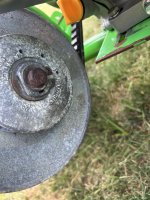
Yes, the outer part of the driver is supposed to slide towards the engine in order to grab the belt as it moves inward and closes. But there is a problem. That is the most filthy, grungy looking driver I have ever seen. In post # 7 I said to get out too brake parts cleaner and scotch brite. Obviously you didn't. After looking at the MESS , you are way past scotch brite territory. Take the springs off of the weights. Clean the shaft that protrudes from each weight and the inside of the corresponding hole into which it slides. When I say clean, I mean sand first with about 180 grit sandpaper, then finish with 320. Then wash with alcohol or completely clean with brake parts cleaner. Next, in your 3rd picture, where you are holding the driver in your hand, the heavy cast piece with the 4 clover leaf tabs needs the same treatment as well as the part it slides into. To get the inside of the weights as well as the channels for the clover leaf, wrap the sandpaper around a thin phillips head screwdriver. Don't be afraid to over work these areas. These parts need to be fall apart loose. Then go after the sheaves ( the disc that grab the belt) same procedure. When you are reassembling, take note of the heavy cast piece. The ends are different. The end with a step in it ( clearly visible in your picture) goes to the outside. You can use graphite to lube if you want. I put mine back together bone dry and they work fine. NO OIL, grease or any normal lubricant at all. I have 5 vehicles with the same torque converters. I have done the above procedure 4 or more times to each one. Usually I catch them before the 180 grit sandpaper is needed. But if you don't do as I have explained, do yourself a favor and throw it away and order a new one. The clutch is constantly opening and closing as throttle applied and the parts need to move freely.
@panchothedog yes I know. Sorry. Today we cleaned the parts possibly not that through. Wire brush, air hose, Evapo rust over night. Wire brushed every thing again. Scotchbrite, acetone wash, lube. Confirmed the springs are working.some of the parts are pitted.
I think something else is wrong I feel like I’m missing something here is the assembly order I’m using. I would like to clean the parts better I did not go all the way down to 180grit sandpaper but if I’m missing something and have to over new then idk.is the order I’m assembling them correct?
I think something else is wrong I feel like I’m missing something here is the assembly order I’m using. I would like to clean the parts better I did not go all the way down to 180grit sandpaper but if I’m missing something and have to over new then idk.is the order I’m assembling them correct?
Attachments
-
 IMG_3459.jpeg2 MB · Views: 6
 -
 IMG_3460.jpeg2 MB · Views: 6
 -
 IMG_3461.jpeg1.7 MB · Views: 6
 -
 IMG_3462.jpeg1.8 MB · Views: 6
 -
 IMG_3463.jpeg2.1 MB · Views: 7
 -
 IMG_3464.jpeg1.6 MB · Views: 7
 -
 IMG_3451.jpeg1.6 MB · Views: 7
 -
 IMG_3454.jpeg1.5 MB · Views: 6
 -
 IMG_3452.jpeg1.8 MB · Views: 6
 -
 IMG_3453.jpeg2 MB · Views: 6
panchothedog
Well-known member
- Messages
- 2,925
- Reaction score
- 3,968
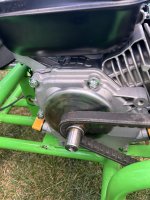
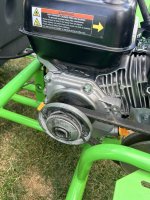
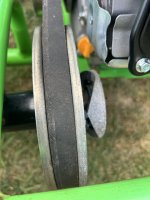
From the pictures, it looks like everything is in the right order. The most important points are that the zinc weights slide open and closed ( without springs ) freely. No drag. Springs should be oriented so that the joints are 180* opposite each other. In your 5th picture, image #3463 if you were to lay the outer assembly on the bench, the heavy cast piece must be able to literally fall through the piece it slides into. I'm sure you're aware that after image #3464 it must be bolted to the crank shaft, and should be torqued to 25 lb.ft. But wait till you get the bugs worked out. What do you think you are missing, or doing wrong. From the looks of the driven clutch, it is probably going to need some attention as well. Don't worry too much about the pitting. It's not good for belt longevity, but as long as there is no surface rust, and it's clean and DRY it should be ready to go. The springs that go around the weights come in different strengths, and yours look tired.. But that would only cause it to shift early. Let's get it going 1st.
Well I can confirm they slide. The springs are heavy but I have also confirm as the rpm’s increase the weights do fly outward. The problem is nothing ever goes further than that. Shouldn’t the weights movin outward push against the piece in 3464 (outter housing) cause it to slide along the shaft towards the motor putting tension on the belt?From the pictures, it looks like everything is in the right order. The most important points are that the zinc weights slide open and closed ( without springs ) freely. No drag. Springs should be oriented so that the joints are 180* opposite each other. In your 5th picture, image #3463 if you were to lay the outer assembly on the bench, the heavy cast piece must be able to literally fall through the piece it slides into. I'm sure you're aware that after image #3464 it must be bolted to the crank shaft, and should be torqued to 25 lb.ft. But wait till you get the bugs worked out. What do you think you are missing, or doing wrong. From the looks of the driven clutch, it is probably going to need some attention as well. Don't worry too much about the pitting. It's not good for belt longevity, but as long as there is no surface rust, and it's clean and DRY it should be ready to go. The springs that go around the weights come in different strengths, and yours look tired.. But that would only cause it to shift early. Let's get it going 1st.
In 3464 shouldn't that outter housing like attach to via that oval essentially locking it please with 3463? Pic 3464 is as close as I can get them. the bolt on with the washer and it holds them together but it’s not locked in place by that oval shape in the center like I feel it should be.
Last edited:
panchothedog
Well-known member
- Messages
- 2,925
- Reaction score
- 3,968
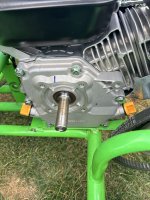
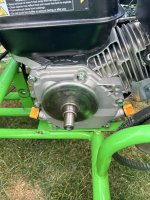
3 things to check. The key in the heavy cast piece, is it engaged on the crank.It needs to be. The outer most piece has two straight edges that have to sit on the end of the cast piece and be locked into place by the washer and bolt. Can you post a picture of it bolted in place. If the bolt is too long, or the washer doesn't marry up against the outer cover you won't get the pressure, or tension to lock everything in place. Lastly, the weights have a different taper on each side. One side is flatter then the other. The steeper side goes towards the engine. You may have them on backwards. Your description of how it all should work is correct.
you guys are awesome! the cart is up and moving... it has no brakes to now there's no stopping it... lmbo! Time to fix the brakes, clean the driven unit, and i probably replace the main sprocket! what did you all use to strip/clean the frame?
Denny
Canned Monster
I used to sandblast. But you probably don’t have the equipment to do that. So a wire wheel on an angle grinder and sandpaper will be your best friends for a while. No need to remove solid paint if it’s not bubbling up. Just blend the edges smooth and primer over it and the bare steel. Oh, we know we’re awesome already.
Denny
Canned Monster
Define save? Do you have a big air compressor? Sandblasting takes lots of air. It’s not so much about saving time as it is about getting the metal clean. Then I like to treat it with ospho or Metal-Ready from POR-15 then a couple coats of POR-15 with some laquer primer over it while it’s still tacky. After it all dries for a few days give it a good sanding with 320 then a nice 2k epoxy coat of primer and scuff it with more 320 and then paint. But I have a tendency to go overboard on these kind of projects.haha! Well i do have an air compressor... i could pick up one of those gravity fed ones at Harbor freight. Will it save a lot of time?

Master Hack
Well-known member
Seriously? Doesn'f sound like it. Thats purdy normal for someone thats OCD.But I have a tendency to go overboard on these kind of projects.
No disrespect intended, i have the same disorder, and several others!

JimD
Well-known member
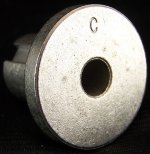
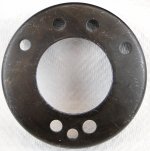
You got the driver looking pretty good. There is a powder metal insert that goes inside the driver unit that looks like this. Has a built in keyway and it is to support the bolt so it goes in straight and prevents the outside cover from excess wobble. Do you still have that part? if you want to have bother the driver cleaned up and the driven, put it in a box and I will take it all apart and makes sure it is all working correctly. If they are overly pitted I will burnish them to make them shine like a mirror but they will still be pitted and that is what will wear the belt. Carter use to put a washer on the crankshaft for alignment which is why this powder metal part has a "C" on it so these went to Carter since most manufacturers didn't put the washer on the crank.
Attachments
-
 32-0007.jpg289.8 KB · Views: 1
Denny
Canned Monster
Thanks for chiming in Jim. It’s been about 30 years since I’ve had a 20 series apart in my hand. Now his problem is brakes. 
JimD
Well-known member
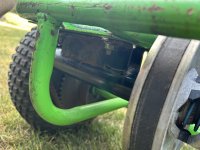
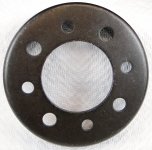
I see the one end of the brake band on the rod but hard to guess where the fixed end is attached until he takes off the wheel and give us another picture. The brake bands are still available and the drums are just a clutch drum with some holes stamped in it to align with the bolt hole pattern on the wheel. When hunting for the brake band all he needs is the OD of the brake drum, ours were 4 3/16" .
Attachments
-
 02-10-07 BD7 (TOP).jpg1.5 MB · Views: 2
 -
 02-10-08 BD8 Drum.jpg1.4 MB · Views: 2
i do not have that...piece i thought it was odd to have that much empty space. My goal is to clean up what I can now let him play with it and take it back apart over winter. Is that something we can arrange for then. The other thought is switching it over to a 30 series since more parts seem to be available from what i gather the driver unit is compatible i'm not sure about the driven unit as some people say it's 5/8 vs. 3/4 thoughts? Im taking the brakes apart this weekend. I just have not had time to dig into the other mechanisms yet (including the driven unit).You got the driver looking pretty good. There is a powder metal insert that goes inside the driver unit that looks like this. Has a built in keyway and it is to support the bolt so it goes in straight and prevents the outside cover from excess wobble. Do you still have that part? if you want to have bother the driver cleaned up and the driven, put it in a box and I will take it all apart and makes sure it is all working correctly. If they are overly pitted I will burnish them to make them shine like a mirror but they will still be pitted and that is what will wear the belt. Carter use to put a washer on the crankshaft for alignment which is why this powder metal part has a "C" on it so these went to Carter since most manufacturers didn't put the washer on the crank.
Denny
Canned Monster
You can not mix and match 20 and 30 series clutches. They take totally different style belts. Also you can not put a 30 series on that kart. It was designed for the 20 series. You’ll never get it lined up properly. The 20 series is much more efficient CVT system. Use only GENUINE COMET OR MAX-TORQUE BELTS!!!
fair enough.You can not mix and match 20 and 30 series clutches. They take totally different style belts. Also you can not put a 30 series on that kart. It was designed for the 20 series. You’ll never get it lined up properly. The 20 series is much more efficient CVT system. Use only GENUINE COMET OR MAX-TORQUE BELTS!!!