Hammer head 208r

margo

New member
Messages
3
Reaction score
0
Hammerhead 208r slow speed

what I have done so far: new spark plug
New filter
New throttle cable
Clean the carburettor
Replaced the throttle springs


slow and doesn’t get full revved out . If I push the governor it fully revves out to .

any help appreciate
 

Attachments

  • 926EE3DA-27FA-48EA-9731-47CC9C2D61B7.jpeg
    926EE3DA-27FA-48EA-9731-47CC9C2D61B7.jpeg
    1.6 MB · Views: 14

madprofessor

"Loose Cannon Creations"
Messages
2,899
Reaction score
968
Location
Jacksonville, Florida
But seriously, Margo :welcome2:. We're all here to help, and we love to do that. :idea2: And obviously in my case like to crack wise and make jokes:lolgoku:. Please try again on the typing to explain what's going on. All I understand so far is that you have to push on the governor to get enough rpm's out of your engine, and maybe it's slow to wind on up :huh:?
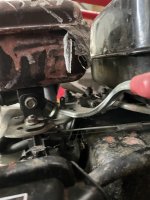
Please provide engine maker and size, and further detail on the problem. If it has a tachometer, how many rpm's before and after pushing the governor. Also, in the picture is that some kind of epoxy used to seal up a leaky gas tank? And how old is the gas in it? 🛸
 

margo

New member
Messages
3
Reaction score
0
Yes that pic is off the hammerhead 208r muffler on the 2nd hammerhead I own . That buggie is what I’m comparing the speed issues with. I had a hole in muffler and tried to fix unsuccessful- need to order a new muffler

the dirt buggies are 2 years old and should go approximately 25mph . No speedometer on buggie .

the issue I’m having is the buggie seems to be restricted to go and higher speed than 15mph. I have unscrew the restrictor .
Can’t seem to get it any faster . If I put in neutral and move the governor it revves much higher .
Engine

  • 208cc LCT Powered Engine
  • Automatic Start with Pull Start backup
  • Transmission: Forward/Neutral/Reverse
Drive Train

  • Clutch: Automatic CVT
  • Driveline: Rear two wheels drive
 

madprofessor

"Loose Cannon Creations"
Messages
2,899
Reaction score
968
Location
Jacksonville, Florida
2 things, the new throttle cable and new throttle springs, leap out to me about this. Could it be that it's something new instead of old giving you grief? Any chance the throttle isn't opening up all the way because that's as far as the new stuff will twist it, due to an installation error? With the engine turned off, can you give it full throttle and physically see if a push of the governor like you're talking about twists it further?
 

margo

New member
Messages
3
Reaction score
0
Hi this is an problem that I have with the buggies and tried To trouble shoot so
replaced new springs and throttle cable to make it better but it’s just the same .
When I press throttle it goes out the same distance as if I were to move leaver my self . I can see the governor move slightly .

but I can get it to increase revves more buy pushing the governor arm.
 

madprofessor

"Loose Cannon Creations"
Messages
2,899
Reaction score
968
Location
Jacksonville, Florida
Sounds like one of two things, throttle linkage is set up too short, or the governor's doing its job. You say the manual throttle lever doesn't twist the throttle any further than the gas pedal does, so that would eliminate a linkage problem.
I hope this means you've looked to see that the manual lever is physically twisting the throttle connection to the carburetor all the way open. After all, the carb has its own limitation as to how far it will twist, you need to be sure that's happening with both the lever and the gas pedal. Verify it by eye and by physically trying to make it go further with your fingers, see for sure that the carb can't open up any further.
If that's all correct, then the governor's doing its job to limit the max rpm's the motor's allowed to spin up. Watch this video to learn how that works, and to learn where the adjustment is.......How the Small Engine Governor Works - YouTube........then watch this video where a guy adjusts the governor arm connection to the protruding governor shaft........How To Adjust Mechanical Governor On Small Engines - YouTube.............
Then if you can stand it, watch this video of Taryl with his hillbilly fake teeth trying to do comedy while teaching how to adjust governors, I believe it's a little easier to follow, watch from 3 minute mark through 9 minute mark...........How To Properly Set the Governor On A Small Engine - With Taryl - YouTube..............
If all else fails, we can show you how to raise the rpm with just a ziptie in about 60 seconds.
 

Karttekk

Well-known member
Messages
2,024
Reaction score
733
Location
Elizabeth, PA
Did you buy the buggy new? When did this performance issue begin? Here is an LCT engine service manual describing how to adjust the governor. The engine appears to be a basic Honda clone similar to the Predator 212 and many others. Is the throttle lever nut loose enough to allow full opening of the lever when fully depressing the gas pedal? Check for a restriction in the exhaust, clogged air or fuel filters, worn, sticking or slipping driven clutch or worn belt, sticking brake caliper. What happens when you jack the rear of the buggy up, start the engine and rev it up through the gas pedal?


Karttekk

Well-known member
Messages
2,024
Reaction score
733
Location
Elizabeth, PA
When the rear of the kart is off the ground, watch the torque converter to make sure both the drive & driven pulleys are working correctly, check if the muffler has a spark arrestor screen that's partially clogged, see if the wheels turn freely off the ground. Eliminate any obvious causes step by step.
 

USAMAC

Member
Messages
88
Reaction score
9
Location
NE Georgia
Watch this video to learn how that works, and to learn where the adjustment is.......How the Small Engine Governor Works - YouTube........then watch this video where a guy adjusts the governor arm connection to the protruding governor shaft........How To Adjust Mechanical Governor On Small Engines - YouTube.............
Then if you can stand it, watch this video of Taryl with his hillbilly fake teeth trying to do comedy while teaching how to adjust governors, I believe it's a little easier to follow, watch from 3 minute mark through 9 minute mark...........How To Properly Set the Governor On A Small Engine - With Taryl - YouTube..............
If all else fails, we can show you how to raise the rpm with just a ziptie in about 60 seconds.
Hey so I watched these videos and others as well, and I still cannot come to grips on if it's good to remove the governor, for more rpm than you can get with it still in there or if makes more sense to leave it installed but to open it up as much as possible?
 

madprofessor

"Loose Cannon Creations"
Messages
2,899
Reaction score
968
Location
Jacksonville, Florida
(#1): I made the mistake of removing the governor arm from the governor shaft (pinch bolt connection) sticking up out of the top of the case, and trusting the cotter key that's under that connection to keep the governor shaft from slipping down into the case. Of course the cotter key vibrated off, of course the shaft slipped down, and of course the shaft got hit, bent, and jammed by the crankshaft counterweights. Fortunately the shaft stayed jammed there and didn't fall down into any other moving parts.
(#2): Had to order a gasket set and open the case of course. If I had just decided to remove the governor guts in the first place and not take a chance on a possible catastrophic failure, could've saved me some grief. You'll take that same chance if you run the engine ungoverned with the OEM guts still in there. Excessive rpm's can sling that stuff apart. It's easy stuff to remove if you don't try and do it from the clutch side of the case like all the YouTube videos show folks struggling with. If you pull off the flywheel on the other side, you can just punch the governor gear into the case from there in 2 seconds.
(#3): If you run ungoverned with the OEM flywheel you take the chance of it exploding, and folks have been killed in the world by less than that. It's the main point of billet flywheels. While replacing it, you punch the governor in as in #2 above.
I got the fear put into me, so I'd personally never leave the guts in there if ungoverned, but you do you. I will say this, if you don't change out the stock valve springs (10.8 lbs. on Predator 212's) for stiffer ones (I've got 22 lbs. now) the valves will start to "float" at a certain rpm and not let the motor rev any higher because of that. On a Predator 212 it's 5,200 - 5,500 rpm.
 

USAMAC

Member
Messages
88
Reaction score
9
Location
NE Georgia
(#3): If you run ungoverned with the OEM flywheel you take the chance of it exploding, and folks have been killed in the world by less than that. It's the main point of billet flywheels. While replacing it, you punch the governor in as in #2 above.

on Predator 212's) for stiffer ones (I've got 22 lbs. now) the valves will start to "float" at a certain rpm and not let the motor rev any higher because of that. On a Predator 212 it's 5,200 - 5,500 rpm.
I'm not intimidated to access the case and to remove both sides, infact I'm just about looking for any excuse to do so for the experience and knowledge! When the day comes I remove the gov, I will for sure go that route.. here's a great video on doing it the way you suggest.
VIDEO

That being said, I am very intimidated by removing the main part in there, not the cam shaft, what's the center one called on a Predator 212?

It's the reinstallation of it that concerns me, I've read of people having trouble getting it right and my inexpensive worries me.

The springs I'd feel alot more comfortable replacing and I do feel like I'm up to that, but I'd love a recommendation for ideal tools in removing the springs as I'll be alone and my first time.

EDIT: I forgot to mention, I ordered a tachometer today for our kart, to monitor and become more knowledgeable before I do remove the governor.
 
Last edited:

Karttekk

Well-known member
Messages
2,024
Reaction score
733
Location
Elizabeth, PA
There are only 6 bolts I believe holding the side cover on. Buzz those loose, tap the side cover with a small hammer & it should pop right off. You'll need some RTV sealant or a new gasket when going back together. Drain any oil first.
 

madprofessor

"Loose Cannon Creations"
Messages
2,899
Reaction score
968
Location
Jacksonville, Florida
I'm absolutely dead set against ever using sealants instead of gaskets on any component where bearing endplay has to be considered.
Yes, people do it all the time, but a few bucks for a full set of gaskets doesn't cost much more than a tube of Room Temperature Vulcanizing sealant. Here's a link to the last performance set I ordered for my Predator 212 hemi, that has a .012 s.s. head gasket, quality valve cover gasket, new main bearing seals, the sump cover gasket of course.........just read it.................
Predator 212 cc 60363 HEM Hi Performance Gasket Set | eBay
If you're worried about getting the sump cover back on because the crankshaft sits in it, trust me it slides right on. Just don't remove or reinstall the cover with your piece of keystock still sitting in the shaft keyway, it can hang up on the shaft seal. The hard part actually is the part about getting that end of the camshaft into its journal looking into the side of the case, but just lay the case over onto the flywheel side and it's a breeze. Get those 2 dots on the cam driver gear and the camshaft gear itself to meet together.
 

USAMAC

Member
Messages
88
Reaction score
9
Location
NE Georgia
Loctite is your friend. The blue stuff. Get a big bottle you’ll use it on everything.
I have and use it and have ordered a bottle of red I intended to use on the crank case when I tap the gov port, but was wondering if this was a sealant mad professor was against too.. I did not like the look of using a sealant as a head gasket or valve cover gasket but made sense to me for threads, over using a gasket on a bolt.
 

madprofessor

"Loose Cannon Creations"
Messages
2,899
Reaction score
968
Location
Jacksonville, Florida
My entire distaste for sealants on crankcases and similar things is based on three simple things..............
One is the oozing of foreign material into the case when torqueing down the bolts.
Another is the mess and worsening mess of doing it repeatedly, like when checking bearing endplay after torqueing it down and then needing to reopen the case for shimming and repeat. And repeat.
Finally, there's the need for very exact and repeating tolerance when doing the repeats just described for setting endplay. A sump cover paper gasket lightly oiled to aid in rip-free removal can repeatedly be torqued down and you can repeatedly have the same amount of bearing endplay as when you added a shim last time. Not so easily done with varying amounts of RTV.
See this link for Loctite brand sealants if you're fond of the brand. You'll see there's much more than just their many levels of threadlockers
................Products (loctiteproducts.com)....................Then see this link for their threadlockers only.............A Full Guide to Loctite Threadlockers: 242 vs 243, 272 vs 271, 221 vs 222 | ToolingFun
 

Karttekk

Well-known member
Messages
2,024
Reaction score
733
Location
Elizabeth, PA
If used correctly, sealants have their place. They fill in small defects in mating surfaces, spread easily and create a tight seal once they cure. The Robin engine I just got running used sealer from the factory on the side cover. I put a clutch pack in my nephew's Honda motorcycle, they call for a particular sealant when reassembling.

Fast forward to about 6:34
 
Top