Thanks for the info! I did mount the master cylinder next to driver seat with a connecting rod to pedal. Seems to work well. Haven't bled brakes yet. Glad mcp told you 700 lbs. I am sure with 2 adults and the weight of the cart I should be below that. But not by much!
I have run into 2 issues that are delaying me.
1. Mounted steering wheel too low.
2. Seats are too close together so I will have to redo mounts for passenger seat.
Should run tomorrow. I will put up pics tonight.
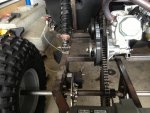
Oh and wouldn't you know, I was one link short on my chain. Figures! No worries though replacement is headed to my house tonight.
Another note on brakes - I initially put the MCP master cylinder behind the pedal so that the pedal pushes on the lever.. it doesn't work well, as in, you'll bend the pedal before you put on enough pressure to lock up the wheels when you're moving. I called MCP to ask them if I should put front brakes on but they told me the hydraulic caliper is rated to stop a 700lbs racing kart so it should be enough if I mounted it correctly.
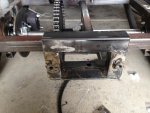
I moved the master cylinder to by the driver seat and used a rod - connected low on pedal to high on lever for maximum leverage - and now it easily locks up the wheels.
My speedo wasn't working but I was probably doing 30-40mph and the caliper was fine. Pretty hot after burning around the forest for a while, but fine.