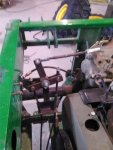
Go gator go

anickode

Active member
Messages
2,296
Reaction score
15
Location
S.E. Michigan
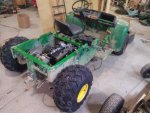
On was much easier than off. 10 minutes each, including seating the beads.

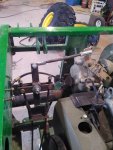
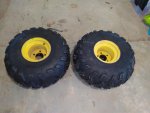
And I didn't even use starting fluid. Had it ready, but no need. With that much sidewall (25" tire, 9" rim), a strap and a couple bounces had them taking air real quick.
 

Attachments

  • IMG_20200412_173803.jpg
    IMG_20200412_173803.jpg
    191.8 KB · Views: 6

anickode

Active member
Messages
2,296
Reaction score
15
Location
S.E. Michigan
Supporting herself on all fours for the first time in years, and probably the first time there's been a matching set of tires on it in over a decade. :lolgoku:

We officially have a roller!
 

Attachments

  • IMG_20200412_213851.jpg
    IMG_20200412_213851.jpg
    228.5 KB · Views: 12

anickode

Active member
Messages
2,296
Reaction score
15
Location
S.E. Michigan
Just got word that my clutch spring FINALLY shipped after my order sitting for about a week. I get it though, they're running on skeleton crews and all of the brick and mortar JD parts stores are closed, so demand is high right now, I'm sure.

I did however realize that my front right shock is blown out and the two don't match. The original shocks (discontinued) on these things were soft and flimsy and prone to bending. The driver's side must have gotten destroyed at some point because it's been replaced with the old (also discontinued) "heavy duty" version, which is not the same as the new heavy duty version.

Since I'll have to buy both to get them to match, and I don't want to spend $200+ for a pair, I'm going to try some cheap 340mm ATV/Motorcycle shocks. Should fit just fine.

In the meantime, I've started on the wiring.
 

anickode

Active member
Messages
2,296
Reaction score
15
Location
S.E. Michigan
Got the basics of the electrical system done. It starts, runs, stops, and the lights work.

Wired from scratch because the old wiring harness was mostly gone, and not set up right for this type of engine. Still some cleaning up to do, and add in wiring for power dump actuator, winch, tail lights, and a radio. That stuff can come later.

https://youtu.be/v--IZDouHyA
 

anickode

Active member
Messages
2,296
Reaction score
15
Location
S.E. Michigan
Depends on what your wiring riding mowers and go karts are crazy simple

Does hooking a kill switch to a wire even count as wiring?

But yes, small engine wiring is child's play. I deal with more complex stuff normally. This install (the nicer looking of the 2 open panels) and the wall was a 2 day build. One prefabbing and wiring the panels, and one installing. Probably THE SIMPLEST stuff I deal with. Latching, non-cascading motor control circuits... 4 remote stop locations, remote control console with indicator board. Easy, wired on the fly, no diagrams or schematics.

Most of what I do is PLC and PLC/electromech combination. Big panels. Thousands of wires, most of which are the same color. :roflol:

The gnarly looking is what was there before.
 

Attachments

  • IMG_20191017_103818.jpg
    IMG_20191017_103818.jpg
    297.1 KB · Views: 11
  • IMG_20190424_084541.jpg
    IMG_20190424_084541.jpg
    370.8 KB · Views: 10
  • IMG_20190530_134638.jpg
    IMG_20190530_134638.jpg
    306.8 KB · Views: 11

landuse

Moderator
Staff member
Messages
18,626
Reaction score
224
Location
Pietermaritzburg, South Africa
Does hooking a kill switch to a wire even count as wiring?

But yes, small engine wiring is child's play. I deal with more complex stuff normally. This install (the nicer looking of the 2 open panels) and the wall was a 2 day build. One prefabbing and wiring the panels, and one installing. Probably THE SIMPLEST stuff I deal with. Latching, non-cascading motor control circuits... 4 remote stop locations, remote control console with indicator board. Easy, wired on the fly, no diagrams or schematics.

Most of what I do is PLC and PLC/electromech combination. Big panels. Thousands of wires, most of which are the same color. :roflol:

The gnarly looking is what was there before.

Nice work!!
 

Kartorbust

Well-known member
Messages
3,901
Reaction score
194
Location
Utica, NE
Does hooking a kill switch to a wire even count as wiring?

But yes, small engine wiring is child's play. I deal with more complex stuff normally. This install (the nicer looking of the 2 open panels) and the wall was a 2 day build. One prefabbing and wiring the panels, and one installing. Probably THE SIMPLEST stuff I deal with. Latching, non-cascading motor control circuits... 4 remote stop locations, remote control console with indicator board. Easy, wired on the fly, no diagrams or schematics.

Most of what I do is PLC and PLC/electromech combination. Big panels. Thousands of wires, most of which are the same color. :roflol:

The gnarly looking is what was there before.

There's something satisfying about proper wire/cable management.
 

anickode

Active member
Messages
2,296
Reaction score
15
Location
S.E. Michigan
There's something satisfying about proper wire/cable management.

It looks even better with the covers on the Panduit. It wasn't quite finished when I took the picture. Not my neatest work, but the time frame I had to do it in was pretty tight. The hardest part was reverse-engineering the wiring diagram. :lolgoku:

In case anybody's curious that's a control unit for a rope tow on a ski hill. :2guns:
 

anickode

Active member
Messages
2,296
Reaction score
15
Location
S.E. Michigan
A bit more done today...

Got the brake linkage modifications done. Had to lengthen the shaft by 2¾" and move one of the cables over by the same amount to accommodate the larger engine. All existing cables disassembled, sleeves blown out and dry lubricated. Everything works as it should. Brakes are nice and responsive and tight (dual mechanical drums)

I have the shift linkage just about sorted. Again, required quite a bit of modification because of the new engine. The turf gator does not have a "neutral" position on the shifter because the engine is never running when you aren't moving. It DOES have a neutral in the trans, but the factory shift mechanism is a sort of sprung over-center mechanism that doesn't allow you to actually put it in neutral. I had to nearly redesign the whole thing as well, to allow it to work around the new engine and allow the trans to be put in neutral. Shift cables used to go directly to the trans. Now they go to a rocker mechanism that shifts the transmission via pushrod, again MOSTLY to work around the new engine. The 3 detents in the transmission don't allow for a good "feel" at the shifter, so I will modify the shift lever itself to provide some positive feedback for the gears. I also eliminated the massively overcomplicated switch mechanism for the backup beeper, as it was partly responsible for the over-center action in the shifter, and the alarm is stupid on a small vehicle anyway.

Pics to come later.
 

anickode

Active member
Messages
2,296
Reaction score
15
Location
S.E. Michigan
Shift linkage in F,N,R positions.

I'll pull it back out for sandblast and paint, probably round off the square corners a bit more, but I wanted to make sure it worked first.
 

Attachments

  • IMG_20200418_194446.jpg
    IMG_20200418_194446.jpg
    226.8 KB · Views: 6
  • IMG_20200418_194525.jpg
    IMG_20200418_194525.jpg
    285.4 KB · Views: 5
  • IMG_20200418_194505.jpg
    IMG_20200418_194505.jpg
    267.4 KB · Views: 6

Kartorbust

Well-known member
Messages
3,901
Reaction score
194
Location
Utica, NE
So, I'm curious on that Cherry Bomb muffler, what did you have to do to get it to hook up the the engine exhaust? Did you use a 1" to 2" adapter? How well does it do to actually suppress the noise? The video kind of made it hard to tell, but it sounded manageable.
 

anickode

Active member
Messages
2,296
Reaction score
15
Location
S.E. Michigan
So, I'm curious on that Cherry Bomb muffler, what did you have to do to get it to hook up the the engine exhaust? Did you use a 1" to 2" adapter? How well does it do to actually suppress the noise? The video kind of made it hard to tell, but it sounded manageable.

I just slotted the 2" collar about every ⅜" and started folding the tabs inward, letting them overlap. Once I had the desired offset cone, I ran a cutoff wheel down each slot again to remove the excess, straightened the tabs out, and then welded them together.

It actually does REALLY nicely with the noise. Cuts out most of the higher frequency tones that tend to give small engines that raspy buzz and leaves the nice deep rumble. It's not terribly loud, especially from up front. Would definitely recommend it for a V-twin build if you have the space. The 2 into 1 header will help scavenge exhaust, and the cherry bomb gives it a really nice tone without the restriction.

If you listen to the video with some good headphones, you can get a better idea of the sound.
 

anickode

Active member
Messages
2,296
Reaction score
15
Location
S.E. Michigan
Clutch spring came in the mail today! Spring rate is perfect. I just need to adjust the cam profile on the weights a bit. The "idle" position on the weights keeps the clutch closed by 1/8", again because of the pedal start setup of the original equipment. I'll lower that a bit, and move the secondary spring out a notch to let it ramp up faster. As low as this thing is geared, with the bigger engine, it'll be OK for it to ramp up quicker.

New belt seems to be just about a perfect fit without having to relocate the axle back, so that's a plus.

It's all coming together! I might even be able to take it for a test drive in the next couple days.
 

anickode

Active member
Messages
2,296
Reaction score
15
Location
S.E. Michigan
OK! Real progress. I spent some time with the die grinder and the clutch weights. I reprofiled one, traced the profile with a VERY sharp awl onto a scrap of painted aluminum flashing, and weighed it on a digital scale. Then carefully ground the others to as close a match as you could humanly get. Most of what I took off was on the idle end of the cam, to allow the clutch to fully open at rest and idle. Gave me just enough clearance between the primary cones and the belt to allow the engine to idle without belt engagement. I did round out the rest of the cam profile a tiny bit to let it shift out a little faster, but I will do most of that adjustment with the secondary spring.

I can now start it, in gear, with the parking brake set, and it will fire up and idle just fine. Haven't gotten it on the ground to see if it's going to want to creep at idle yet, but everything looks very promising.

I'm thinking I might put a new carb on it as well... it's still wanting to idle a *little* fast, and I'm thinking it's getting some air leakage around the throttle plate shaft. It IS a fairly old engine, after all. Definitely going with a stock one though, as maintaining governor function is critical with OEM rods and flywheel on these engines. I'm building for work, not speed. I've driven one of these with an arctic cat 550 in it, and it was HORRIBLE.

I'm definitely looking forward to getting this thing done... Not only do I have a ton of uses for it, I'm ready to move on to more fun projects. I promised the kids a kid-sized entry level go kart this summer, and I intend to deliver.
 

anickode

Active member
Messages
2,296
Reaction score
15
Location
S.E. Michigan
Despite my urge to put a piece of wood on top of the gas tank for a seat and pull the gator outside, I resisted... I did take it off the jackstands and ran it back and forth in the shop a little bit. Idles beautifully, shifts back and forth at idle just fine without having to hold pressure on the shift lever, thanks to my spring loaded linkage. It does creep a tiny bit, but that wasn't unexpected. The clutch alignment isn't quite perfect yet, and these primary clutches don't use a bronze bushing on the shaft. Even so, one click on the parking brake lever is enough to keep it still.

Still waiting for my throttle cable to come, and contemplating my options for a carburetor. They sell chinese clone carbs for these engines for under $40, with US made OEM ones for around $90. Rebuild kits are significantly cheaper... still can't help but think about custom carb and intake manifold options, because I like to complicate things.
 
Top