• OFF TOPIC fun forum - NO politics - NO religion - NO jerks. It's not complicated. Thanks!

framing experts please help me out

Status
Not open for further replies.

supermanotorious

Winchmaster 5000
Messages
2,088
Reaction score
103
Location
New River, AZ
A sequel to the wood stove post I'm getting the chimney installed and riding the struggle bus. Well really the challenge is framing the support box.

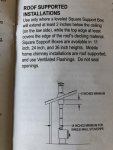
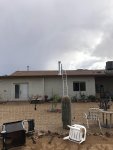
I have a "roof supported" installation. The chimney is passing through the roof where an old patio was enclosed. My joists are 24" on center and I need to make a 14"x14" framed opening. Where the patio was enclosed it was finished. So in a cross cut view we have the sheetrock ceiling, the joists and insulation, then the OSB, tar paper, shingles. There is no attic/crawl/access space at all.

How much of the sheetrock do I need to cut away to attach my framing members to the joists? Do I need to cut the entire 24" span between joists? Do I need to cut beyond that, to get to the back side of both joists to nail the framing members in place?
 

Attachments

  • IMG_6545.jpg
    IMG_6545.jpg
    313 KB · Views: 5

kevbo22

Member
Messages
347
Reaction score
0
Location
Colorado
You'll have to cut the entire 24" span. You dont have to go past that, you can just "toenail" your framing in instead of nailing from the other side. Cut about half way into the joist so your repair patch of sheetrock has something to get screwed into, or cut straight to the joist and double up the framing on it with a 2x4 so your repair patch of sheet rock can get screwed into that 2x4.
 

supermanotorious

Winchmaster 5000
Messages
2,088
Reaction score
103
Location
New River, AZ
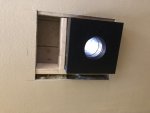
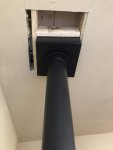
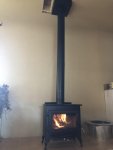
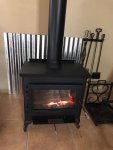
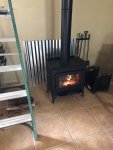
while I was waiting for a response I went to Home Depot, got new 2x6's, and some actual construction screws with torx heads. That w plus cutting the drywall span made it pretty easy. I still need to finish the ceiling, align the stove to the support box better, add a bracket to the chimney but I thought I'd fire it to bake off the paint residuals.
 

Attachments

  • IMG_6547.jpg
    IMG_6547.jpg
    269.1 KB · Views: 8
  • IMG_6549.jpg
    IMG_6549.jpg
    172.2 KB · Views: 6
  • IMG_6550.jpg
    IMG_6550.jpg
    143.2 KB · Views: 6
  • IMG_6553.jpg
    IMG_6553.jpg
    859.2 KB · Views: 6
  • IMG_6552.jpg
    IMG_6552.jpg
    387.8 KB · Views: 9

supermanotorious

Winchmaster 5000
Messages
2,088
Reaction score
103
Location
New River, AZ
Now I need to design a badass wall covering to protect the paint on the wall behind the stove. I’m thinking a solid sheet of steel with a steel cutout welded to the face of it
 

supermanotorious

Winchmaster 5000
Messages
2,088
Reaction score
103
Location
New River, AZ
Slowly patching up the ceiling
 

supermanotorious

Winchmaster 5000
Messages
2,088
Reaction score
103
Location
New River, AZ
corrugated looks great, need to cut out a hole for the electric outlet behind the stove for the fan cord though
 

Attachments

  • IMG_6581.jpg
    IMG_6581.jpg
    243.4 KB · Views: 3
  • IMG_6582.jpg
    IMG_6582.jpg
    251.3 KB · Views: 4

supermanotorious

Winchmaster 5000
Messages
2,088
Reaction score
103
Location
New River, AZ
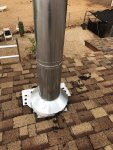
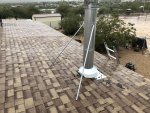
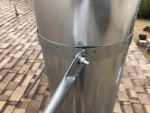
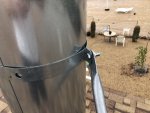
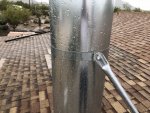
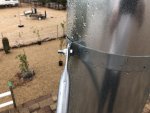
more or less followed this guy's video to make the roof support brace, only 1 piece of flat metal though

https://www.youtube.com/watch?v=KHvvfI4QA5M

I used nylon lock nuts because the triple wall chimney stays surprisingly cool on the outside

still not finished yet because I just painted the roof mounts I made from an old bed frame
 

Attachments

  • IMG_6587.jpg
    IMG_6587.jpg
    754.5 KB · Views: 6
  • IMG_6586.jpg
    IMG_6586.jpg
    309.4 KB · Views: 3
  • IMG_6585.jpg
    IMG_6585.jpg
    264.3 KB · Views: 3
  • IMG_6583.jpg
    IMG_6583.jpg
    520.1 KB · Views: 3
  • IMG_6584.jpg
    IMG_6584.jpg
    296.4 KB · Views: 3

supermanotorious

Winchmaster 5000
Messages
2,088
Reaction score
103
Location
New River, AZ
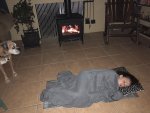
Well we just had our first official burn of the winter. Despite a couple preseason burn we're still getting a bit of "new stove" smell in the house which isn't too terrible. Our youngest approves.

I put the ceiling patch on hold because we may or may not have a leak. I need to run the hose up there and run it for a while to know for sure.

May have a leak? Well during our most recent preseason burn it started raining. As I started the fire the ceiling started dripping. The rain never let up but when the stove was burning at almost 100% the leak seemed to stop. I'm wondering if some of the fresh roof tar/adhesive was able to melt in to place from the heat of the chimney and chimney support.
 

Attachments

  • IMG_6832.jpg
    IMG_6832.jpg
    288.3 KB · Views: 3

supermanotorious

Winchmaster 5000
Messages
2,088
Reaction score
103
Location
New River, AZ
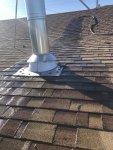
Hmmm, ran the hose for about 30 minutes and yes, there is a small leak. There is no attic space for me to trace the water line which is making this a little difficult. I do know its one side of the flashing so I guess I'll remove nails, pry it up and shoot more tar in there, I dunno what else to do.
 

Attachments

  • IMG_6895.jpg
    IMG_6895.jpg
    687.1 KB · Views: 5
  • IMG_6896.jpg
    IMG_6896.jpg
    207.7 KB · Views: 5

anickode

Active member
Messages
2,296
Reaction score
74
Location
S.E. Michigan
Large roof penetrations can be tricky, especially when retrofitting an existing roof, where you have to get up underneath old shingles.

I really like Loctite PL S30 for roof and flashing. It's a black polyurethane adhesive sealant. A bit pricey, but well worth it.
 

supermanotorious

Winchmaster 5000
Messages
2,088
Reaction score
103
Location
New River, AZ
well I shot a whole nother tube of tar under the flashing and surrounding shingles, ran the hose for over 30 minutes and did not see a leak, I feel like I want to run it again for an hour just to be safe
 

anickode

Active member
Messages
2,296
Reaction score
74
Location
S.E. Michigan
I'd set a sprinkler up there and let it rain. If the water is getting between the pipe and the flashing boot, running water on the shingles won't show it. Just a thought.
 
Status
Not open for further replies.
Top