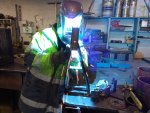
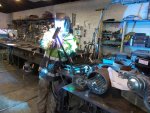
First build, first bike

Status
Not open for further replies.

Grimm

newb
Messages
17
Reaction score
0
Location
north idaho
First build, fat tire bike

long story short, i am building an off road mini bike/ trail bike. because it will have to traverse more than dirt trails, i want to have full suspension and fat-ish knobby tires. i have already bought the predator engine, some carlisle tires and a pair of 8*7 rims. still need to get the TAV, misc drive train hardware and to build the frame...
so yes i know its a big undertaking, but i am determined to get it done :)

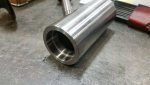
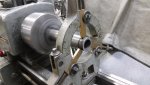
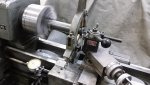
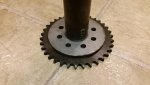
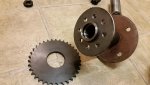
here are some pictures of the start of my wheel hubs. i decided to make my own instead of modify new ones or go on a scavenger hunt.
i can't finish them until i get the rims (should show up this friday) because i need to figure out where the hubs' plates need to go etc.

the tires are 19*7-8 trail wolf ATV tires. i will be making a swing arm jack shaft style chain drive.

i work in a production shop and have access to a lathe, mill, welders etc, so making parts isn't difficult.
 

Attachments

  • 20160916_125634.jpg
    20160916_125634.jpg
    223.1 KB · Views: 4
  • 20160916_125700.jpg
    20160916_125700.jpg
    213.1 KB · Views: 5
  • 20160916_141645.jpg
    20160916_141645.jpg
    195.8 KB · Views: 5
  • 20160916_144733.jpg
    20160916_144733.jpg
    220.3 KB · Views: 6

Grimm

newb
Messages
17
Reaction score
0
Location
north idaho
thanks, it was my first time using a steady rest on the longer bearing tube :)
once I have the wheels, I can turn the small shelves for the plate parts to fit perpendicular for welding.
 

big-d

New member
Messages
138
Reaction score
1
Location
Mapleton, Utah
Looking forward to watching this build. I love the look of the fat tired bikes. I have 3 atc's sitting around that I want to convert into bikes.
 

Grimm

newb
Messages
17
Reaction score
0
Location
north idaho
I am also going to be adding an alternator to the engine as i need to have headlights and tail lights for the occasional long trail ride.
it might be over engineered but it will work well and let me add more functionality later on.
here is a quick demo of the alternator working https://www.youtube.com/watch?v=WqT-IVLgA5g
 

Grimm

newb
Messages
17
Reaction score
0
Location
north idaho
got some mounting done today :)
they look a little narrower on the rims, but it'll work.
 

Attachments

  • 20160922_171136.jpg
    20160922_171136.jpg
    206.1 KB · Views: 7

Grimm

newb
Messages
17
Reaction score
0
Location
north idaho
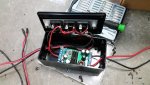
today I got my electrical bits into a project box, tested again to make sure before closing it up.
if anyone wants to make something similar i can get you a detailed parts list of what I am using.
 

Attachments

  • 20160924_143651.jpg
    20160924_143651.jpg
    319 KB · Views: 5

chancer

ɔ ɥ ɐ u ɔ ǝ ɹ
Messages
9,358
Reaction score
93
Location
COMFORT, TEXAS
Tell us more about the outrunner alternator.
How many pms will it need,
How will you attach it.
Is it belt or chain driven.
Etc etc.
 

Grimm

newb
Messages
17
Reaction score
0
Location
north idaho
it's a belt drive with teeth so it won't slip. the lights are only pulling 36 watts total so the outrunner has lots of room as when run via a motor controller it can handle over 300 watts. with the pulleys I have, it will spin 2.6 times faster than the engine. that works out to 9600 rpm at governed speed. because of the buck-boost regulator, even if the outrunner only puts out 5V it will still run the lights.

the plan for mounting is to make a mount that will share 2 of the bolt holes for the TAV with the outrunner in front of the engine.
i put a small fan on the back of it that will draw air from outside aimed towards the engine to avoid engine heat getting to the magnets.

if anyone plans on making one, look for an outrunner with fairly low Kv rating, as it will have more winds and get more volts per rpm. it will be easier to get a pulley for a 5mm shaft size than the 4mm i have.
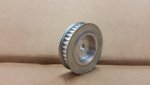
the engine pulley i machined to get rid of the set screw collar and opened up the other side so that the bolt doesn't have to be very long.
 

Attachments

  • 1474760212689.jpg
    1474760212689.jpg
    126.2 KB · Views: 4
  • 20160817_183918.jpg
    20160817_183918.jpg
    256.2 KB · Views: 6

Grimm

newb
Messages
17
Reaction score
0
Location
north idaho
for pulleys and belt, I used the XL size which is 1/5" or 5.08mm between teeth and 3/8" wide. they can get spendy if you don't look hard enough, I think i paid $7 for the small one (12 tooth) and $14 for the large one (35 tooth)
when I ordered, they let you pick the bore diameter, for the larger one I went with 8mm which is very close to the predator shaft bolt of 5/16ths.
I got them both on ebay as well as the belt.
 

Grimm

newb
Messages
17
Reaction score
0
Location
north idaho
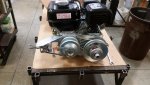
today the torque converter showed up, and as I had heard, it did not come with the correct bolts. :mad2: so a trip to home despot and here we are.
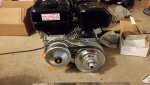
I think I have everything on correctly, although the flat sides are not 100% in line (about 1/16th off)

when assembling it, I was concerned that there is not much engine shaft up inside the clutch area, but after looking at some assembly videos, it seems they are normally like that.
next I will be getting another engine shaft bolt long enough for my pulley and possibly a lock washer.
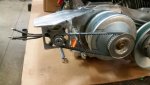
looking at where everything is, I could make my alternator mount come from a few different places and not interfere with anything... I'll have to play around and see what comes of it :popcorn:
 

Attachments

  • 20160926_192716.jpg
    20160926_192716.jpg
    179.7 KB · Views: 3
  • 20160926_192743.jpg
    20160926_192743.jpg
    177.6 KB · Views: 4

Grimm

newb
Messages
17
Reaction score
0
Location
north idaho
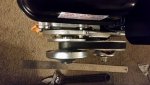
so I have been working on the mount, and I think it is pretty good.
since theae pictures were taken I added another piece that ties to the left gas tank stud because it had some flexing.

when the engine is running, the lights come on at just over the idle, so I will be using a battery in between. I just need to figure out the charger circuit.

also, today I went to the motorcycle recycling shop and bought a pair of front forks. they are older but look about right. later on I might see if they need new seals or anything.
 

Attachments

  • 20160930_121342.jpg
    20160930_121342.jpg
    212.7 KB · Views: 7
  • 20160930_121348.jpg
    20160930_121348.jpg
    208.9 KB · Views: 10
  • 20160930_121406.jpg
    20160930_121406.jpg
    182.1 KB · Views: 9

Grimm

newb
Messages
17
Reaction score
0
Location
north idaho
I got some more parts closer today, all the components of the rear hub are ready to weld, and the jack shaft is getting closer.

the long tube is the rear hub, the smaller 8 holed plate is for the sprocket, and the red one is for the rim. the sprocket will be drilled so i can change the final ratio if needed.
the 17 and 10 tooth sprocket will be welded into the thick tube along with the giant washer for the brake rotor (haven't gotten one just yet)
I also got some split collars to keep things in place.
 

Attachments

  • 20161006_180846.jpg
    20161006_180846.jpg
    242.2 KB · Views: 3
  • 20161006_180737.jpg
    20161006_180737.jpg
    234.6 KB · Views: 4
  • 20161006_180657.jpg
    20161006_180657.jpg
    169.6 KB · Views: 3
  • 20161006_180638.jpg
    20161006_180638.jpg
    211.6 KB · Views: 4
  • 20161006_180535.jpg
    20161006_180535.jpg
    241.5 KB · Views: 4

Grimm

newb
Messages
17
Reaction score
0
Location
north idaho
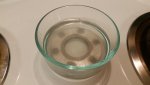
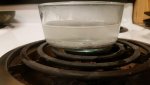
still slowly progressing when I have free time, I obtained a brake rotor from an older snowmobile, it happens to be nearly perfect fit for the parts I already have. so I matched it's hole pattern to my mount that will go on the jackshaft. I also stripped off the zinc plating so it can be safely welded. to do this with any steel plated parts, just mix a little salt into some white vinegar and heat it for 1 minute in the microwave, then drop in your part. it takes a few hours but better to be safe.
 

Attachments

  • 20161012_122036.jpg
    20161012_122036.jpg
    234.3 KB · Views: 0
  • 20161012_222157.jpg
    20161012_222157.jpg
    114.9 KB · Views: 2
  • 20161012_222815.jpg
    20161012_222815.jpg
    129.3 KB · Views: 0

Grimm

newb
Messages
17
Reaction score
0
Location
north idaho
I know it's been a while since I had anything to post on this project, but I got a free week of vacation between the holidays! So I took a winter drive to my brother in laws' house because at his job he has tools better suited to frame building :wai:

No, its not totally straight, no we didn't do proper engineering for rake and trail. Everything is seat of the pants built. It's not meant to be a race bike or go fast so I'm not concerned.

It's all made with 3/4 inch 1/8th wall gas pipe (1.1" o.d.!?) with 3/16th plate gussets. On the front we welded a length of channel that will fit the dom for the bearing tube that I've yet to make. this way we had an easier time mating the 4 front tubes with plenty of room to weld them all the way around.
The overall width is 9" so that the TC will ride against the left side and the pull starter is still outside of the right.
It is looking like it'll have about 8-9 inches of ground clearance, not as high as i hoped for but should be fine.

Let me know what you guys think, i still have quite a few parts to make and time to look for improvements.

Edit: the gussets are not in the pictures here, they were added the next day. also, that's my brother in law riding her :D
 

Attachments

  • IMG_20161230_160751.jpg
    IMG_20161230_160751.jpg
    322.1 KB · Views: 5
  • IMG_20161230_160730.jpg
    IMG_20161230_160730.jpg
    336.8 KB · Views: 3
  • IMG_20161230_160718.jpg
    IMG_20161230_160718.jpg
    381.1 KB · Views: 4
  • IMG_20161230_160716.jpg
    IMG_20161230_160716.jpg
    365.2 KB · Views: 6
  • IMG_20161230_165802.jpg
    IMG_20161230_165802.jpg
    281.2 KB · Views: 8
Status
Not open for further replies.
Top