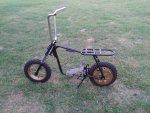
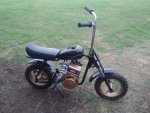
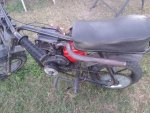
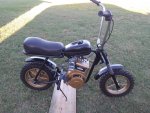
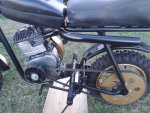
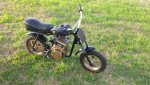
Finally got a Mini Bike, ID Help

Status
Not open for further replies.

Rail rider

Inmate # 3192016
Messages
792
Reaction score
6
Location
Planet earth ( the flat one)
OK, That's re assuring... (puts on preride check list). Just for fun I'd screw some 1" ratchet strap ribbon on it . To prevent over extension of those fork tubes ..The off roaders do it too.
 

Hellion

Moderator
Messages
8,559
Reaction score
3,645
This is a really neat go kart design and from the manufacturer's name alone, you can obviously tell they went almost overboard on the complexity of the frame (compared to the bare bone styles of some competitors). Engineered the :censored: out of it. :cornut:

I've never seen one of these in the flesh so preserving and "pickling" this specimen is a good deed. It cries out to be saved from further decay.

You're doing fine work, Texan.
 

Texan

Senor Member
Messages
461
Reaction score
11
Location
Deep In The Heart of Texas
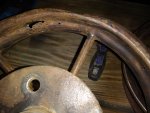
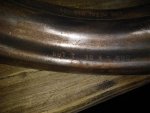
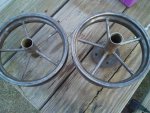
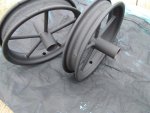
Been doing some work on the wheels. I got them completely stripped and wire wheeled. One of them has some good pitting thru around the valve hole, the other has just a couple small holes. I am going to patch them up. One wheel had a bad bearing, so I knocked out all four because might as well start fresh. Ordered some already, they are 5/8”x1-3/8”x1/2” flange bearings.

I need to get some tires now. The ones on here are marked Fox Corporation 2.50-10. The wheels are marked Sun Metal 0864 & DOT T 10x1.600.

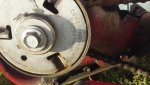
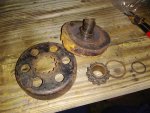
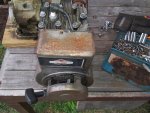
The engine that came on the bike is a Briggs, the flywheel & shroud were missing, so not sure what model or hp, looks like maybe a 3hp? No plans to fix that, will put on the shelf with my others for parts. It did come with a 12 tooth Comet Clutch, and it looks to be in ok condition other than a little rusty/dirty. I took it apart and the teeth are good and so is the bronze bushing. I’m going to clean it up, hopefully it still works.

20170513_213621.jpg

20170513_212908.jpg

20170515_203252.jpg

20170427_190243.jpg

20170512_212317.jpg
 

TX7

New member
Messages
79
Reaction score
0
Location
Northeast Ohio
Find somebody with a hydraulic press, those forks can be straightened. The bike is worth restoring. Many older bikes use that spring retainer system. My '70 Broncco does, just for example.
 

Texan

Senor Member
Messages
461
Reaction score
11
Location
Deep In The Heart of Texas
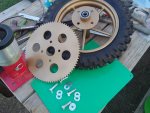
Patched up the wheels with JB Steel Stick. I did all the holes and on the thin spots as a preventative measure. Couple coats of primer and one coat of finish paint. Plan on giving a second and maybe third finish coat later on before assembly, will also do a clear coat. Did the same on the sprocket. I didn't like any of the gold spray paint that I saw, most looked too shiny/tacky. I went with Rustoleum Champagne, I think it looks pretty close to the original color.

Cleaned up the Comet Clutch and did little paint job on it.

Need to start on the forks and get some tires now.

20170518_202923.jpg

20170519_064113.jpg

20170522_202926.jpg

20170516_202021.jpg

20170517_210831.jpg
 

Texan

Senor Member
Messages
461
Reaction score
11
Location
Deep In The Heart of Texas
Got my wheels and tires finished.

Made my own spoke/tube liners. Used the old tubes, cut into strips and glued into place.

Since the bike will be used for the property which is about half sandy and half clay, I went with dirt bike tires. Picked out Michelin Starcross MS3 tires. Got them for $73 with tubes on Ebay. And of course it was PITA to mount them. I tried to be careful, but I ended up dinging up my freshly painted wheels. Had to do some touch up painting on them, hopefully it will be a long time before I have to pull them off.

Installed new bearings on all four sides.

Installed the sprocket with new hardware.

Top coated the frame & fenders with black enamel and added a few coats of clear.

Almost got a roller :wai:

20170603_142759.jpg

20170619_195525.jpg

20170619_202024.jpg
 

Texan

Senor Member
Messages
461
Reaction score
11
Location
Deep In The Heart of Texas
Got back to work on this project, and now got a roller.

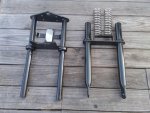
I was able to unbend the upper forks. It was a little hassle to get them realigned with the bottom forks and to freely move up and down. Had to do some light sanding and polishing on the uppers. Also was able to get a small Dremel sanding drum inside the lowers to clean them out.

Kept the original fork springs, just took some meticulous cleaning off of the layers of paint, back to their original chrome finish. Few coats of paint and some good grease on the forks and they reassembled nicely. They now have good up and down spring action to them.

Also cleaned the painted handlebars back to chrome. They are not original to the bike and somewhat scratched up, but look good enough.

I have the fenders painted, just gotta install them. Kept the original scrub brake, had a little clearance issue with the new tires, but I think I worked it out, only after a test drive will I really know.

20170906_184116.jpg

20170907_195114.jpg
 

Texan

Senor Member
Messages
461
Reaction score
11
Location
Deep In The Heart of Texas
These bikes originally had a Tecumseh 5hp engine. I was on the lookout out for one, but didn’t have any luck locally. I decided to go with an early 90’s Briggs flathead.


I bought this one a while back ($20), came with no carb, gas tank or exhaust, but did fire up with a little gas poured thru the spark plug hole. Somebody had started stripping the paint off of it, I just finished cleaning it up and painted the shroud. I also removed the governor.


Since the engine had no gas tank, I decided to use the original tank, which was not being used by the PO. Stripped off the paint, and repaired a crack. Still looked ugly, so I sprayed it with a can of Plasti-Dip and some clear coat. Looks good enough now.


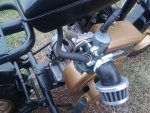
Installed a knockoff Briggs Animal carb. Used a Tecumseh intake manifold. After a few pulls, it fired right up. Messed with the mixture and idle screws a little bit and got it to run pretty good. The air cleaner on there came with the carb, but I think it might be too small?? I would really like the carb to be under the tank/seat, but will need to find/make a custom manifold, so this will have to do for now.


Still to do:
-Throttle Cable (have one on order with kill switch)
- Exhaust (would like a header exiting behind the seat)
- Install fuel shutoff & filter, re-route line
- Seat (one in pic is not mounted/not using it, just there for mockup)
- Install clutch & chain (have both), need chain guard too

20170919_185456.jpg

20171010_185230_Burst02.jpg

20171010_185355.jpg
 

KingCobra

TROLL CRUSHER INC.
Messages
583
Reaction score
1
Location
TROLL TORTURE ROOM
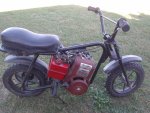
Yeh, those handle bars don't do it justice!! Talk about Ape Hangers!!! Very nice job!!! Now the video please!!!!
 

Attachments

  • 00000000000000000000000000000000000000000.jpg
    00000000000000000000000000000000000000000.jpg
    4 KB · Views: 64

Hellion

Moderator
Messages
8,559
Reaction score
3,645
You've made fantastic headway on this thing. Bravo. It looks absolutely first rate. I like the gold color choice too on the wheels. Kind of an understated gold.
There were gold and copper painted Briggs engines also back in the 60s and 70s, depending on what appliance they were attached to and what the manufacturer wanted (Montgomery Wards, etc.). So the gold on the engine looks "right". Fine work.

:thumbsup:

Yeh, those handle bars don't do it justice!! Talk about Ape Hangers!!! Very nice job!!! Now the video please!!!!
:feedtroll:

I'm with you, Texan.This guy keeps wading into Briggs threads where he has apparently made himself unwanted. :( :rolleyes:

If you eventually showed him a running video, he'll just make disparaging remarks and call your engine junk. ;)


The handlebars are what they are. They're a period-correct mod and shows us the previous owner's tastes up until the bike was left abandoned. What was old is now new again as we have folks doing the same thing with Monkey Bars (on full size motorcycles).
 

KingCobra

TROLL CRUSHER INC.
Messages
583
Reaction score
1
Location
TROLL TORTURE ROOM
Video of the bike finished or the engine running?? Surely not of the engine right? I thought you despised Briggs & Stratton ;)

I don't care what's on it and where did you see me say 'DESPISED'? They just aren't my brand anymore. Not since Preditor stole the market and I'm under no racing rules, soooooo nah nah nana nah.................. :D :p I want to see a video of anyone riding that beast. 'Ape Hangers'........ :D
 

Texan

Senor Member
Messages
461
Reaction score
11
Location
Deep In The Heart of Texas
Another Bird Mini Bike

Picked this up last weekend. It is a Bird Thunderbird. It runs, but carb needs to be cleaned and gaskets replaced as it leaks gas. I will eventually make another refurb thread on this one.

In the mean time stole the custom header and seat off of it to use on the Nighthawk.

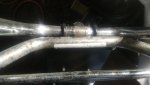
I repaired the seat, and painted the header. Used Rustoleum High Heat paint. I know it will not last long, but it will do for now. I plan on putting header wrap eventually.

Also installed the throttle cable with kill switch. Probably will get a slightly longer cable, as this does one not have much slack.

20171022_172348.jpg

20171022_172530.jpg

20171025_180048.jpg

20171025_180122.jpg
 

Hellion

Moderator
Messages
8,559
Reaction score
3,645
That is a nice custom header--clears the frame and seat perfectly. Wonder if it was made in someone's garage or a factory job...?

The finished bike looks great and I was wondering how well it performs on the straight chain setup. Lets us know.

And... great find on the new find. LUCKY.

Are you running a little extra oil than what is specified to counter the engine's angle or no? If I recall correctly, the racers who use the angled side mount use a little more or maybe a little less oil than the factory specified 21 oz.
 

pRoFiT

Can't buy it?, build it!
Messages
1,151
Reaction score
63
Location
California
Wow really nice to see this finally completed. You've put a lot of work into this one.

I guess two birds are better then one.
 

Texan

Senor Member
Messages
461
Reaction score
11
Location
Deep In The Heart of Texas
That is a nice custom header--clears the frame and seat perfectly. Wonder if it was made in someone's garage or a factory job...?

The finished bike looks great and I was wondering how well it performs on the straight chain setup. Lets us know.
-
And... great find on the new find. LUCKY.

Are you running a little extra oil than what is specified to counter the engine's angle or no? If I recall correctly, the racers who use the angled side mount use a little more or maybe a little less oil than the factory specified 21 oz.

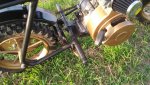
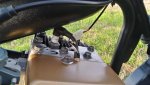
-The header is pretty nice, probably was custom ordered, as the bends and welding look professionally done. I've been surprised how well the paint is holding up on it. I used the "Ultra" version of Rustoleum High Heat paint.

-The straight chain has been working great so far. I have ridden it at least 10 times and have not had to adjust it. That old Comet Clutch I cleaned up has had no problems either.

-I put in the oil before mounting the engine to the bike, so I put the regular "fill till it spills" amount.


On another note, carb is working good. I left the small air cleaner on there, haven't had any issues. Seems like it allows enough air flow. Engine is very easy to start, usually one or two pulls. They don't have to be yanks either, a gentle pull will get it going.

Really liking the grip of the tires. They have been working well in the sand and have no problem cutting thru a grass field. Really want to see how they do in the mud. :cornut:
 

Texan

Senor Member
Messages
461
Reaction score
11
Location
Deep In The Heart of Texas
Little update on this one.

The ape handle bars kept slipping no matter how tight I torqued the u-bolts down. The knurl was centered so the u-bolts didn't have anything to grip. I decided to change them after hitting a hole in the ground. The bars slipped and pulled the throttle cable with and almost pulled the bike from under me.

-I used a set of handle bars from my Honda parts stash. They are from a 70's Honda CL100 Scrambler, just needed a good cleaning. The knurls lined up with the u-bolts, so they are nice and snug.

-Made a front plate / number badge out of a scrap piece of aluminum.

-Found exact replacement Hunt Wilde foot peg grips.

-Ran the kill switch thru the handlebars, and installed a quick connect to make future engine removal easier.

-Installed a new air filter.


20180217_220918.jpg

20180218_172125.jpg

20180218_172032_HDR.jpg

20180218_171956.jpg

20180218_171918.jpg
 
Status
Not open for further replies.
Top