Master Hack
Well-known member
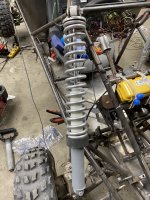
How about Coilovers for about $120 each? I decided to try my hand at 'em and the result is nothing short of amazing! They might not be much to look at but the performance is perfect. I needed coilovers for the Franken Kart project and $400 or more was not in my budget. So if you're interested follow along.
You need the following materials:
Shock (obviously)
Spring(obviously)
.1875 inch aluminum sheet
.125 inch steel sheet
a foot or two of 2 inch electrical EMT conduit
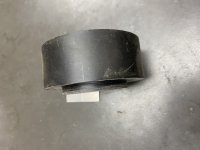
3.75 inch polyurethane or other suitable plastic rod
2 inch Plastic rod
2 inch welded ring
Tools:
3.75 inch hole saw
2 inch hole saw
Bandsaw or hacksaw
.625 inch drill bit
A couple of files
A lathe would be nice but not required.
So on to making stuff:
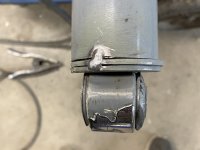
I bought these shocks cuz I have had excellent results with them on past projects. I chose 12 inch travel, but you will need to decide what length you need. This shock with 12 inch stroke has an overall length of almost 32 inches. (uncompressed obviously)
 www.procompusa.com
Springs, There are a million different lengths, rates and diameters. Here I used18 inch long 2.5 inch x 250 lbs spring rate. There is an online tool to help figure out what rate you need. There are a million variables like, shock angle, fulcrum point and more. Don't just guess. Springs are here: https://www.magnitudeperformance.com/collections/2-5-coil-over-springs
Making parts:
cut out round aluminum discs using the hole 3.75 inch hole saw:
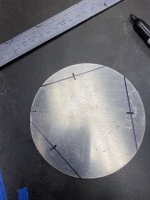
I had some already cut so I needed to find center:
to find center of a circle:
Draw 3 (or more) chords on the circle. All chords must be equal length.
Then find center of each chord and draw a 90 degree line towards the center.


Where the lines intersect is center.
Repeat the process with steel. 2 inch diameter.
Now drill a .625 (5/8) inch hole on center of all Aluminum discs You need 2 aluminum and 2 steel for each shock. Steel discs will require a larger hole.(depending on your shock).
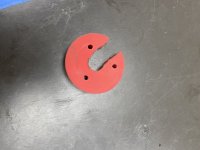
From Center of the aluminum discs cut out a 5/8 inch slot.

Drill 3 holes an inch or inch and a quarter from center (not critical). Drill one disc with a number 7 drill and thread 1/4 x 20. The other disc drill for 1/4 x 20 clearance.
Stay tuned for phase 2 of coilers for cheapskates!
You need the following materials:
Shock (obviously)
Spring(obviously)
.1875 inch aluminum sheet
.125 inch steel sheet
a foot or two of 2 inch electrical EMT conduit
3.75 inch polyurethane or other suitable plastic rod
2 inch Plastic rod
2 inch welded ring
Tools:
3.75 inch hole saw
2 inch hole saw
Bandsaw or hacksaw
.625 inch drill bit
A couple of files
A lathe would be nice but not required.
So on to making stuff:
I bought these shocks cuz I have had excellent results with them on past projects. I chose 12 inch travel, but you will need to decide what length you need. This shock with 12 inch stroke has an overall length of almost 32 inches. (uncompressed obviously)
ES9000 Series Shock Absorber - 929507 - Pro Comp
www.procompusa.com
Springs, There are a million different lengths, rates and diameters. Here I used18 inch long 2.5 inch x 250 lbs spring rate. There is an online tool to help figure out what rate you need. There are a million variables like, shock angle, fulcrum point and more. Don't just guess. Springs are here: https://www.magnitudeperformance.com/collections/2-5-coil-over-springs
Making parts:
cut out round aluminum discs using the hole 3.75 inch hole saw:
I had some already cut so I needed to find center:
to find center of a circle:
Draw 3 (or more) chords on the circle. All chords must be equal length.
Then find center of each chord and draw a 90 degree line towards the center.
Where the lines intersect is center.
Repeat the process with steel. 2 inch diameter.
Now drill a .625 (5/8) inch hole on center of all Aluminum discs You need 2 aluminum and 2 steel for each shock. Steel discs will require a larger hole.(depending on your shock).
From Center of the aluminum discs cut out a 5/8 inch slot.
Drill 3 holes an inch or inch and a quarter from center (not critical). Drill one disc with a number 7 drill and thread 1/4 x 20. The other disc drill for 1/4 x 20 clearance.
Stay tuned for phase 2 of coilers for cheapskates!
Last edited: