Dirtbox Venom mini-buggy upgrade/rebuild!

Status
Not open for further replies.

exenos

Project Nut
Messages
1,217
Reaction score
0
Location
Ontario, Canada
I'll give it a shot, just give me a few minutes.

Oh, an i just skimmed through my previous post and it might seem a bit insulting, so sorry bout that. I was just worried that you might have already went ahead a chopped it up.
 

exenos

Project Nut
Messages
1,217
Reaction score
0
Location
Ontario, Canada
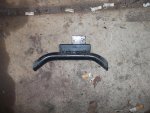
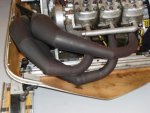
OK, so first the heat shield needs to come off. (The aluminum covering) What you need to do is bend the pipe without creating too sharp of a angle. Ideally the angle of each cut&bend should be kept to under 45 degrees, less is better. The reason for the shallow angle is because the returning pulses/waves tend to get scattered when bouncing off high angles, reducing the effectiveness of it (less escaping air/fuel mix gets shoved back into the cylinder). It doesnt matter that the bends will be sharp angles without any smooth radius to them like your pipe, it was just made that way because it is easier to mass produce a hydro formed chamber than a hand welded one.
This is what I mean by sharp angles without a smooth radius


I don't think I can explain how the pipe needs to be bent any better in words than the picture can so just tell me if you cant make sense of it and I'll try to explain.

EDIT: Oh, the green arrows mean the pipe section rotate in that direction. The black V's are the cutouts and the black lines are where the cutouts get inserted.
 

Attachments

  • pipe.jpg
    pipe.jpg
    201.2 KB · Views: 33
  • AaenPipes003.jpg
    AaenPipes003.jpg
    62.2 KB · Views: 26
Last edited by a moderator:

mysteryboy28

New member
Messages
1,582
Reaction score
10
Location
Lansing, MI
awesome, thanks! :)

it'll be a few days before that part gets done, meanwhile building the motor cage.

ordered up some Kawasaki brute force 650 12" ear rims. trying to score a good deal on some 137x4 bolt pattern rear hubs (common kawasaki hub) with lugnuts.

a honda civic radiator looks like a good route to go. looking for a good deal on one with a fan. wasn't factoring in having to spend $90 for a freakin radiator. jeesh. figured a sled that was liquid cooled would have a normal radiator. blah. oh greaser... mysteryboy needs a sugar daddy! lol.
 

exenos

Project Nut
Messages
1,217
Reaction score
0
Location
Ontario, Canada
Dam I just realized, You hacked up the heat exchanger dint you? That alone would have paid for your rad. As I had said before, you could be making so much more if you would take your time and properly take the sled apart and sell the stuff you don't need. Most of the time you would be making money from parting out the sled.
 

mysteryboy28

New member
Messages
1,582
Reaction score
10
Location
Lansing, MI
bottom cage fabbed up, top cage tomorrow!
 

Attachments

  • DSCF4046.jpg
    DSCF4046.jpg
    119.1 KB · Views: 31
  • DSCF4048.jpg
    DSCF4048.jpg
    107.2 KB · Views: 30
  • DSCF4049.jpg
    DSCF4049.jpg
    117 KB · Views: 31

greaser

new here
Messages
126
Reaction score
0
Location
moose lake mn
Looks good from here lol. One thing though don't bother with that airbox it has little to no filtration in it, Its not needed in winter (no dust).
 

mysteryboy28

New member
Messages
1,582
Reaction score
10
Location
Lansing, MI
well as these sleds are beginning to prove - the airbox serves 2 functions: to NOT filter air to any reasonable extent, and to channel air into the carbs in a controlled fashion. mike's buggy ran like poop without the airbox. popped it on - instant power! had done some research on this phenomenon, and best explanation is that it controls the amount of air, as well as the type of air flow, channeled nice and smooth through the rounded chambers, also possibly allowing for a better combining of fuel and air. might all be witchcraft, but i'll try it both ways. :)
 

greaser

new here
Messages
126
Reaction score
0
Location
moose lake mn
Rejeting will take care of the issues with the pod filters we run them on sleds here all the time you will prob. Have to go down one or two.
 

mysteryboy28

New member
Messages
1,582
Reaction score
10
Location
Lansing, MI
the airboxes actually restrict air flow to a slight degree, and the pod filters allow more air to enter than the airboxes do. you'd actually want to jet bigger to accomodate the increased air flow.

i read a couple of stories about guys that had switched to pod filters. got them dialed it to seemingly run good, but once they got up into higher altitudes the sleds would bog down and run poopy. slapped the airboxes back on and they were back in business again with no bogging.

i'll leave the experimenting up to you. :)
 

exenos

Project Nut
Messages
1,217
Reaction score
0
Location
Ontario, Canada
The reason they ran poor at altitude is because of the thinner air. They were stupid an tuned the engine at a lower level, so ya if you go up a few thousand feet it will run horrible without re jetting no mater what.

With the jets on this engine, you want to jet down a few sizes in the summer and then put the stock jets back in for the fall/winter. Just don't leave the summer jets in too far into the fall or you will have a lean burn down.

And greased, you should try just gutting the airbox instead of using uni-filters. The unit-filters draw warm air in from the engine bay while the air box draws in cold air from outside the engine bay.
 

mysteryboy28

New member
Messages
1,582
Reaction score
10
Location
Lansing, MI
top of motor cage done. final welded the rest of the cage. sat the sled motor mount in it, need to trim off about an inch or so.

need more metal!
 

Attachments

  • DSCF4057.jpg
    DSCF4057.jpg
    129.8 KB · Views: 23
  • DSCF4056.jpg
    DSCF4056.jpg
    107.9 KB · Views: 23
  • DSCF4055.jpg
    DSCF4055.jpg
    108.4 KB · Views: 40
  • DSCF4052.jpg
    DSCF4052.jpg
    123.5 KB · Views: 23
  • DSCF4051.jpg
    DSCF4051.jpg
    121.3 KB · Views: 22
  • DSCF4061.jpg
    DSCF4061.jpg
    126.3 KB · Views: 27

mysteryboy28

New member
Messages
1,582
Reaction score
10
Location
Lansing, MI
amid kid craziness i managed to fab up the rear shock mount tabs, and welded the bottom ones together. should have the buggy standing on it's own rear legs tomorrow! got some more 1 1/4" thin-walled steel tubing, which will be great for the horizontal support of the rear shock tripods (keeping the shocks from swinging left or right), and will use the 0.125" thick-walled heavy duty 1 1/4" tubing for the weight bearing portion of the shock tripods.
 

Attachments

  • DSCF4064.jpg
    DSCF4064.jpg
    127.6 KB · Views: 17
  • DSCF4063.jpg
    DSCF4063.jpg
    113.5 KB · Views: 20
  • DSCF4062.jpg
    DSCF4062.jpg
    101.4 KB · Views: 27

greaser

new here
Messages
126
Reaction score
0
Location
moose lake mn
And greased, you should try just gutting the airbox instead of using uni-filters. The unit-filters draw warm air in from the engine bay while the air box draws in cold air from outside the engine bay.

Most of the guys running unis arent running a hood, I runt frogs skinz on mine direct cold air straight to the TBs.
 

mysteryboy28

New member
Messages
1,582
Reaction score
10
Location
Lansing, MI
the buggy is standing on all 4 feet! still need to finish the "tripod" portion of the shock mounts, but the hard part is done (the measuring, triple checking angles, etc.).

keep in mind that the back will be getting a couple more inches of lift once the 25's go on (replacing the 22's), and the front will be getting 25's to replace the 24's.
 

Attachments

  • DSCF4068.jpg
    DSCF4068.jpg
    122.8 KB · Views: 31
  • DSCF4069.jpg
    DSCF4069.jpg
    129.9 KB · Views: 34
  • DSCF4075.jpg
    DSCF4075.jpg
    117.6 KB · Views: 31
  • DSCF4077.jpg
    DSCF4077.jpg
    121.5 KB · Views: 29

mysteryboy28

New member
Messages
1,582
Reaction score
10
Location
Lansing, MI
rear shock tripods complete. hacked out the original rack n pinion mounting bar, ground down as much as i could get to. final welded the new front shock upper mounting bars. cut off the old ball joint ends on the rack n pinion (to be replaced with 1/2" heims), went to cut some new extentions for the tie-rods, and my freakin' grinder died! again! bah :ack2:
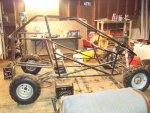
, off to harbor freight i go...
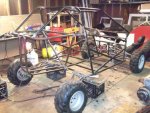
 :auto:
 

Attachments

  • DSCF4099.jpg
    DSCF4099.jpg
    89 KB · Views: 27
  • DSCF4097.jpg
    DSCF4097.jpg
    105.6 KB · Views: 24
  • DSCF4096.jpg
    DSCF4096.jpg
    119.7 KB · Views: 27
  • DSCF4094.jpg
    DSCF4094.jpg
    125.6 KB · Views: 27
  • DSCF4092.jpg
    DSCF4092.jpg
    127 KB · Views: 26
  • DSCF4100.jpg
    DSCF4100.jpg
    120.2 KB · Views: 21
  • DSCF4102.jpg
    DSCF4102.jpg
    160.6 KB · Views: 21
Status
Not open for further replies.
Top