Dingo rescue.

still kikn

Member
Messages
102
Reaction score
3
Location
Missouri
I need to move the lever horizontally to the left and moving the lever pin from one side to the other won't make any difference in that respect. The end result would be that the lever was in the same position in regards to the brake rod except that now it would be pointing up instead of hanging down.

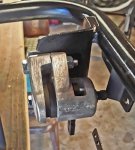
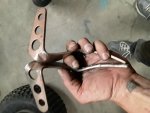
I think I've come up with the solution though. As I mentioned to Smerf above, I wanted to flip the caliper but couldn't do that as there was a clearance problem with the adjustment screw hitting the bearing bracket. Here's a pic I took last night of what I'm talking about.

I looked it over pretty good and think I can cut a small corner off that bracket, just enough for the adjusting screw to clear it and still give me room to get a wrench in there when needed. I don't think it'll weaken anything by much. I can weld a small gusset just above my cut if need be. Also there's another set of holes in the bracket just above the one that visible in the pic and I'm using the upper set anyway so the corner I'm cutting off shouldn't have any effect on the upper set of holes. I'm heading back over to the shop to do that now. I'll post a pic of the results next time I take a break.
 

Attachments

  • adjusting screw.jpg
    adjusting screw.jpg
    1 MB · Views: 9

still kikn

Member
Messages
102
Reaction score
3
Location
Missouri
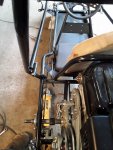
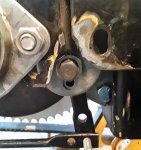
It fits much better now. After cutting off a small corner of the bearing bracket and a little grinding I was able to flip the caliper and slide it over a lot further than before. It isn't perfect, there's still a very slight bow in the rod when hooked up to both ends now but it's much less than before and shouldn't cause any problems. I could add a little spacer bushing in between the caliper lever and the rod to about a quarter inch long and make it completely straight shot but think I'll run it like that and see how it works out before trying that. Think I rather keep the rod and lever connection as close to each other as I can so as not to put extra stress on the connecting bolt. Here's a couple more pics.
 

Attachments

  • brake rod pic 2.jpg
    brake rod pic 2.jpg
    601.4 KB · Views: 6
  • adjusting screw 2.jpg
    adjusting screw 2.jpg
    638 KB · Views: 7

still kikn

Member
Messages
102
Reaction score
3
Location
Missouri
Back to the tc. When the small sprocket on the jack shaft is installed, according to the drawing sent with it, the chain will run within a few thousands of an inch of the mounting plate. I know it's going to slap the side of that plate when running, it's that close. There's a washer that goes between the sprocket and the driven pulley according to the drawing, but if I were to move that washer to the inside of the sprocket, up against the bearing in other words, it would hold the sprocket, and thus the chain, out about 1/32 of and inch or so, giving a bit more clearance between the chain and plate. So not as apt to wear. And this wouldn't change the position of the driven pulley at all since the the washer would still be in there, just in a different order. Anyone got any opinion on where the washer should be and whether it even makes any difference as to the operation. I'm leaning hard towards installing it between the sprocket and bearing, against the directions, because I'd feel better with a little more chain clearance.
 

still kikn

Member
Messages
102
Reaction score
3
Location
Missouri
Torque converter installed, sprockets aligned and fastened down, chain installed, brakes done. Fired it up and tested it all (on jack stands) tonight and everything seems to be working fine.It's coming together.

I'm waiting on a set of front tires which have been back-ordered since May 24. Also waiting for a pair of suspension springs and an accelerator pedal spring. Still have some tweaking to do on my homemade gas pedal too. Throttle cable needs hooked up yet. Gonna have to look around for a couple parts for that as they didn't come with either the engine or the cable. I may have them laying around here somewhere.

I'm going to give the frame a light sanding and another coat of paint tomorrow if it isn't still raining. If I can't paint I still need to put the back tires back on the rims and slip em on the axle. Have enough to keep me busy for a few more days then I'll be at a standstill til the rest of the stuff on order gets here.

Oh yeah, and gotta hook up the steering linkage too but I'm waiting for the suspension springs to get here and do that all at once.
 

still kikn

Member
Messages
102
Reaction score
3
Location
Missouri
Didn’t make a whole lot of progress today.

First thing this morning I realized that when I set my rear sprocket alignment I’d somehow managed to have the axle a bit off center so I had to break the chain, loosen up the sprocket slide the axle over a half inch then move and reset the sprocket and move the brake disc over to the left the same amount. Got er did though and this time all is as it should be. Probably been easier to do it right the first time……..

Cleaned up the steering linkage and got it all working smoothly. I think everything’s lined up correctly but will have to check it all again once I get the wheels on.

Replaced all front wheel bearings, the old ones turned but felt pretty rough.

Put new valve stems in all four wheels and cleaned the inside of the rear tires and sprayed rubberized undercoat inside to hopefully seal up the weather cracks. Anybody here ever try that? Don’t know it it’ll work or not but with the price of new 18 x 9.50 tires I thought it was worth a shot.
The tread is great on the back tires, hardly worn at all but sitting flat for so long cracked the sidewalls some. Hoping they’ll hold air now but the temperature hit 90+ and the humidity made it feel like twice that by the time I got ready to remount them and I’d had enough so quit for the day.

My good wife got the seat and back covers cut out and sewn together for me. All I have to do with them is staple them to the new boards that I cut out last week and bolt em on the kart. They look great.

I’d be done in a couple more days if I had all the parts but still waiting on suspension and pedal springs, front tires, and a seat-belt. Looks like I’ll be waiting on the tires for at least another week. Got an email today saying they were still on back-order but they hoped to have them in by the end of next week.

Gonna make a run to town in the next few days to try to find a helmet that’ll fit my grand-daughter who will be riding this whenever I’m not. I ordered one for her and sized it according to Bells head size chart but it was too tight so other than try that again I’ll just bite the bullet and give the local bike shop some business. They’re insanely proud of their stuff and everything in the store is over priced but probably not a good idea to buy a helmet without trying it on anyway.

I don't meet the requirements for posting on For sale/Wanted thread yet but still looking for hex bore wheels and an original Dingo gas pedal if anyone comes across one.
 

still kikn

Member
Messages
102
Reaction score
3
Location
Missouri
Well, the rubberized undercoating was a total waste of time. Mounted both tires and aired them up and dumped a little soapy water over them. Air bubbles seeping out all along the cracks, just like before I did the undercoat experiment. So didn't gain a thing. Now I know. So since it was such a nice day, 96 with humidity of over 50% and since it's so much fun pulling tires off of rims and remounting them again, that's what I did, several times. First I pulled the cracked knobbys off their rims then pulled two turf savers off the old mower rims that I talked about the other day, then remounted those on the cart rims. I could have picked a better day to dismantle tires but it's done and I now have back tires that actually hold air.

Doesn't look quite as cool with the turf savers on there but all in all it may be a good thing by making it a little more likely to slide vs roll. Or that's what I'm thinking anyway, could be wrong. My zero turn has the same tread design and that thing wants to slide downhill like crazy if I try to mow sideways across a slope we have in the back.

That's about all I accomplished today but wanted to post up the results of the undercoat experiment in case anyone was interested.
 

still kikn

Member
Messages
102
Reaction score
3
Location
Missouri
The suspension springs arrived today so that's everything I need to finish except for the front tires which are still on back order. I'll put the springs on in the morning and then it's done except for those front tires. I'm pretty anxious to test her out so waiting on those tires is gonna drive me nuts.

I guess this Dingo make-over was a pretty dull project for most of you that build these things from scratch but I had a lot of fun doing it, for the most part, and I'm pretty happy with the results and think I've got a pretty decent kart. Once those tires get here I'll post a couple pics of the completed Kart.

For anyone interested I figured out what I have invested tonight and the four hundred I had figured it would take wasn't close. The total cost for materials, that includes everything from the engine all the way down to the paint and sandpaper came to exactly 559 dollars and 55 cents. So quite a bit over budget but still far cheaper than a new one.
 

still kikn

Member
Messages
102
Reaction score
3
Location
Missouri
Still no word on the tires so I assume they're still on back order. I guess the delay is due to the Corvid stuff but patience is not my strongest attribute so I pulled a couple of ridiculously small tires off an old mower, slobbered the bushings with wheel bearing grease and slipped em on the front spindles.

The kart runs good and my grand-daughter loves it. Thought I was gonna have to pry her out of it but finally convinced her to give it a little rest. Too hot for grampa to stand out there in the sun and keep an eye on things and I'm not comfortable with leaving her unsupervised on that thing just yet. Her fearlessness is liable to get her into trouble. Anyways she was all smiles and had zero problems so all is good. I'll swap out the tires and wheels as soon as the new ones come in but those little ones will do in the meantime I think, as long as I keep em greased up.

Well, I've tried uploading pics four times and keep getting a message saying I am not logged in or I do not have permission to access this page. I am logged in so I'll see if it'll let me post this text.

---------- Post added at 06:05 PM ---------- Previous post was at 06:01 PM ----------

Still won't me upload any pics, I'll try again later.
 

still kikn

Member
Messages
102
Reaction score
3
Location
Missouri
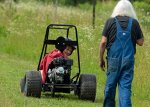
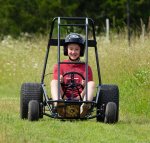
Here's my grand-daughter on her first run. Nervous grampa watching closely.
 

Attachments

  • First ride-06-08-2020(2)resized.jpg
    First ride-06-08-2020(2)resized.jpg
    1.1 MB · Views: 19
  • First ride-06-08-2020.jpg
    First ride-06-08-2020.jpg
    1.8 MB · Views: 18

still kikn

Member
Messages
102
Reaction score
3
Location
Missouri
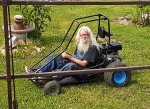
It'll look better with right tires and wheels. My memory must be going , I can't remember if I'm 71 or 17.
 

Attachments

  • kart test run-06-08-2020.jpg
    kart test run-06-08-2020.jpg
    1.4 MB · Views: 14

still kikn

Member
Messages
102
Reaction score
3
Location
Missouri
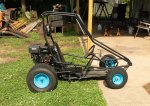
The front tires finally got here yesterday and I put them on first thing this morning, then took it for a spin of course. Got an original accelerator pedal from Smerf85 so now the Kart is officially finished, except I may add a roll cage over the engine someday.
 

Attachments

  • Kart with new front tires 07-02-2020.jpg
    Kart with new front tires 07-02-2020.jpg
    1.7 MB · Views: 16
Top