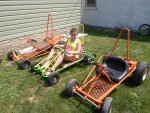
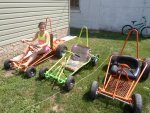
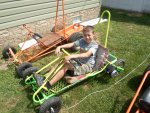
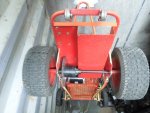
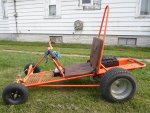
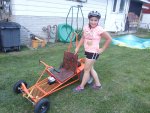
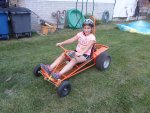
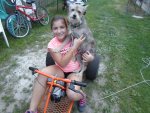
Desteny's "Cotton Candy" kart

Status
Not open for further replies.

Functional Artist

Well-known member
Messages
5,650
Reaction score
3,281
Location
Toledo, Ohio
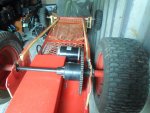
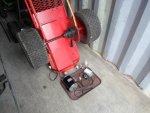
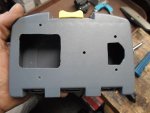
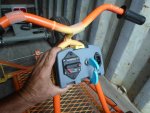
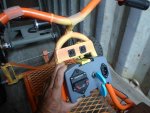
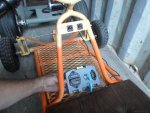
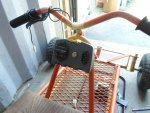
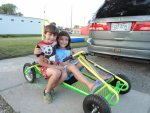
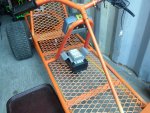
My twins, Desteny & Winston, are out growing their karts :smiley_omg:

So, I'm thinkin,

Desteny can "move up" to "Cotton Candy" (that's what she wants to call 'er)
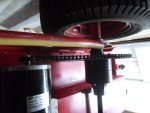
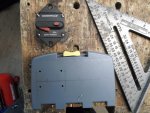
...it started off (2016) as "Double Trouble" (2) (24V 450W motors) https://www.youtube.com/watch?v=TRIKLdvGlTA

...& then (2017) was known as El Turbo (1) 24V 450W motor with an "overvolt switch" that would "temporarily boost" 'er up to 36V :2guns:

https://www.youtube.com/watch?v=H-704ZyJkaU

& Winston can "move up" to Desteny's kart :cheers2:

https://www.youtube.com/watch?v=apJH3f1YBZM
 

Attachments

  • SAM_1543.jpg
    SAM_1543.jpg
    586.4 KB · Views: 9
  • SAM_1544.jpg
    SAM_1544.jpg
    611.3 KB · Views: 10
  • SAM_1551.jpg
    SAM_1551.jpg
    565.8 KB · Views: 11
  • SAM_1554.jpg
    SAM_1554.jpg
    645.8 KB · Views: 9

Functional Artist

Well-known member
Messages
5,650
Reaction score
3,281
Location
Toledo, Ohio
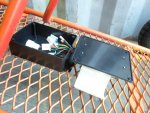
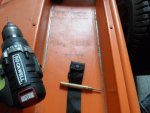
So, this kart needs (a little TLC) :cheers2:
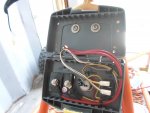
...a motor, controller, on/off switch, circuit breaker, charge port & (4) batteries

I got a 48V 1,000W motor kit from Alfa Wheels (~$100.00)
(off of the !Arriba! kart)
...& (4) 12V 17AH SLA batteries
(I had 'em on the shelf, I used then on El Dingo II last summer)

Motor: 48V 1,000W ZY-1020
Speed Controller: 48V 1,000W YK-31
On/off switch: key switch
Circuit Breaker: 50A
Charge port: PC style

I'll start with installing the motor :thumbsup:

Over/under or Under/over :lolgoku:
 

Attachments

  • SAM_1452.jpg
    SAM_1452.jpg
    262.5 KB · Views: 6
  • SAM_1450.jpg
    SAM_1450.jpg
    295.7 KB · Views: 2
  • SAM_1449.jpg
    SAM_1449.jpg
    204.5 KB · Views: 2
  • SAM_1445.jpg
    SAM_1445.jpg
    297.9 KB · Views: 3

Functional Artist

Well-known member
Messages
5,650
Reaction score
3,281
Location
Toledo, Ohio
Motor's on...Check :thumbsup:

Now, for the other stuff

Let's get creative :cheers2:

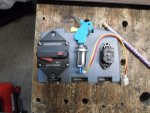
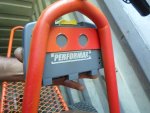
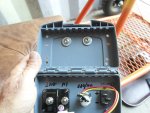
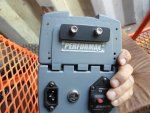
I think, I'ma gonna mount the key switch (on/off)
...circuit breaker
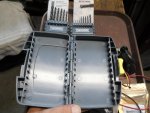
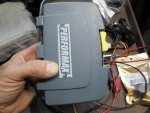
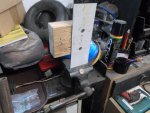
...& charge port in one of those kool plastic "drill bit boxes"

Kinda like an enclosed "dash" :idea2:
…mounted onto the steering support
...easily reachable
...under the steering wheel
...right in front of the operator (my little Desteny) :wai:

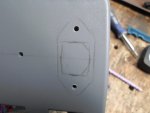
Layed out, measured, marked, drilled, cut/check, cut/check, cut/check
 

Attachments

  • SAM_1343.jpg
    SAM_1343.jpg
    351.3 KB · Views: 3
  • SAM_1341.jpg
    SAM_1341.jpg
    316.4 KB · Views: 4
  • SAM_1336.jpg
    SAM_1336.jpg
    250.8 KB · Views: 2
  • SAM_1335.jpg
    SAM_1335.jpg
    317.6 KB · Views: 2
  • SAM_1333.jpg
    SAM_1333.jpg
    275.7 KB · Views: 2
  • SAM_1346.jpg
    SAM_1346.jpg
    251.8 KB · Views: 2
  • SAM_1349.jpg
    SAM_1349.jpg
    208.9 KB · Views: 2
  • SAM_1350.jpg
    SAM_1350.jpg
    254.7 KB · Views: 3
  • SAM_1353.jpg
    SAM_1353.jpg
    252.1 KB · Views: 5
  • SAM_1354.jpg
    SAM_1354.jpg
    263.9 KB · Views: 2

Functional Artist

Well-known member
Messages
5,650
Reaction score
3,281
Location
Toledo, Ohio
Hmmmm, should it go
…@ the bottom?
...in the middle?
...or right under the steering wheel?

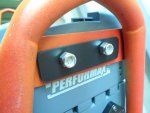
Right under the wheel is the winner :wai:
...just gotta remove the (2) switches
…& bolt 'er down
(even using the holes that are in the existing bracket) :2guns:

Since it's just a plastic box, I used big washers under the bolt heads (inside the box)
…& made a "doublewide/plastic" washer (for the back side)
...to spread out the pressure :cheers2:

Yup, nice-n-solid
...that'll work :thumbsup:
 

Attachments

  • SAM_1443.jpg
    SAM_1443.jpg
    278.9 KB · Views: 2
  • SAM_1444.jpg
    SAM_1444.jpg
    283.9 KB · Views: 3
  • SAM_1442.jpg
    SAM_1442.jpg
    309.2 KB · Views: 2
  • SAM_1441.jpg
    SAM_1441.jpg
    282.4 KB · Views: 2
  • SAM_1586.jpg
    SAM_1586.jpg
    275.6 KB · Views: 2
  • SAM_1590.jpg
    SAM_1590.jpg
    244.7 KB · Views: 2
  • SAM_1591.jpg
    SAM_1591.jpg
    301.4 KB · Views: 2
  • SAM_1594.jpg
    SAM_1594.jpg
    242.4 KB · Views: 2
  • SAM_1597.jpg
    SAM_1597.jpg
    332.3 KB · Views: 3

Functional Artist

Well-known member
Messages
5,650
Reaction score
3,281
Location
Toledo, Ohio
Kids grow up so fast

Yes they do. :iagree:

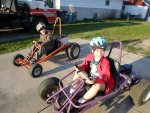
First (2) picks are from back in 2014
...purple kart, is the first kart I made for them
...orange kart is Winston's kart

Third & fourth pics (~2015) are of Desteny's kart (before paint)

Last pic is Desteny's kart (after paint)

Wow, "memory lane"
...their getting so big (i'm about to cry)
 

Attachments

  • SAM_0569.jpg
    SAM_0569.jpg
    331.7 KB · Views: 4
  • SAM_0555.jpg
    SAM_0555.jpg
    378.7 KB · Views: 4
  • SAM_0554 (1).jpg
    SAM_0554 (1).jpg
    331.7 KB · Views: 5
  • SAM_0521.jpg
    SAM_0521.jpg
    462.5 KB · Views: 3
  • SAM_0520.jpg
    SAM_0520.jpg
    419.5 KB · Views: 2

Functional Artist

Well-known member
Messages
5,650
Reaction score
3,281
Location
Toledo, Ohio
Speed controller is next :2guns:
...but, ...where to put it?

Hmmm...
...batteries will be behind ya
...motor is mounted under the seat
...dash is right up under the steering

I had the previous (24V 500W) speed controller
...mounted under the seat (right next to the motor)
...but, the connections/plugs & wiring were all right out in the open & exposed :ack2:

I would like to put the connections in a box (kinda like I did on the Torsk)
...to protect them from damage (physical &/or water/corrosion)

How about, right on the kart floor
...behind the steering support
...directly below the dash

Ya, that might work :cheers2:

I got a couple of these kool black plastic boxes
(different project/different story)

I figured, maybe
...mount the speed controller to the top of the box
...route the wires thru a hole
...& make/keep the connections inside :thumbsup:
 

Attachments

  • SAM_1479.jpg
    SAM_1479.jpg
    281 KB · Views: 1
  • SAM_1480.jpg
    SAM_1480.jpg
    257.5 KB · Views: 1
  • SAM_1484.jpg
    SAM_1484.jpg
    202.8 KB · Views: 1
  • SAM_1482.jpg
    SAM_1482.jpg
    227.8 KB · Views: 1
  • SAM_1485.jpg
    SAM_1485.jpg
    244.5 KB · Views: 1

Functional Artist

Well-known member
Messages
5,650
Reaction score
3,281
Location
Toledo, Ohio
Yup, I like it :cheers2:

But, what about kooling?

Speed controllers get hot

It's gonna be right out in the open
…& has "mini" kooling fins on the case

They are usually (or recommended to be) mounted to a flat (preferably metal) surface
(to act as a "heat sink" & help draw some of the heat out of the controller)

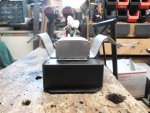
So, since it's gonna be mounted to a plastic box
...we should probably add a heat sink

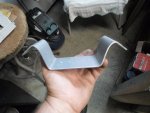
:idea2: I'm imagining a controller with "wings"
...lets make a "homemade" heat sink

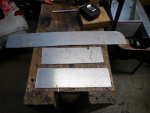
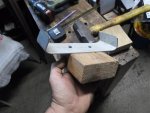
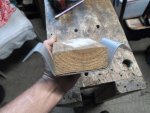
Cut a piece of aluminum (out of an old sign)
...screwed it to a wooden piece of 2" x 4"
…& did some body work

Yea, :wai:
...that should help "wick" some heat away :thumbsup:

Looks kool & functional... "Functional Art" :2guns:
 

Attachments

  • SAM_1459.jpg
    SAM_1459.jpg
    252.4 KB · Views: 1
  • SAM_1458.jpg
    SAM_1458.jpg
    270.8 KB · Views: 1
  • SAM_1457.jpg
    SAM_1457.jpg
    269.9 KB · Views: 1
  • SAM_1455.jpg
    SAM_1455.jpg
    227.5 KB · Views: 1
  • SAM_1453.jpg
    SAM_1453.jpg
    201.8 KB · Views: 2
  • SAM_1461.jpg
    SAM_1461.jpg
    223.5 KB · Views: 1
  • SAM_1462.jpg
    SAM_1462.jpg
    192.3 KB · Views: 1
  • SAM_1466.jpg
    SAM_1466.jpg
    257.2 KB · Views: 0
  • SAM_1469.jpg
    SAM_1469.jpg
    228 KB · Views: 0
  • SAM_1470.jpg
    SAM_1470.jpg
    244.2 KB · Views: 0

Functional Artist

Well-known member
Messages
5,650
Reaction score
3,281
Location
Toledo, Ohio
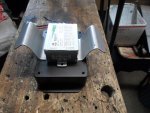
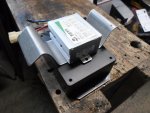
Lets stack 'em up

Speed controller, on top
…"winged" heat sink, in between
…& plastic box, on the bottom
(conveniently, with "feet" for mounting to the kart) :thumbsup:
 

Attachments

  • SAM_1491.jpg
    SAM_1491.jpg
    233.2 KB · Views: 1
  • SAM_1475.jpg
    SAM_1475.jpg
    291.6 KB · Views: 0
  • SAM_1472.jpg
    SAM_1472.jpg
    281.3 KB · Views: 0
  • SAM_1471.jpg
    SAM_1471.jpg
    264.7 KB · Views: 1

Functional Artist

Well-known member
Messages
5,650
Reaction score
3,281
Location
Toledo, Ohio
I simply set the speed controller assembly under the steering support & bolted 'er down
...using a "big" plastic "washer" (pressure spreader) under the kart

It's centrally located, will get plenty of "air", is out of the way & safely protect the plugs/connections :2guns:

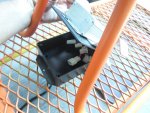
The "best" part is that the top of the box, with speed controller attached, flips open for easy access to the connections :thumbsup:
 

Attachments

  • SAM_1610.jpg
    SAM_1610.jpg
    312 KB · Views: 1
  • SAM_1609.jpg
    SAM_1609.jpg
    313 KB · Views: 1
  • SAM_1602.jpg
    SAM_1602.jpg
    378.7 KB · Views: 0
  • SAM_1604.jpg
    SAM_1604.jpg
    363.1 KB · Views: 0
  • SAM_1603.jpg
    SAM_1603.jpg
    424.4 KB · Views: 1
  • SAM_1628.jpg
    SAM_1628.jpg
    395.1 KB · Views: 1
  • SAM_1629.jpg
    SAM_1629.jpg
    339.6 KB · Views: 1

Functional Artist

Well-known member
Messages
5,650
Reaction score
3,281
Location
Toledo, Ohio
Now we gotta connect everything up :thumbsup:

Motor is close enough to "plug right in"
Throttle & brake wires were long enough too
Key switch just needed (2) wires to connecting it
Charge port positive (+) connects to the circuit breaker, inside of the dash box
...& the negative (-) connects to the speed controller negative (-), inside of the black box
Battery connections were last
...the positive (+) runs thru the circuit breaker first, then to the battery pack positive (+)
...the negative (-) runs straight to the battery pack negative (-)
 

Attachments

  • SAM_1631.jpg
    SAM_1631.jpg
    193.9 KB · Views: 1
  • SAM_1630.jpg
    SAM_1630.jpg
    266.8 KB · Views: 1

Functional Artist

Well-known member
Messages
5,650
Reaction score
3,281
Location
Toledo, Ohio
The "Power Pack" is last

The battery box was originally designed to fit (4) 12V 35AH SLA batteries (~20 lbs. ea./~80 lbs. total) snuggly

Since I've come to the conclusion that its "stupid" to carry around all of that weight :ack2:
(all of that added weight affects top speed & maneuverability dramatically)
...but, is also a PITA to move around & deal with while in storage

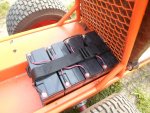
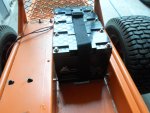
The (4) 12V 17AH SLA batteries (~10 lbs. ea./~40 lbs. total) that we are gonna use, are a lot smaller & lighter (& I already had 'em so, lets put 'em to use) :thumbsup:

Smaller batteries means that we will have lots of extra space/room in the battery box

We need a way to hold 'em in place (so, they don't slide around in the box)
…& strap them down (so, they don't bounce around)

Hmmm.... :idea2:

We can slide 'em (the batteries) all of the way forward
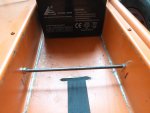
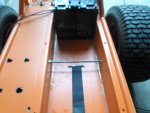
…& use a ~2" wide strap (with a nice little latch) to "strap 'em down" (help hold them in place)

Then, install a 1/4" bar/rod across the back side (to keep 'em from sliding back) :2guns:

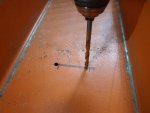
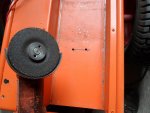
*to install the strap, I had to add a 'slot' for the strap to go thru
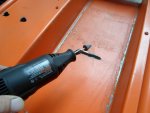
...marked the spot, drilled a couple of "guide holes". used an angle grinder to "cut the slot" & cleaned 'er up with a Dremel
 

Attachments

  • SAM_1658.jpg
    SAM_1658.jpg
    274.3 KB · Views: 1
  • SAM_1659.jpg
    SAM_1659.jpg
    382.8 KB · Views: 0
  • SAM_1662.jpg
    SAM_1662.jpg
    296.8 KB · Views: 0
  • SAM_1663.jpg
    SAM_1663.jpg
    266.4 KB · Views: 0
  • SAM_1664.jpg
    SAM_1664.jpg
    164.9 KB · Views: 0
  • SAM_1672.jpg
    SAM_1672.jpg
    233 KB · Views: 0
  • SAM_1671.jpg
    SAM_1671.jpg
    192.5 KB · Views: 0
  • SAM_1670.jpg
    SAM_1670.jpg
    334.7 KB · Views: 0
  • SAM_1668.jpg
    SAM_1668.jpg
    258.1 KB · Views: 0
  • SAM_1667.jpg
    SAM_1667.jpg
    417.7 KB · Views: 0
Status
Not open for further replies.
Top