Dèjá Vu Gas Buggy

Status
Not open for further replies.

chancer

ɔ ɥ ɐ u ɔ ǝ ɹ
Messages
9,358
Reaction score
83
Location
COMFORT, TEXAS
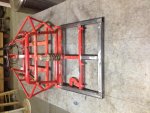
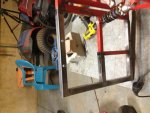
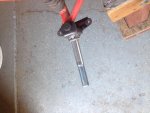
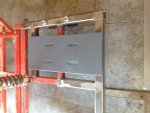
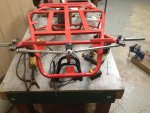
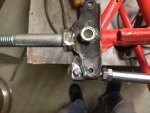
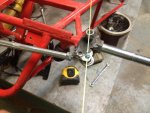
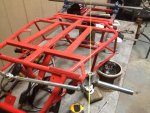
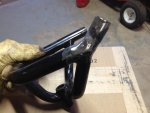
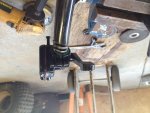
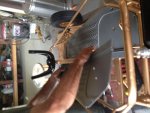
Here I go again. I mentioned in my previous build that both my little kids had a Razor Buggy Electric kart. Just finished Hers so here I go with His. Should be a little better the second time around. So far got the frame stripped and tacked on the new rear sub frame to accept the gas motor, jackshaft and sprockets.
:horse:
 

Attachments

  • IMG_3189.jpg
    IMG_3189.jpg
    115.3 KB · Views: 31

chancer

ɔ ɥ ɐ u ɔ ǝ ɹ
Messages
9,358
Reaction score
83
Location
COMFORT, TEXAS
1. I cant help it if they made a product that needs "fixed" and
2 Dude! it was sitting in my garage, what I am supposed to leave it alone! I tried it just kept looking at me. Both of them did I swear.:funnypost:
 

chancer

ɔ ɥ ɐ u ɔ ǝ ɹ
Messages
9,358
Reaction score
83
Location
COMFORT, TEXAS
Yeah he is getting happy. But not as happy as his sister, she has been drivin hers non stop for 3 days. It is his fault thou. The little smart @$$ told me. "Do hers first and if it works then you can do mine.

For now I gotta order a bunch of parts so I can continue. So this may be a liitle slow on the updates for a few days or week an ahalf.
 

XMG50

New member
Messages
52
Reaction score
0
Location
WA State
LOL! That's awesome! I bet he wants you to hurry and get his done now. Did you put a 212 on the other one?
 

chancer

ɔ ɥ ɐ u ɔ ǝ ɹ
Messages
9,358
Reaction score
83
Location
COMFORT, TEXAS
Oh yeah I forgot. They both get the 79cc predator and approx. 12:1 gearing.
 

chancer

ɔ ɥ ɐ u ɔ ǝ ɹ
Messages
9,358
Reaction score
83
Location
COMFORT, TEXAS
I drilled the frame and installed the bearing hangars. Slow progress still. Many parts will be in late next week. These hangars have 3/4" long slotted holes. I am using 7/16 bolts so there is 5/16 adjustability. I finally got something right and the holes are square so I should not need this adjustment but it is nice to have.
 

Attachments

  • IMG_1899.jpg
    IMG_1899.jpg
    92.2 KB · Views: 14
  • IMG_1900.jpg
    IMG_1900.jpg
    96.6 KB · Views: 12
  • IMG_1901.jpg
    IMG_1901.jpg
    88.8 KB · Views: 12

chancer

ɔ ɥ ɐ u ɔ ǝ ɹ
Messages
9,358
Reaction score
83
Location
COMFORT, TEXAS
Just doin a little more while waiting for parts. Got the front bar for the engine mount put in. And made the engine mount plate. I will wait for the sprocket to come before welding the plate. That way I can square the plate off the sprocket. Also welded my new spindle bolts to the spindles, They are 5/8 the stock ones were small metric equivalent to 3/8.
Oh yeah and we picked a color. It is a deep fire engine red. We first laid on a base coat of Krylon metallic Gold, Then covered that with Plasti-kote brand Red anodized semi-transparent. It came out really cool. There is a small dollar and up Mom and Pop store here and they sell spray paint for $2 bucks a can:wai:
 

Attachments

  • IMG_3202.jpg
    IMG_3202.jpg
    118.7 KB · Views: 11
  • IMG_3201.jpg
    IMG_3201.jpg
    78 KB · Views: 13
  • IMG_3200.jpg
    IMG_3200.jpg
    86 KB · Views: 6
  • IMG_3199.jpg
    IMG_3199.jpg
    95.7 KB · Views: 7

XMG50

New member
Messages
52
Reaction score
0
Location
WA State
Sweet! Looks like it's coming along nicely. I like that Fire engine red. $2 a can? Awesome!!
 

chancer

ɔ ɥ ɐ u ɔ ǝ ɹ
Messages
9,358
Reaction score
83
Location
COMFORT, TEXAS
Tie rods Ackerman

Got some parts in today, My Clutch, (but no motor yet) and the new tie rod ends. Yesterday I fixed the Ackerman. With the frame upside down I Ran a string from the center of the rear axle to the center of the front spindle bolt. Had to add a mount to the existing arm to be able to drill a new tie rod mount ½" wider than stock, on both sides.
Today we (finally parts the boy can help bolt on) put on the new tie rods and set the toe neutral.
:wai:I just figured out if I hold the I phone sideways my pictures show up right (not Sideways)
 

Attachments

  • IMG_1944.jpg
    IMG_1944.jpg
    109.5 KB · Views: 16
  • IMG_1945.jpg
    IMG_1945.jpg
    86.8 KB · Views: 12
  • IMG_1948.jpg
    IMG_1948.jpg
    89.5 KB · Views: 17
  • IMG_1947.jpg
    IMG_1947.jpg
    111.4 KB · Views: 15

chancer

ɔ ɥ ɐ u ɔ ǝ ɹ
Messages
9,358
Reaction score
83
Location
COMFORT, TEXAS
I got my thumb throttle and it was not the perfect application for use on this style steering wheel. Kids just don't have Giant thumbs. So I needed to adjust the angle of the mount to bring down the thumb throttle. I used an old trick I saw member "Noiseguy" do on his dingo restoration. I cut 3 slits 1/8 wide and 1/8 apart in the top of the bar. Then bent the bar upwards to close the gaps from the cuts. I then welded up the seams and ground down smooth. Now the boy will be able to reach the throttle and still steer the controls.
Edit: Pic 4 was supposed to be pic 1. and it is upside down,tried to fix sorry. Anyway it shows before and the need for huge thumbs.
 

Attachments

  • IMG_3287.jpg
    IMG_3287.jpg
    100.8 KB · Views: 5
  • IMG_3289.jpg
    IMG_3289.jpg
    103.9 KB · Views: 6
  • IMG_3290.jpg
    IMG_3290.jpg
    70.5 KB · Views: 5
  • IMG_3286.jpg
    IMG_3286.jpg
    85.7 KB · Views: 3

chancer

ɔ ɥ ɐ u ɔ ǝ ɹ
Messages
9,358
Reaction score
83
Location
COMFORT, TEXAS
I've been busy workin on this. But not a lot to share just time consuming measuring and finishing up details, like Jackshaft mount and brake caliper mount. But anyway all the frame welding is complete and we started the Paint process this afternoon. I mentioned before it was going to be a deep candyapple like red. So we laid down a base gold coat for the transparent red. However The boy has seen the gold and insists that we leave it gold, just gold and only gold.:rolleyes: 
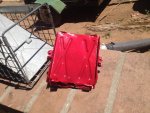
Its kind of humorous to me actually hilarious! What do you guys think? Be honest, I don't mind.
 

Attachments

  • IMG_3311.jpg
    IMG_3311.jpg
    95.5 KB · Views: 16

chancer

ɔ ɥ ɐ u ɔ ǝ ɹ
Messages
9,358
Reaction score
83
Location
COMFORT, TEXAS
I was thinking Austin Powers "Gold Member" or for you OLD guys "007 Gold finger". Then I remembered Dennis' Go Kart Alley Rockford Pontiac. I guess the Gold won't be as bad as I thought. Plus with the fine dust in our yard where they ride... It will actually stay clean looking. Our red and blue karts always have a tinge of Tan dust on them anyway.
 

chancer

ɔ ɥ ɐ u ɔ ǝ ɹ
Messages
9,358
Reaction score
83
Location
COMFORT, TEXAS
Final Assembly went like this: Front end, steering wheel and tires. Rear axle, sprockets and tires Jack shaft mount and motor. Floor boards. All very typical. I will get some shots uploaded of the finished Kart tomorrow.:yawn: 
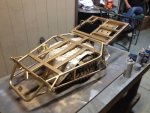
All in all It was very fun and came out better, and was easier the second time around.
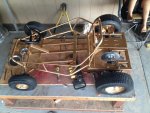
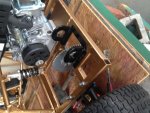
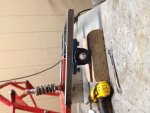
 :cheers2:
Thanks for looking
 

Attachments

  • dylans kart 7.jpg
    dylans kart 7.jpg
    111 KB · Views: 23
  • dylans kart 10.jpg
    dylans kart 10.jpg
    84.1 KB · Views: 14
  • dylans kart 2.jpg
    dylans kart 2.jpg
    105.3 KB · Views: 17
Status
Not open for further replies.
Top